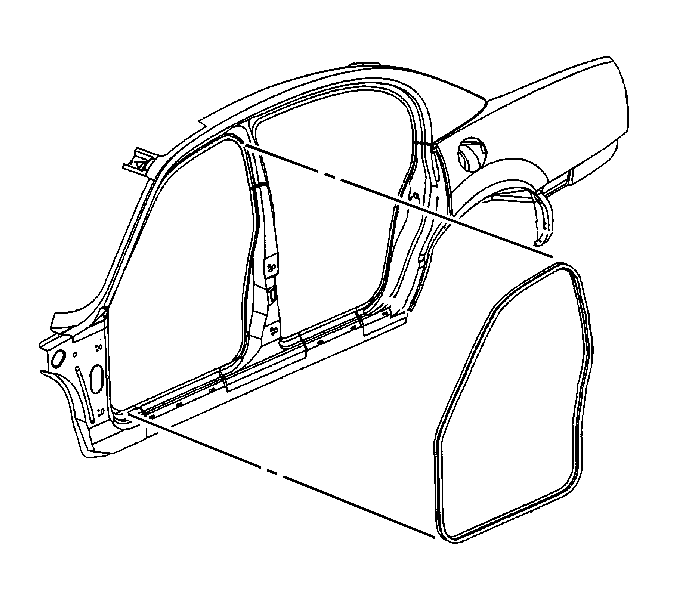
For 1990-2009 cars only
Removal Procedure
- Remove the right or left IP end cap. Refer to Instrument Panel Outer Trim Cover Replacement - Right Side or Instrument Panel Outer Trim Cover Replacement - Left Side in Instrument Panel, Gages and Console.
- Remove the center trim panel. Refer to Center Pillar Garnish Molding Replacement in Interior Trim.
- Disengage the front sill plate retainers by pulling upward.
- Remove the front sill plate.
- Remove the weatherstrip.

Installation Procedure
- Line up the locating mark. Start at the upper corner of the B-pillar.
- Push the weatherstrip onto the pinchweld. Work downward from the corner and continue around the entire opening.
- Ensure that the weatherstrip is seated around the entire opening.
- Align the front sill plate to the door opening.
- Push down on the sill plate retainers in order to engage.
- Install the center trim panel. Refer to Center Pillar Garnish Molding Replacement in Interior Trim.
- Install the right or left IP end cap. Refer to Instrument Panel Outer Trim Cover Replacement - Right Side or Instrument Panel Outer Trim Cover Replacement - Left Side in Instrument Panel, Gages and Console.

Important:
• The single red line on the weatherstrip is for the right side
of the vehicle. • The double red line on the weatherstrip is for the left side of
the vehicle.
