TAIL LAMP CONDENSATION MODIFY DRAIN HOLES IN LENS

SUBJECT: TAIL LAMP CONDENSATION (MODIFY DRAINS)
VEHICLES AFFECTED: 1991 BUICK REGAL W CARS (LIMITED COUPE ONLY)
Condition Moisture in tail lamps
Cause: Water from road and/or car washes entering lamp
Correction: Perform the following procedure:
1. Some lamps may have an insufficient seal between the red and clear lenses on either side. Spray the face of the lamp while on the vehicle with a high pressure water source and look for moisture entering between the red and clear lens. If moisture appears here, obtain and install a new lamp assembly. If no moisture appears, continue with the procedure.
2. Remove lamp from vehicle using Service Manual procedures.
3. Inspect drains on bottom of lamp. If drains are plugged with glue, remove glue. If the drains are not plugged with glue, and the inside of the lamp is not visible through the drains because the drains have been sealed internally when manufactured, obtain and install a new lamp assembly (the seal between the lens and housing may be damaged and not repairable). If a new assembly is used, do not continue with this procedure.
4. Obtain three pieces of 19 mm (3/4 inch (diameter) flexible electrical conduit approximately 12mm to 16 mm (1/2 to 5/8 inches) long. (Cut from P/N 08919356 or equivalent).
Note: After cutting the conduit to length, insure that the ends are relatively smooth, as the ends will be glued to the lamp later.
5. Cut each piece of conduit in half along its axis in order to form 6 (six) "C" shaped pieces.
6. Using a heat gun on low heat setting, dry the lamp thoroughly by forcing warm air through the bulb socket holes.
7. Clean and dry the bottom of the lamp in the area of each of the six lamp drains. (three drains per side)
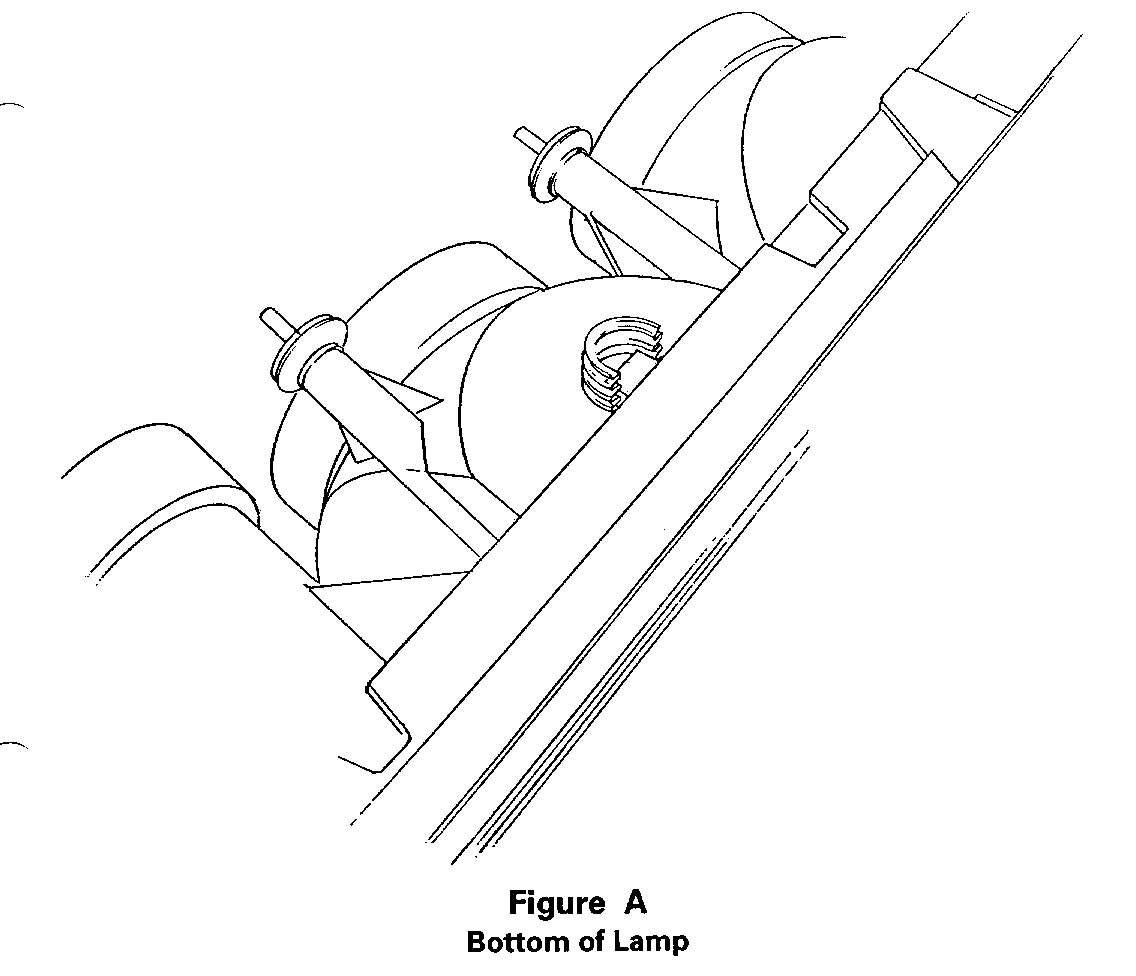
8. Using 3M Clear Auto Sealer (3M #08551), glue the pieces of conduit to the lamp as shown in Figure A.
Note: The conduit should overlap the sides of the drain slightly. There should be a 6 mm (1/4 inch) gap between the ends of the conduit and the edge of the lamp housing. (See Figure A)
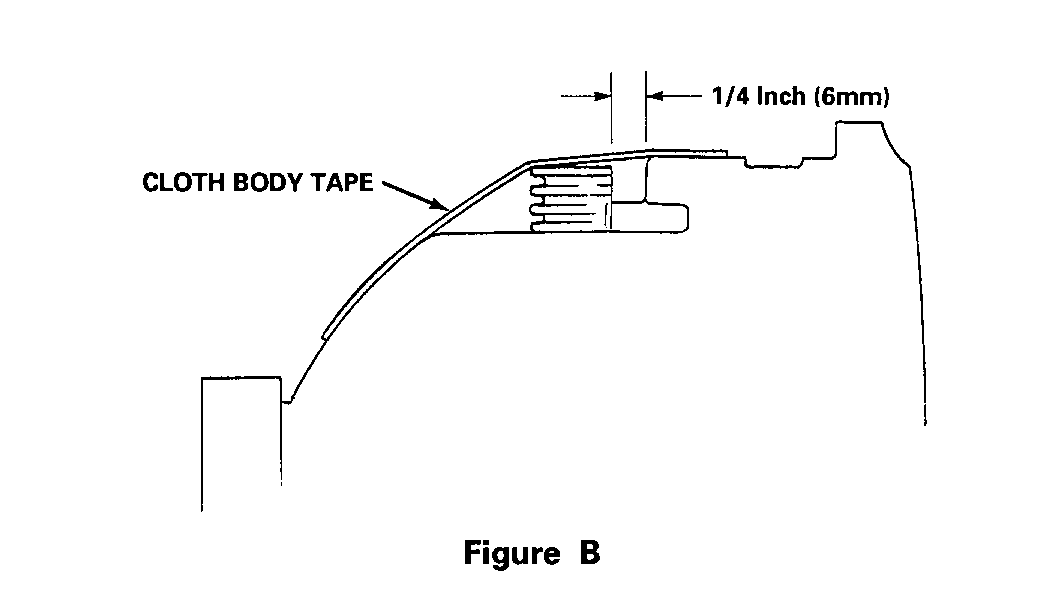
Apply a piece of cloth body tape (duct tape) 25mm x 100 mm (1 inch wide X 4) inches long over the conduit. The tape should be oriented front to back of the lamp (from the bulb to the lens). (See Figure B). The tape will hold the conduit in position until the glue dries and also act as an additional baffle to help prevent water entry.
Note: The conduit and the "step" in the lamp housing should keep the tape from contacting the outer surface of lamp drain. If the tape contacts the outer surface of the drain, moisture may still enter the lamp.
10. Reinstall lamp.
Use the most applicable Labour Operation and Time from the Canadian Labour Time Guide.


General Motors bulletins are intended for use by professional technicians, not a "do-it-yourselfer". They are written to inform those technicians of conditions that may occur on some vehicles, or to provide information that could assist in the proper service of a vehicle. Properly trained technicians have the equipment, tools, safety instructions and know-how to do a job properly and safely. If a condition is described, do not assume that the bulletin applies to your vehicle, or that your vehicle will have that condition. See a General Motors dealer servicing your brand of General Motors vehicle for information on whether your vehicle may benefit from the information.
