FRONT AND REAR DOOR TRIM PANEL REMOVAL AND INSTALLATION

MODELS AFFECTED: 1986 SKYLARK
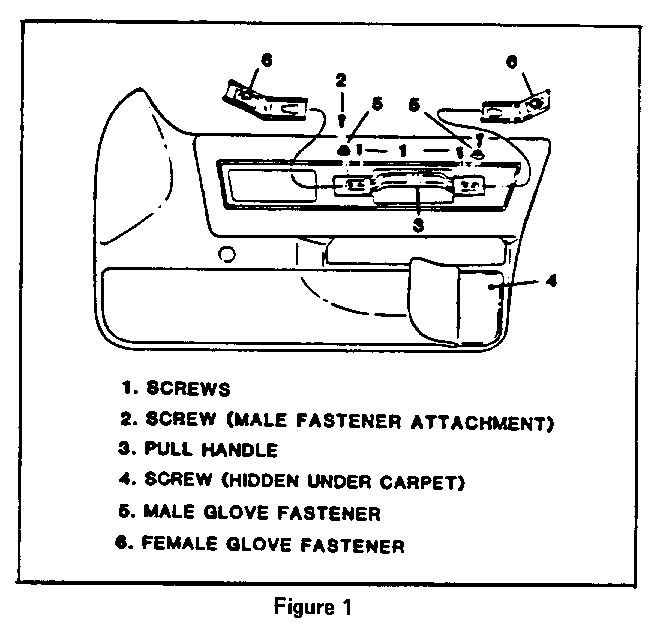
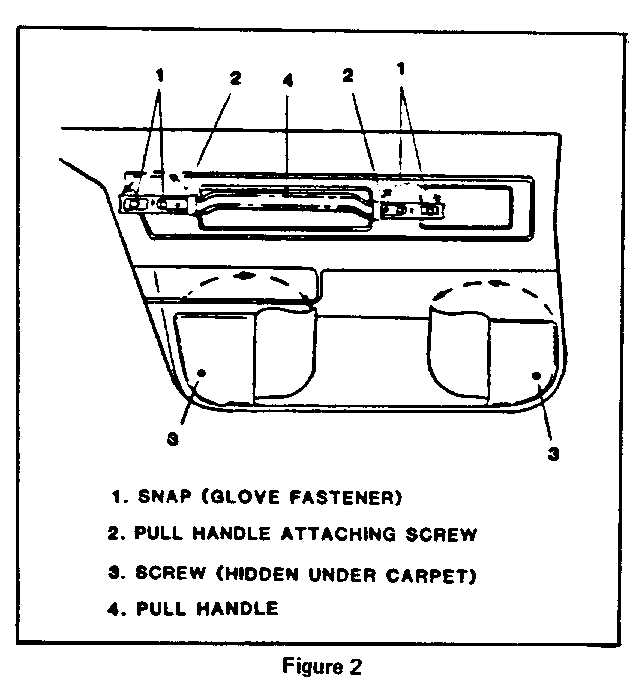
Please be advised that when removing door trim panels on the 1986 Skylark, screws located behind the trim panel carpet must be removed prior to removing trim panel or damage to the trim panel will occur. The front door trim panel has one screw located under the carpet near the rear of the trim panel. The rear door has two screws beneath the carpet, one near the front of the trim panel and one near the rear of the trim panel (see attached illustrations). Follow procedures below for proper removal and installation of subject screws.
Removal
1. After all other trim attachments have been removed, remove staples retaining carpet to trim panel for a distance of approximately 4" from the rear edge of the front door trim panel, if servicing front door components or 4" it from the front edge and 4" from the rear edge of trim panel, if servicing the rear door.
2. Fold carpet back to expose screw(s) and remove screw(s).
3. Trim panel can now be removed following procedure provided in the Body Service Manual.
Installation
1. Install trim panel to door inner panel as specified in the Body Service Manual.
2. Install screws removed in Step 2 of removal procedure.
3. The carpet can now be installed to the trim panel using trim adhesive and following manufacturer's instructions.
4. Install all other trim attachments previously removed in Step 1 of removal procedure.


General Motors bulletins are intended for use by professional technicians, not a "do-it-yourselfer". They are written to inform those technicians of conditions that may occur on some vehicles, or to provide information that could assist in the proper service of a vehicle. Properly trained technicians have the equipment, tools, safety instructions and know-how to do a job properly and safely. If a condition is described, do not assume that the bulletin applies to your vehicle, or that your vehicle will have that condition. See a General Motors dealer servicing your brand of General Motors vehicle for information on whether your vehicle may benefit from the information.
