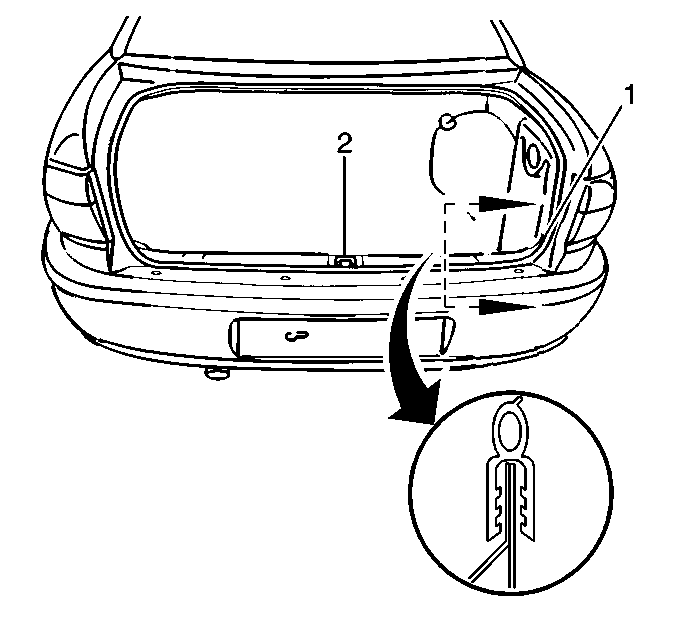
This vehicles uses a foam clinch type weatherstrip. The
foam has an integral metal reinforcing section which grips and seals the weatherstrip
to the flange.
Removal Procedure

- Pull the weatherstrip
from the flange toward the lower corners.
- Remove the rear compartment lid weatherstrip (1).
Installation Procedure
Review the following steps before installing the weatherstrip to the
rear compartment opening:

- Check for the locating
mark on the weatherstrip.
- Check for the center mark below the latch (2).
- Install the weatherstrip in one direction on the flange to insure
a seal at the end.
- Install the weatherstrip to the clinch cavity to ensure proper
seating to the flange around the entire opening.
- Use a rubber mallet to install the weatherstrip on the flange
for proper seating.
- The joint end of the weatherstrip must be 360 mm (14 in)
to 460 mm (18 in) to the right of the center when joining the
weatherstrip.
- Water test the rear compartment weatherstrip for waterleak(s).
Refer to
Body Waterleak Repair
in Water Leaks.
- Perform the following steps if waterleak(s) is present:
| 8.1. | Remove the weatherstrip from the rear compartment opening. |
| 8.2. | Dry off the weatherstrip. |
| 8.3. | Install weatherstrip adhesive to the weatherstrip cavity. |
| 8.4. | Reinstall the weatherstrip. |


