
| Subject: | AM Radio Reception Poor (Diagnose and Replace Radio Antenna Cable) |
| Models: | 1999-2000 Cadillac Catera |
| Built Prior to VIN Breakpoint YR117966 |
Condition
Some customers may comment that the reception is poor on the AM radio
band.
Cause
This condition may be caused by corrosion developing at the antenna
cable connections which may lead to high shielding resistance causing a reduction
in the AM radio signal at the radio receiver.
Correction
A new antenna cable, P/N 09120443 (radio to antenna amplifier),
has been released with improved connector crimps and coating. Prior to replacing
cable, first verify condition and check for proper antenna cable shielding
and grounding using the following procedure:
Service Procedure
- Disconnect the antenna lead-in connector from the radio receiver.
| 1.1. | Remove the instrument panel (I/P) accessory trim plate from the
I/P. Refer to the replacement procedure in the Instrument Panel, Gauges, and
Console sub-section of the Service Manual. |
| 1.2. | Remove the screws retaining the radio to the I/P center support
bracket. |
| 1.3. | Begin to remove the radio from the center support bracket enough
to access the connectors. |
| 1.4. | Disconnect the electrical/audio and antenna cable connectors from
the radio. Remove the radio. |
- Using an ohmmeter, check the resistance from the cable outside
crimp to the radio ground (E16 in the blue connector). Record the reading.
- Reverse the leads and record that reading.
- If the average of the two measurements exceeds .5 ohms, the antenna
system ground/shielding is ineffective. All antenna connections, radio and
amplifier grounds are possible faults and if identified, should be corrected.
Important: Replacement of the antenna cable on a system with a ground/shielding
of .5 ohms or less will not likely improve the reception performance.
- Refer to the Entertainment sub-section in Body and Accessories of the
Service Manual for additional diagnosis information. If further diagnosis
indicates that the antenna cable is the fault, then replace the antenna cable
using the replacement procedure listed below.
Antenna Cable Replacement
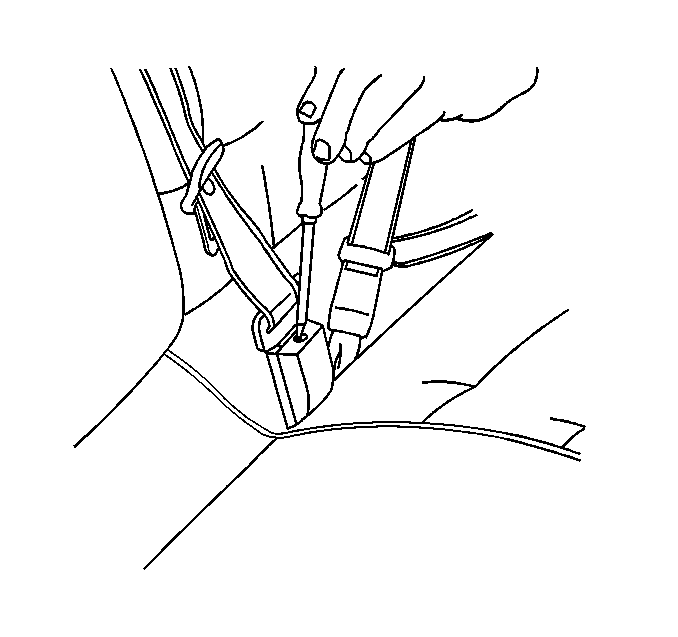
- Release the rear seat belt center latch
to buckle.
- Remove the screws and rear assist handle.
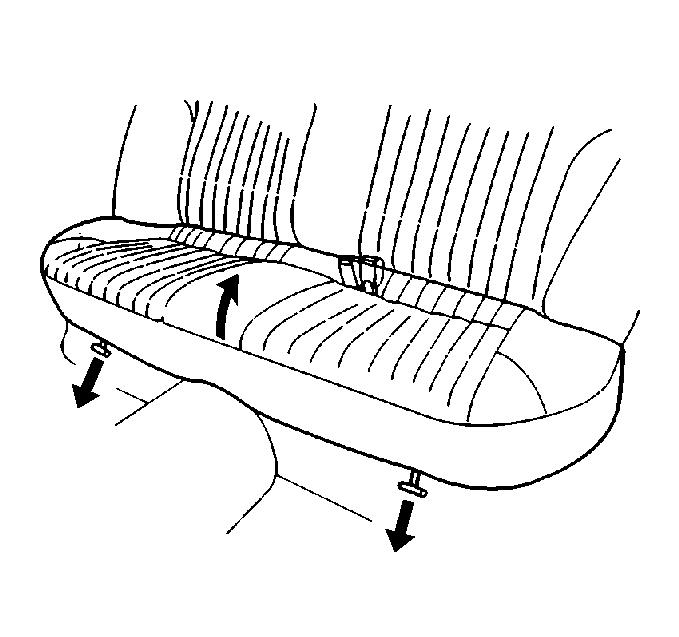
- Remove the rear seat cushion from the
vehicle.
| 3.1. | Pull the release handles that are located at the base of the rear
seat cushion. |
| 3.2. | Disconnect the heating element electrical connectors. |
| 3.3. | Remove the rear seat belt from the lower seat cushion. |
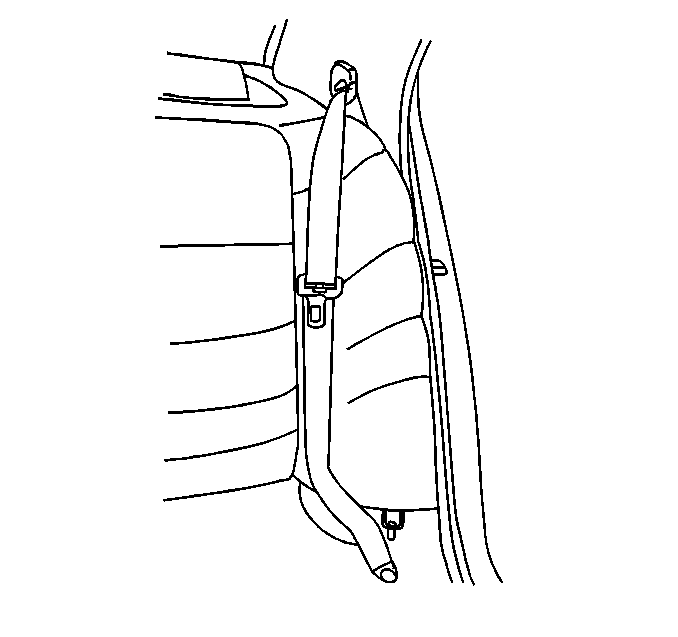
- Remove the rear seat back outer cushions.
| 4.1. | The tab is located at the base of the rear seat back outer cushion. |
| 4.2. | Bend the tab outward and push upward on the rear seat outer cushion
to release from hook. |
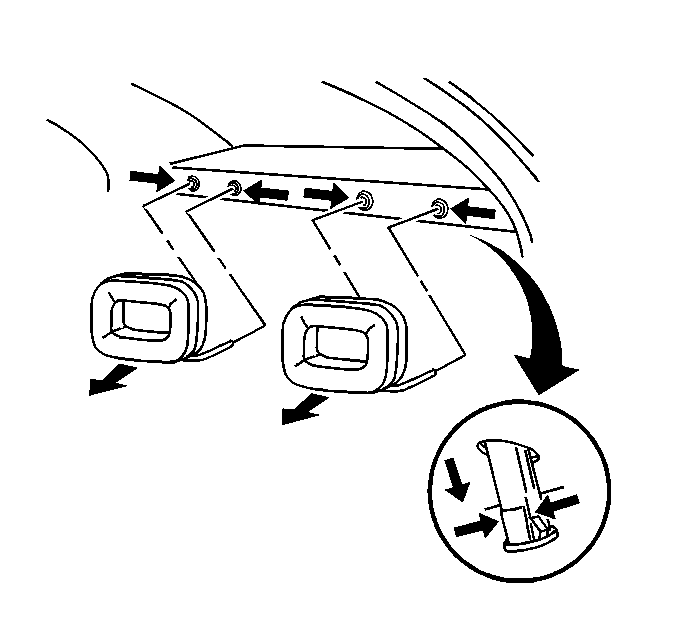
- Remove the headrest restraints. Pull
out the headrest restraint and push in on the tabs located under the restraint
to release.
- Push in on the release tabs and remove the headrest restraint
release tab retainers from the rear seat to back window trim panel.
- Remove the RH side rear seat belt shoulder belt retractor.
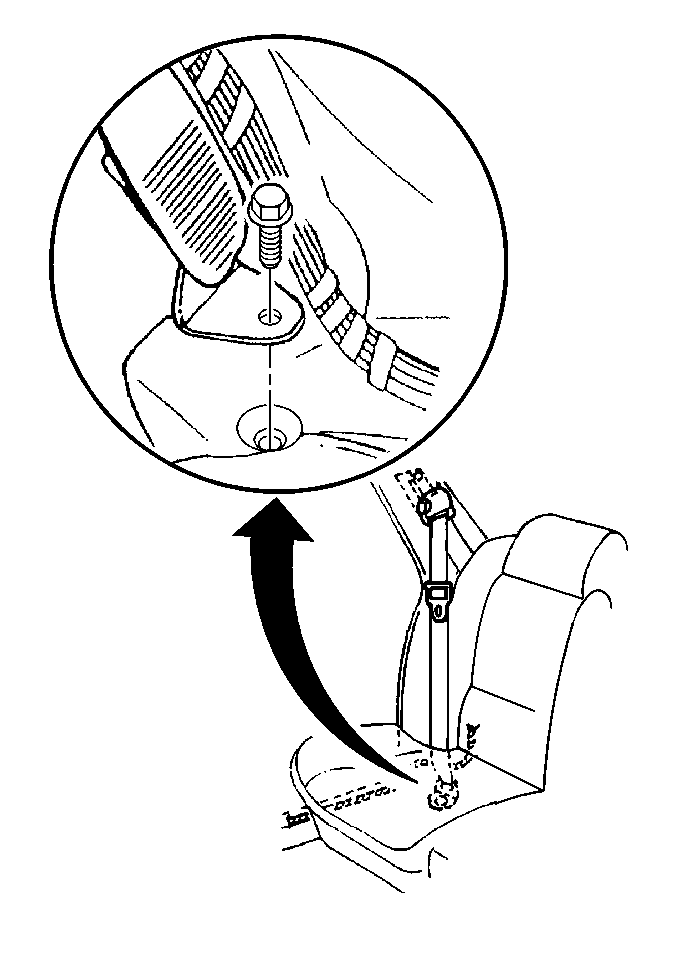
| 7.1. | Remove the lower rear seat belt retractor
bolt. |
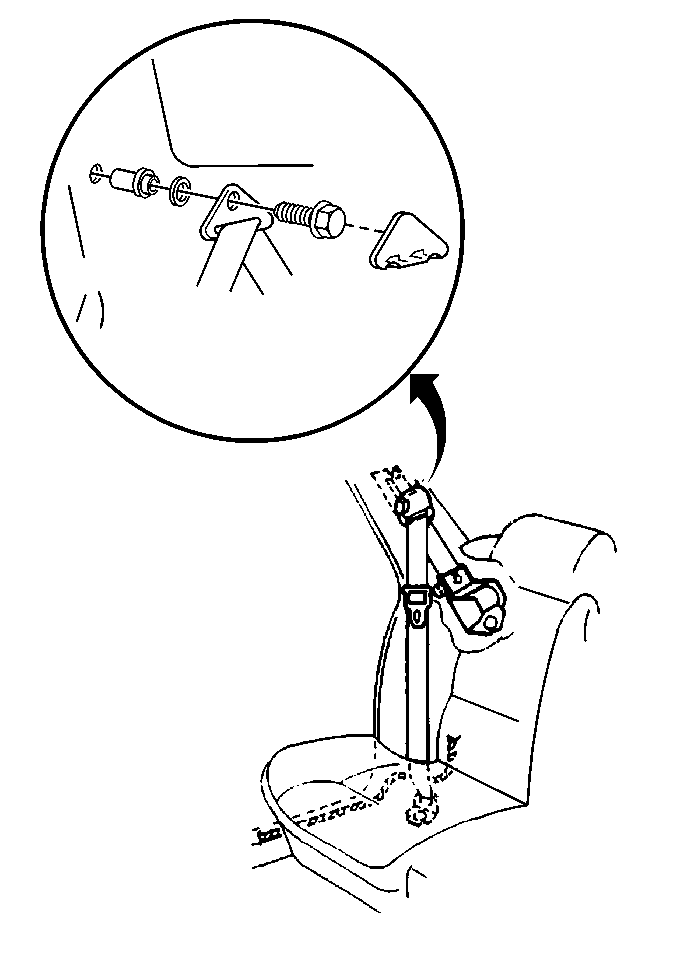
| 7.2. | Remove the bolt cover from the rear shoulder
belt guide adjuster. |
| 7.3. | Remove the bolt from the rear seat belt shoulder belt guide adjuster. |
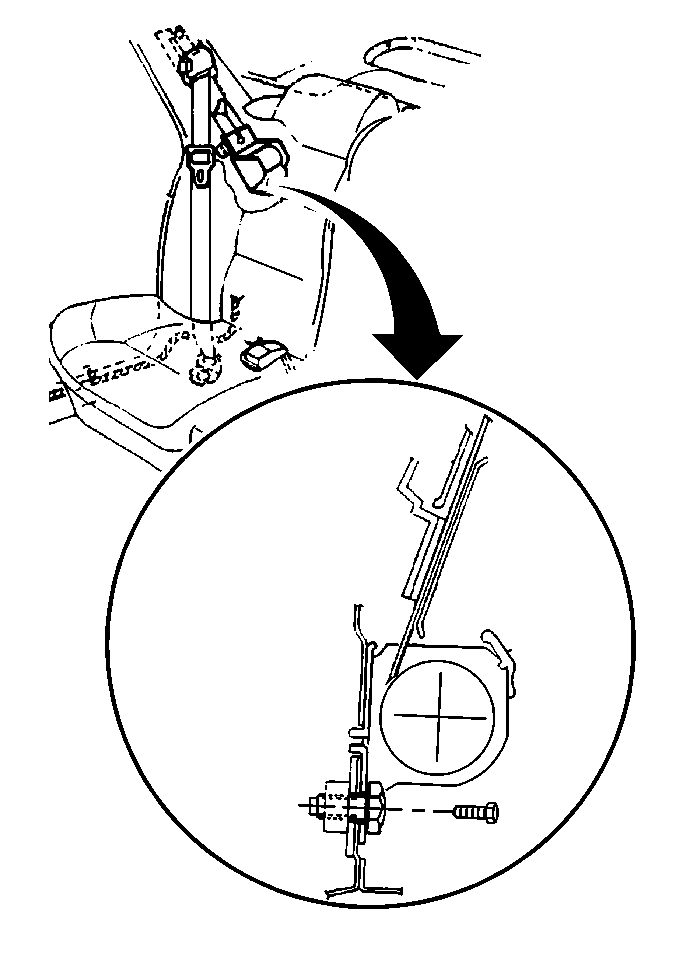
| 7.4. | Remove the bolt from the rear seat shoulder
belt retractor. |
- Remove the RH side rear quarter trim finish panel.
| 8.1. | Remove the covers and two screws from the rear quarter trim finish
panel. |
| 8.2. | Pull back on the rear quarter trim finish panel in order to release
the clips on the back side. |
| 8.3. | Disconnect the electrical from the roof rail courtesy reading
lamp. |
- Remove the rear seat to back window trim panel.
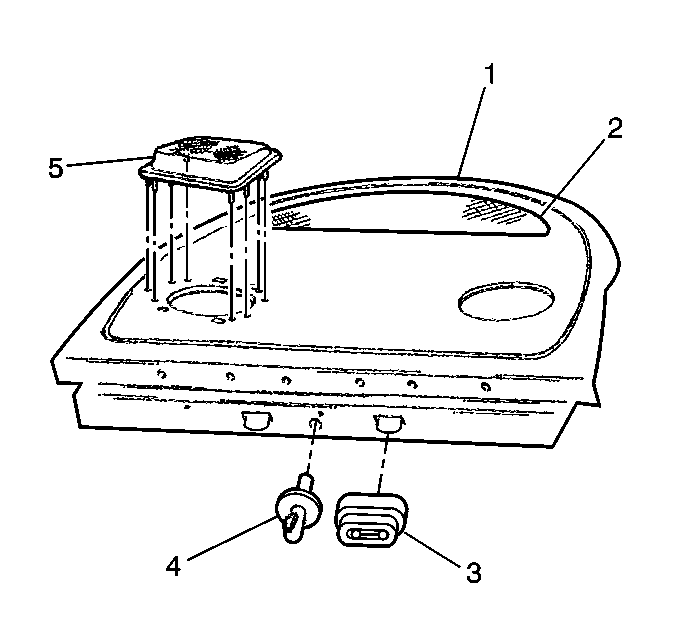
| 9.1. | Unsnap the rear speaker grilles from
the rear seat to back window trim panel. |
| 9.2. | Remove the rear seat to back window trim panel air vent. |
| 9.3. | Remove the seatback armrest latch pin. |
| 9.4. | Remove the seatback anchor covers. |
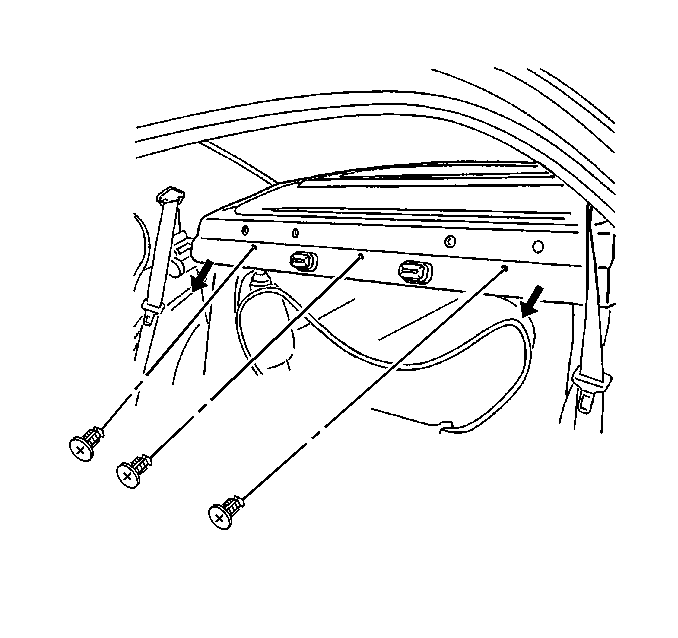
| 9.5. | Remove 3 push retainers securing the
front edge of the rear seat to back window trim panel. |
| 9.6. | Disconnect the sunshade electrical connector, if equipped. |
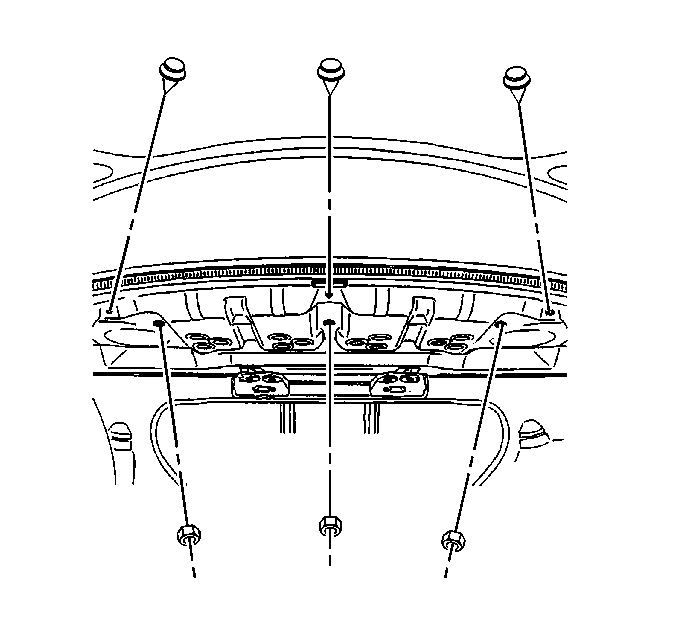
| 9.7. | Remove 3 nuts from inside the rear compartment
area retaining the window trim panel. |
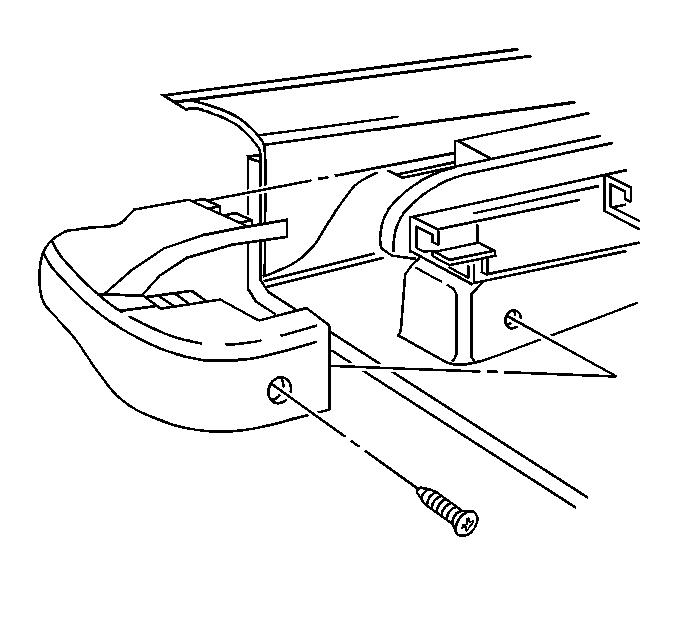
- Remove the RH side outer seat track covers.
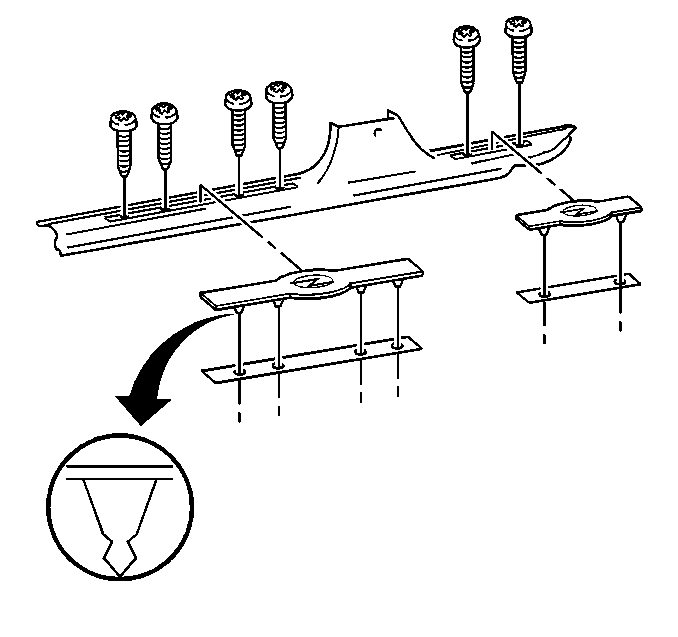
- Remove the RH side carpet retainer.
| 11.1. | Remove the carpet retainer center screw, located below the center
pillar lower trim finish panel. |
| 11.2. | Remove the carpet retainer inserts to expose the screws. |
| 11.3. | Remove the carpet retainer screws. |
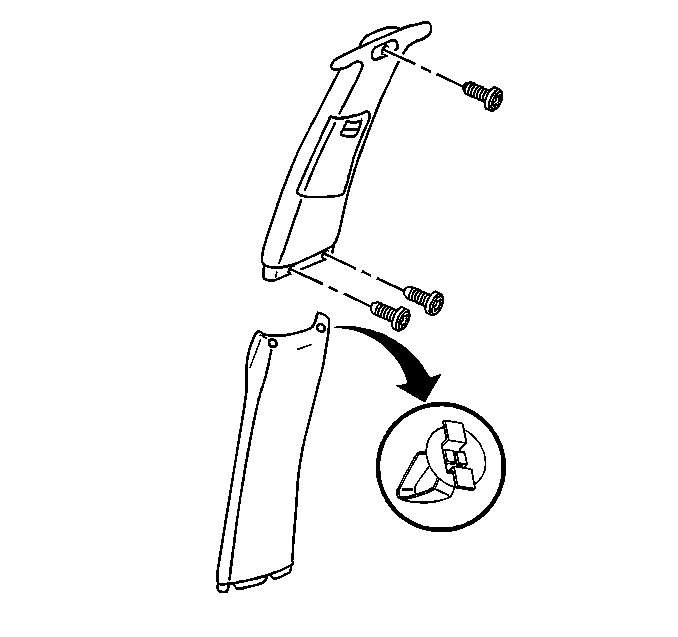
- Remove the RH side center pillar lower
trim, pull outward to release the center pillar lower trim from the center
pillar.
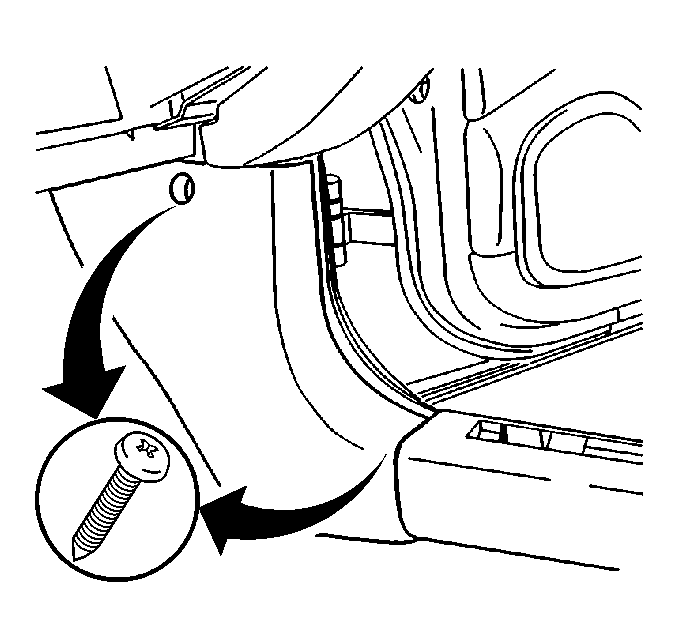
- Remove the RH side hinge pillar trim
finish kick panel.
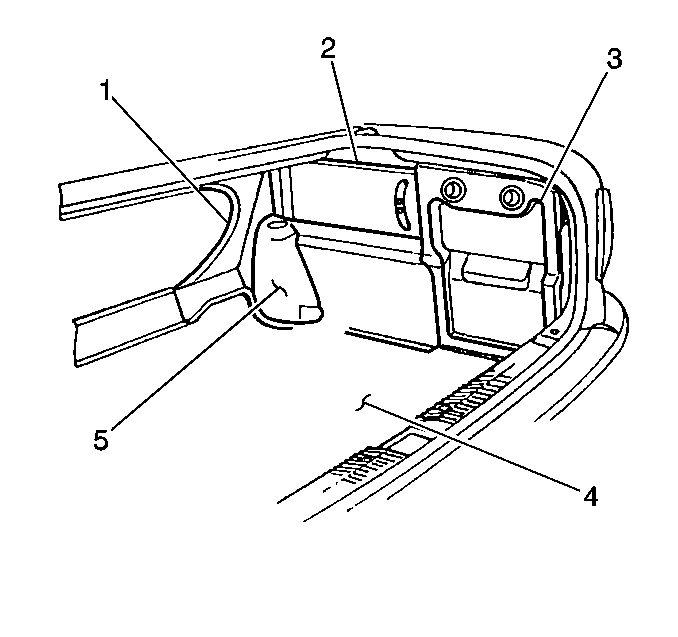
- Remove the rear compartment floor carpet
(4).
| 14.1. | Unclip the cargo net from the rear compartment floor. |
| 14.2. | Fold down the rear seat backs. |
| 14.3. | Remove the protective edge (1) around the opening. |
| 14.4. | Remove the two push retainers. |
- Remove the jack and the handle kit.
| 15.1. | Remove the jack and the handle storage door. |
| 15.2. | Remove the screw retaining the jack and the handle kit. |
- Remove the CD/stowage door.
| 16.1. | Open the CD/stowage door. |
| 16.2. | Remove the nuts retaining the CD/stowage door. |
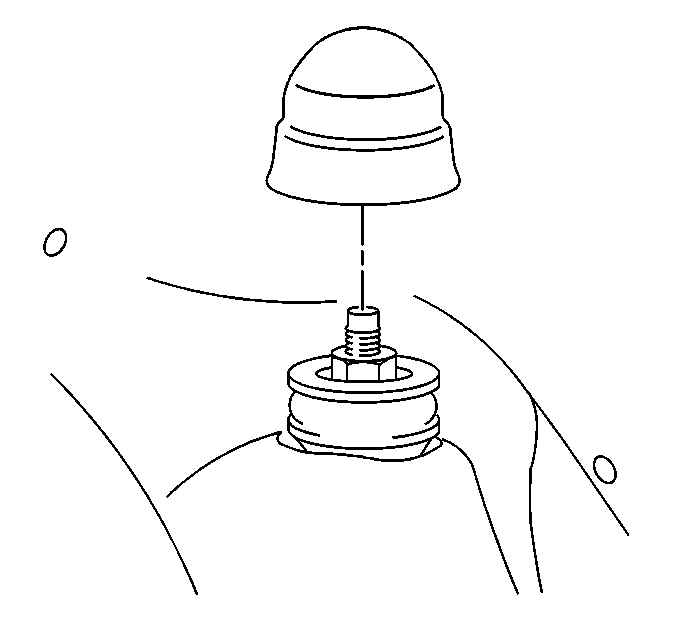
- Remove the RH side shock tower cover.
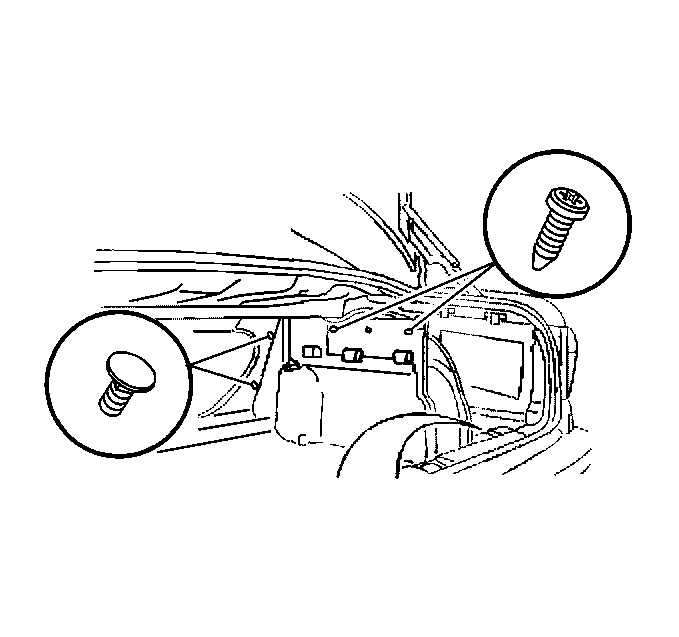
- Remove the RH rear compartment side trim.
| 18.2. | Remove the push retainers. |
- Disconnect the antenna cable from the antenna amplifier.
- On the amplifier end of the old antenna cable, cut the end from
the existing wiring harness.
- On the radio end of the old antenna cable, cut the end from the
existing wiring harness.
- Starting at the rear parcel shelf, route the new antenna cable
(avoid attaching the new antenna cable to pre-existing wire harnesses to prevent
electrical interference).
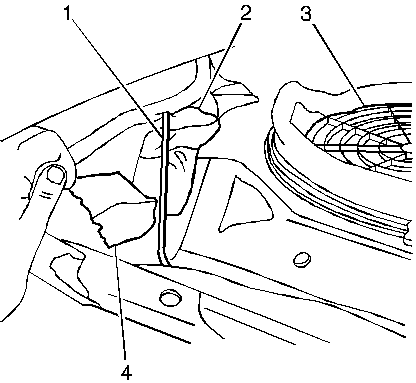
| • | Place a piece of tape (4) around the
edge of the hole (2) in the rear seat to the back panel to prevent chafing
of the new antenna cable (1). |
| • | Route the antenna cable through the hole in the rear to the back
window panel. |
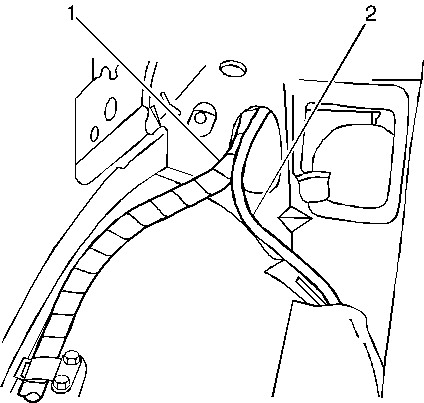
| • | Run the antenna cable (2) down the inboard
side of the wheel well. |
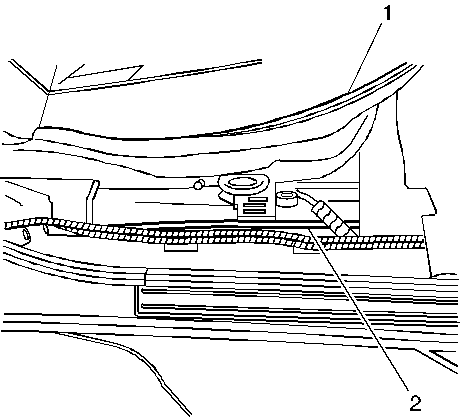
| • | Run the antenna cable (2) along the RH
side of the vehicle to the front hinge pillar kick panel. |
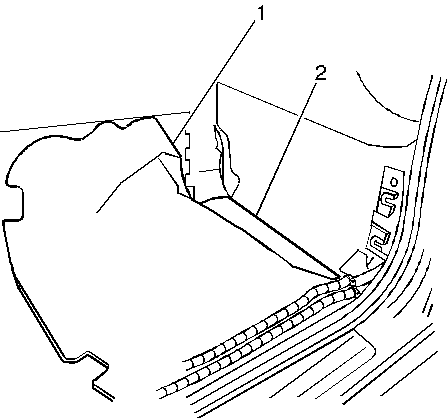
| • | Pull back on the RH side
front carpet (1) to expose the wire channel (2) on the floor pan. |
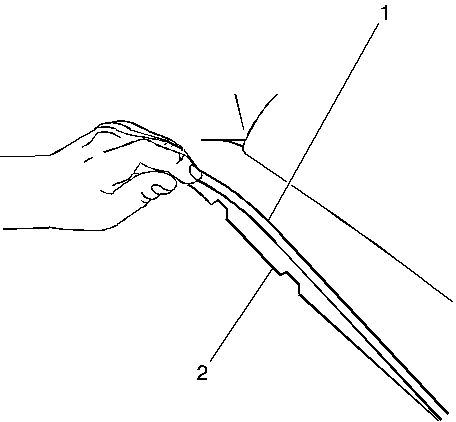
| • | Route the antenna cable (1) in the track
(2) of the existing plastic wire harness located on the front floor pan. |
| • | Route the antenna cable up to the radio opening along the side
of the HVAC module. |
- Connect the new antenna cable to the amplifier.
- Secure the new cable to the rear seat to back window panel and
the floor pan with duct tape to prevent vibration.
- Connect the electrical/audio and antenna cable connectors to the
radio. Install the radio to the I/P center support bracket.
- Install the screws retaining the radio to the I/P center support
bracket.
- Install the I/P accessory trim plate to the instrument panel.
Refer to the replacement procedure in the Instrument Panel, Gauges, and Console
sub-section of the Service Manual.
- Reposition the RH side front carpet.
- Install the RH rear compartment side trim, push retainers and
screws.
- Install the RH side shock tower cover.
- Install the CD/stowage door.
| 31.1. | Install the nuts retaining the CD/stowage door. |
| 31.2. | Close the CD/stowage door. |
- Install the jack and the handle kit.
| 32.1. | Install the screw retaining the jack and the handle kit. |
| 32.2. | Install the jack and the handle storage door. |
- Install the rear compartment floor carpet.
| 33.1. | Install the two push retainers. |
| 33.2. | Install the protective edge around the opening. |
| 33.3. | Reposition the rear seat backs. |
| 33.4. | Clip cargo net to the rear compartment floor. |
- Install the RH side hinge pillar trim finish kick panel.
- Install the RH side center pillar lower trim to the center pillar.
- Install the RH side carpet retainer.
| 36.1. | Install the carpet retainer screws. |
| 36.2. | Install the carpet retainer inserts. |
| 36.3. | Install the carpet retainer center screw, located below the center
pillar lower trim finish panel. |
- Install the RH side outer seat track covers.
- Install the rear seat to back window trim panel.
| 38.1. | Install 3 nuts from inside the rear compartment area retaining
the window trim panel. |
| 38.2. | Connect the sunshade electrical connector, if equipped. |
| 38.3. | Install 3 push retainers securing the front edge of the rear seat
to the back window trim panel. |
| 38.4. | Install the seatback anchor covers. |
| 38.5. | Install the seatback armrest latch pin. |
| 38.6. | Install the rear seat to back window trim panel air vent. |
| 38.7. | Snap the rear speaker grilles to the rear seat to the back window
trim panel. |
- Install the RH side rear quarter trim finish panel.
| 39.1. | Connect the electrical to the roof rail courtesy reading lamp. |
| 39.2. | Push down on the rear quarter trim finish panel in order to insert
clips. |
| 39.3. | Install the two screws and covers to the rear quarter trim finish
panel. |
- Install the RH side rear seat belt shoulder belt retractor.
| 40.1. | Install the bolt to the rear seat shoulder belt retractor. |
Tighten
Tighten the rear seat shoulder retractor bolt to 35N·m (26 lb ft).
| 40.2. | Install the bolt to the rear seat belt shoulder belt guide adjuster. |
Tighten
Tighten the rear seat shoulder guide adjuster bolt to 35N·m (26 lb ft).
| 40.3. | Install the bolt cover to the rear shoulder belt guide adjuster. |
| 40.4. | Install the lower rear seat belt retractor bolt. |
Tighten
Tighten the lower rear seat belt retractor bolt to 35N·m (26 lb ft).
- Install the headrest restraint release tab retainers to the rear
seat to the back window trim panel.
- Install the headrest restraints.
- Install the rear seat back outer cushions.
- Install the rear seat cushion to the vehicle.
| 44.1. | Connect the heating element electrical connectors. |
| 44.2. | Install the rear seat belt from the lower seat cushion. |
- Install the rear assist handle and screws.
- Reconnect the rear seat belt center latch to the buckle.
Parts Information
Part Number
| Description
|
09120443
| Cable, Radio Antenna
|
Parts are currently available from GMSPO.
Warranty Information
For vehicles repaired under warranty, use:
Labor Operation
| Description
| Labor Time
|
R0514
| Cable, Radio Antenna - Replace
| 2.5 hrs
|
Add
| Diagnosis Time
| 0.3 hr
|
This time is updated from
the current Labor Time Guide. The next update of the Labor Time Guide will
show this change.
|


