Tools Required
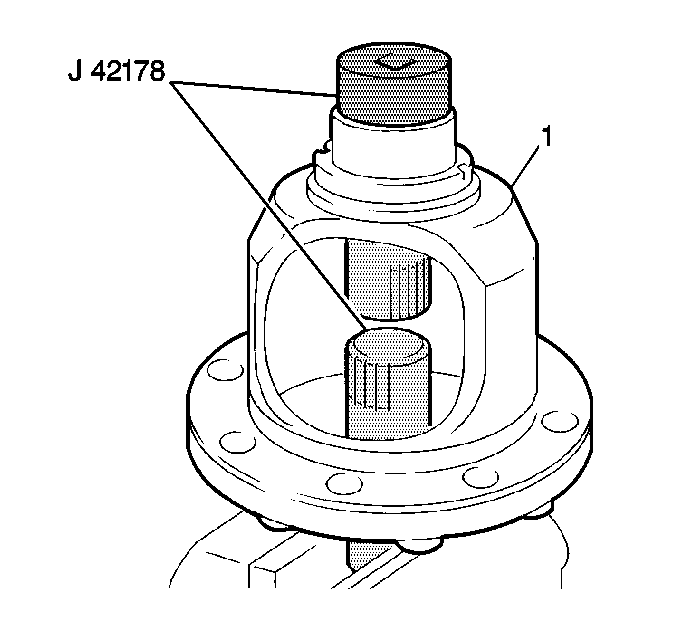
J 42178 Differential Carrier Gear Alignment Arbors
- Place the differential carrier on the J 42178 , clamped in the vice, with the ring gear flange downwards.
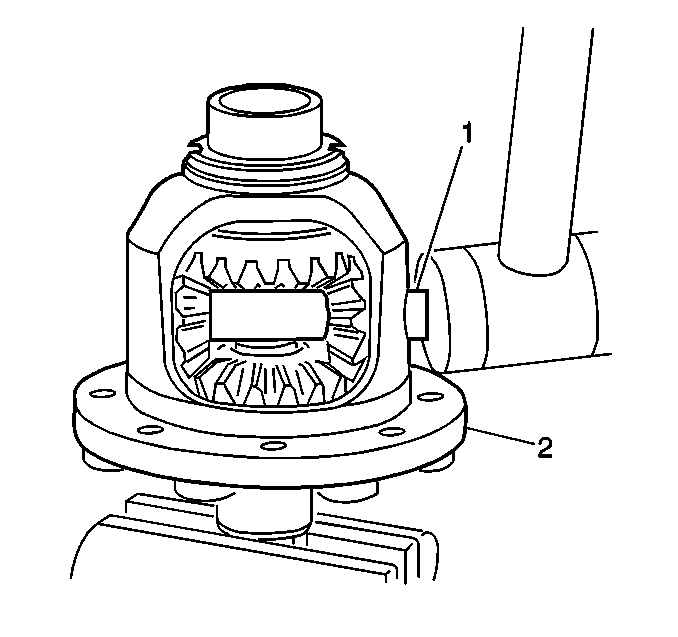
- Install the counterpiece of the J 42178 into the opposing differential carrier bore (1).
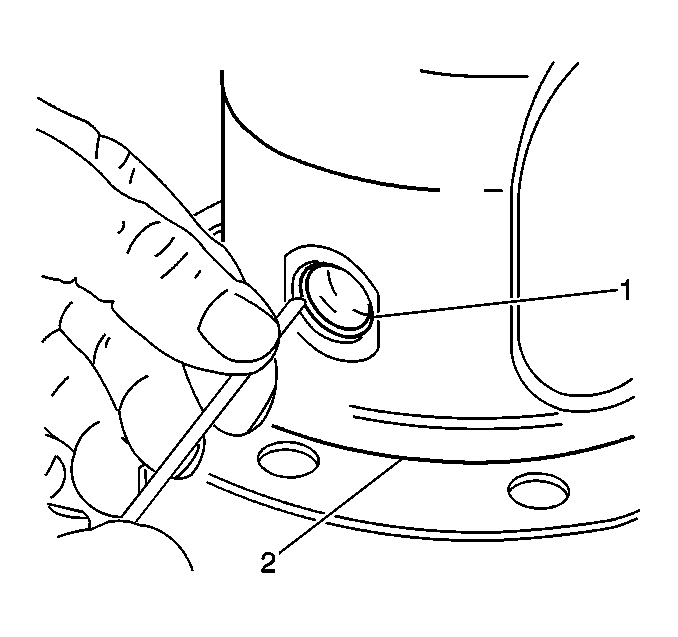
- Install a NEW differential pinion gear retaining ring (1) into the differential carrier (2).
- Thoroughly clean all the components.
- Place the shims on the differential side gears.
- Place the differential side gears with the previously installed shims into the differential carrier and onto both of the pieces of the J 42178 .
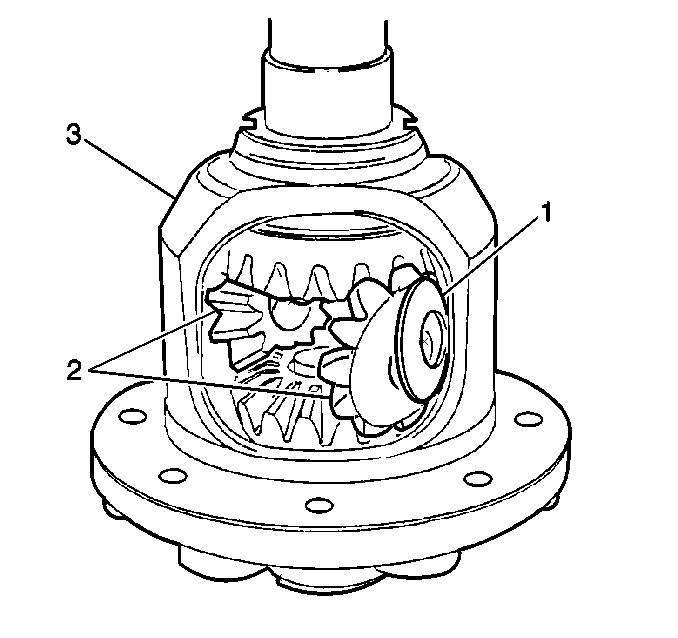
- Lubricate with gear lubricant and engage the differential pinion gears (2) and engage the conical washers (1) with the differential side gears. Align them so that they are exactly opposite each other in the carrier window.
- Move the differential pinion gear conical washers (1) forward in the intended rotational direction so that they will lead the pinion gears (2) into the mounting position.
- Use a ratchet to rotate the J 42178 in order to draw the pinion gears and conical washers into position.
- Use a deadblow hammer to drive the differential pinion gear shaft (1) into the carrier bore (2) after aligning the differential pinion gears and washers with the pinion gear shaft bores.
- Mount a torque wrench to the J 42178 .
- Inspect for proper pinion rotating torque and proper side gear rotating torque.
- Heat the ring gear to approximately 100°C (212°F).
- Install the ring gear onto the differential carrier.
- Install NEW ring gear bolts.
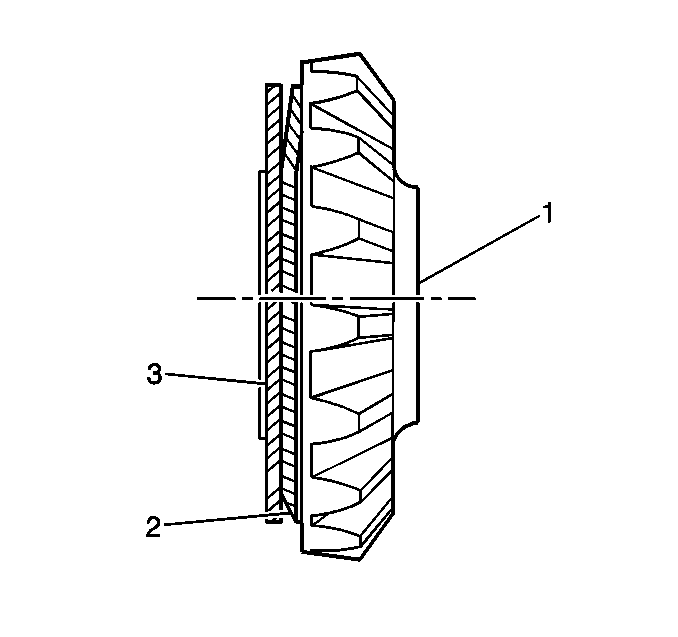
| 5.1. | Coat the gears with rear axle lubricant. |
| 5.2. | Coat the shims with rear axle lubricant. |
| 5.3. | Install the thinner (conical) washer toward the differential side gear (1). |
| 5.4. | Install the thicker shim (with notches around the outer edge) toward the carrier. |
Use a small hammer and drift to assist the washers into position, if necessary.
Important: Ensure that the retaining ring remains centered in the carrier bore while driving in the pinion gear shaft.
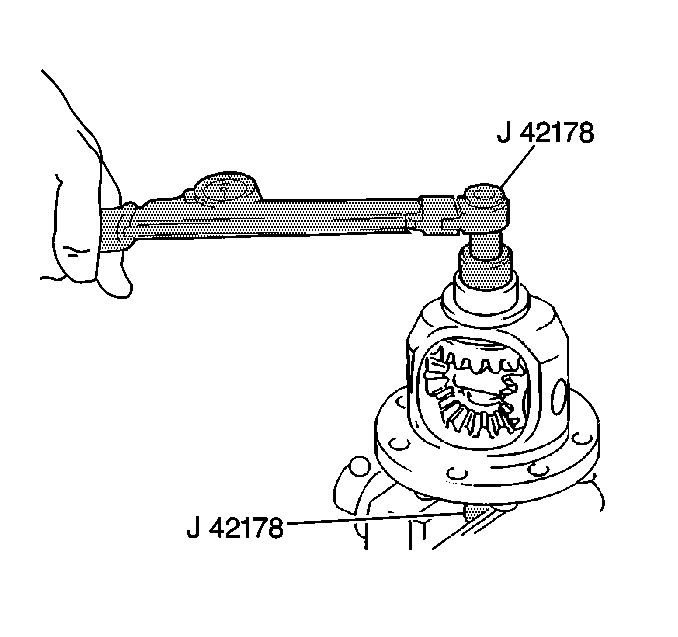
Specification
15-30 N·m (11-22 lb ft).
Important: Do NOT overheat the ring gear. Damage to the ring gear may occur.
Notice: Use the correct fastener in the correct location. Replacement fasteners must be the correct part number for that application. Fasteners requiring replacement or fasteners requiring the use of thread locking compound or sealant are identified in the service procedure. Do not use paints, lubricants, or corrosion inhibitors on fasteners or fastener joint surfaces unless specified. These coatings affect fastener torque and joint clamping force and may damage the fastener. Use the correct tightening sequence and specifications when installing fasteners in order to avoid damage to parts and systems.
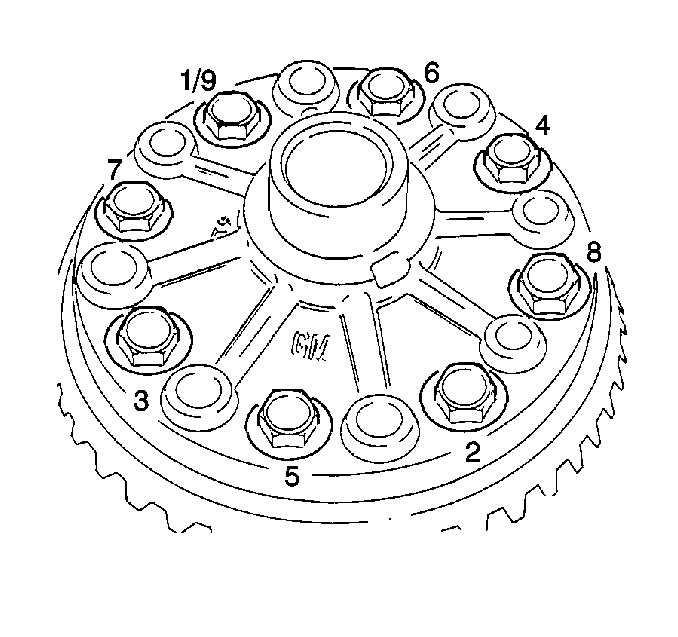
Tighten
The ring gear bolts must be torqued in the sequence shown to 115 N·m
(85 lb ft).
