For 1990-2009 cars only
Forward Body Mount Replacement FE7
Removal Procedure
- Raise the vehicle and suitably support. Refer to Lifting and Jacking the Vehicle .
- Remove the wheels and the tires. Refer to Tire and Wheel Removal and Installation .
- Remove the exhaust system. Refer to Exhaust System Replacement .
- Support the forward end of the rear suspension support with a suitable jack.
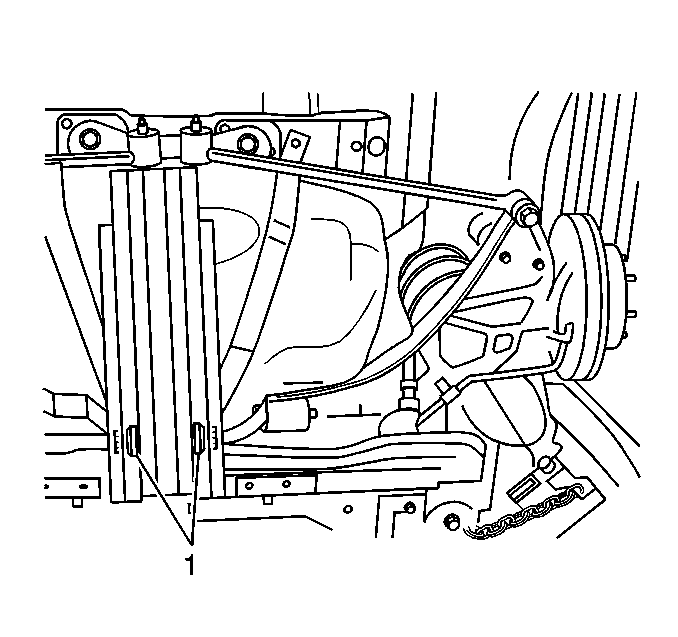
- Remove the center support bracket bolts (1).
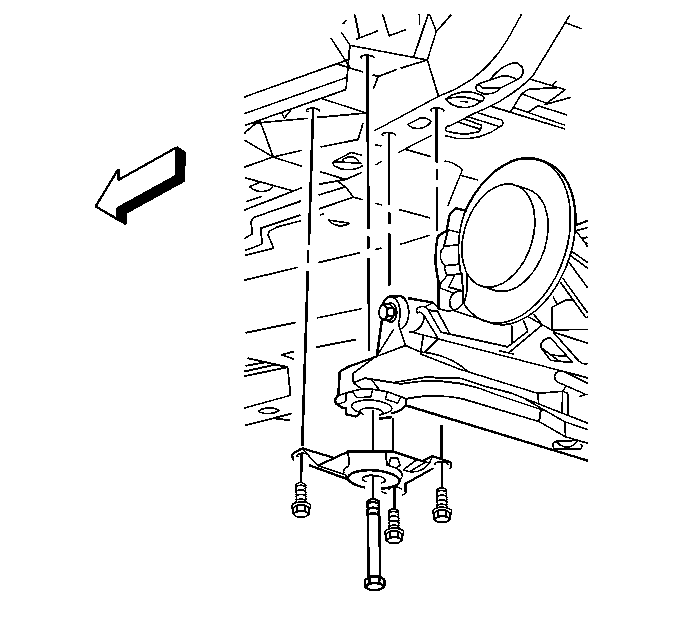
- Remove the forward body mount brackets at the support assembly.
- Remove the 2 bolts securing the front of the support assembly to the vehicle.
- Lower the jack to allow the front end of the support assembly to lower enough to allow for the removal of the mounts.
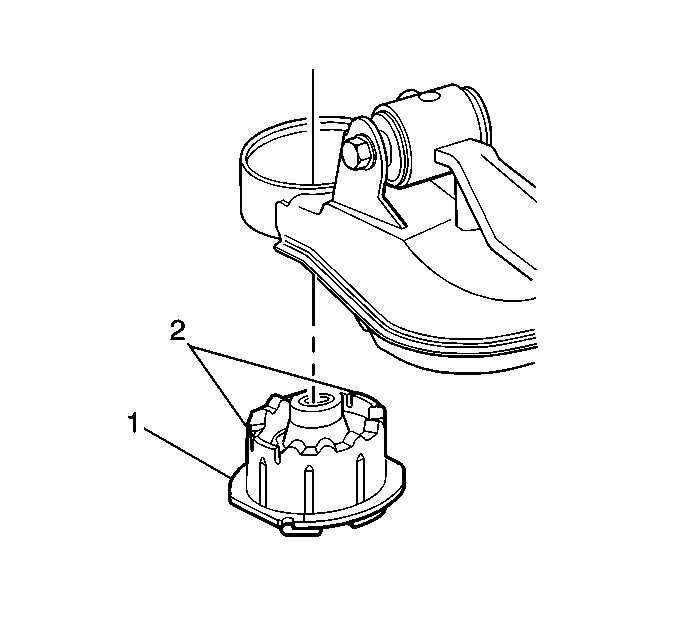
- Using a punch, bend the tabs on the mount inboard (1) and then tap the mount downward and out of the support assembly.


Installation Procedure
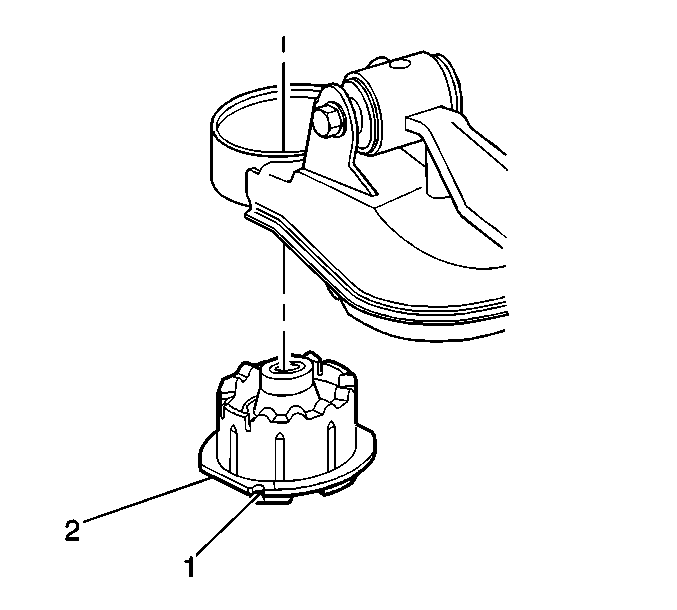
- Tap the mount into the support assembly ensuring the flat is outboard (2) and the notch (1) is rearward upon the installation.
- Bend the tabs outboard with a large pair of pliers. The tabs should be fully seated against the chamfer in the support assembly retainer ring.
- Raise the support assembly to the body of the vehicle.
- Install the 2 bolts securing the front of the support assembly to the vehicle body.
- Install the support bracket to the body (1).
- Install the brackets to body at the support assembly forward mounts.
- Install the exhaust system. Refer to Exhaust System Replacement .
- Install the wheels and the tires.
- Lower the vehicle.
- Inspect and adjust the rear toe. Refer to Rear Toe Adjustment .

Notice: Refer to Fastener Notice in the Preface section.

Tighten
Tighten the bolts to 181 N·m (133 lb ft).

Tighten
Tighten the support bracket to the body bolts to 128 N·m (94 lb ft).
Tighten
Tighten the insulator to the body bracket bolts to 86 N·m (63 lb ft).
Tighten
Tighten the wheel nuts to 125 N·m (80 lb ft).
Forward Body Mount Replacement FE1 and FE3
Removal Procedure
- Raise the vehicle and suitably support. Refer to Lifting and Jacking the Vehicle .
- Remove the wheels and the tires. Refer to Tire and Wheel Removal and Installation .
- Remove the exhaust system. Refer to Exhaust System Replacement .
- Support the forward end of the rear suspension support with a suitable jack.
- Remove the forward body mount brackets at the support assembly.
- Remove the two bolts securing the front of the support assembly to the vehicle.
- Lower the jack to allow the front end of the support assembly to lower enough to allow for removal of the mounts.
- Using a punch, bend the tabs on the mount inboard (1) and then tap the mount downward and out of the support assembly.


Installation Procedure
- Tap the mount into the support assembly ensuring the flat is outboard (2) and the notch (1) is rearward upon the installation.
- Bend the tabs outboard with a large pair of pliers. The tabs should be fully seated against the chamfer in the support assembly retainer ring.
- Raise the support assembly to the body of the vehicle.
- Install the 2 bolts securing the front of the support assembly to the vehicle body.
- Install the brackets to body at the support assembly forward mounts.
- Install the exhaust system. Refer to Exhaust System Replacement .
- Install the wheels and the tires.
- Lower the vehicle.
- Inspect and adjust the rear toe. Refer to Rear Toe Adjustment .

Notice: Refer to Fastener Notice in the Preface section.

Tighten
Tighten the bolts to 181 N·m (133 lb ft).
Tighten
Tighten the body bracket bolts to 77 N·m (57 lb ft).
Tighten
Tighten the wheel nuts to 125 N·m (80 lb ft).
