Control Arm Bushing Replacement Lower Control Arm
Removal Procedure
- Raise and support the vehicle. Refer to Lifting and Jacking the Vehicle in General Information.
- Remove the tire and wheel assemblies. Refer to Wheel Removal in Tires and Wheels.
- Support the inboard end of the lower control arm with a transmission jack. Position the brackets on the jack in order to securely hold the control arm.
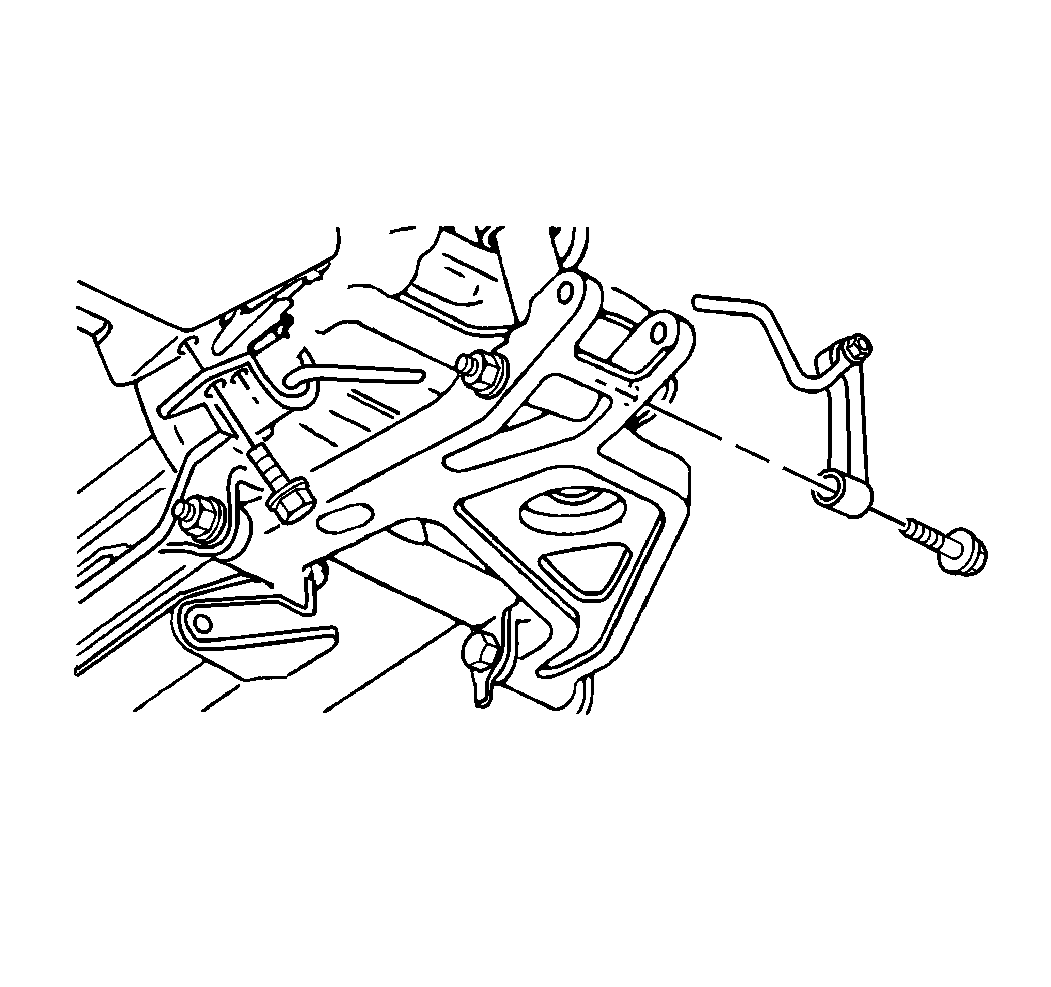
- Remove the stabilizer link lower attachment.
- Remove the shock absorber lower attachment.
- Remove the inboard lower control arm nuts and bolts.
- Slowly lower the transmission jack in order to relieve the spring pressure.
- Pull the lower control arm down in order to remove the spring.
- Lower the control arm outboard bolt, if you are removing the control arm.
Caution: Place Jackstand under front of vehicle to prevent vehicle from falling from hoist.
Installation Procedure
- Position the control arm in the vehicle.
- Install the spring and insulators.
- Raise the transmission jack under the inboard end of the lower control arm in order to slightly compress the spring.
- Insert the inboard lower control arm nuts and bolts.
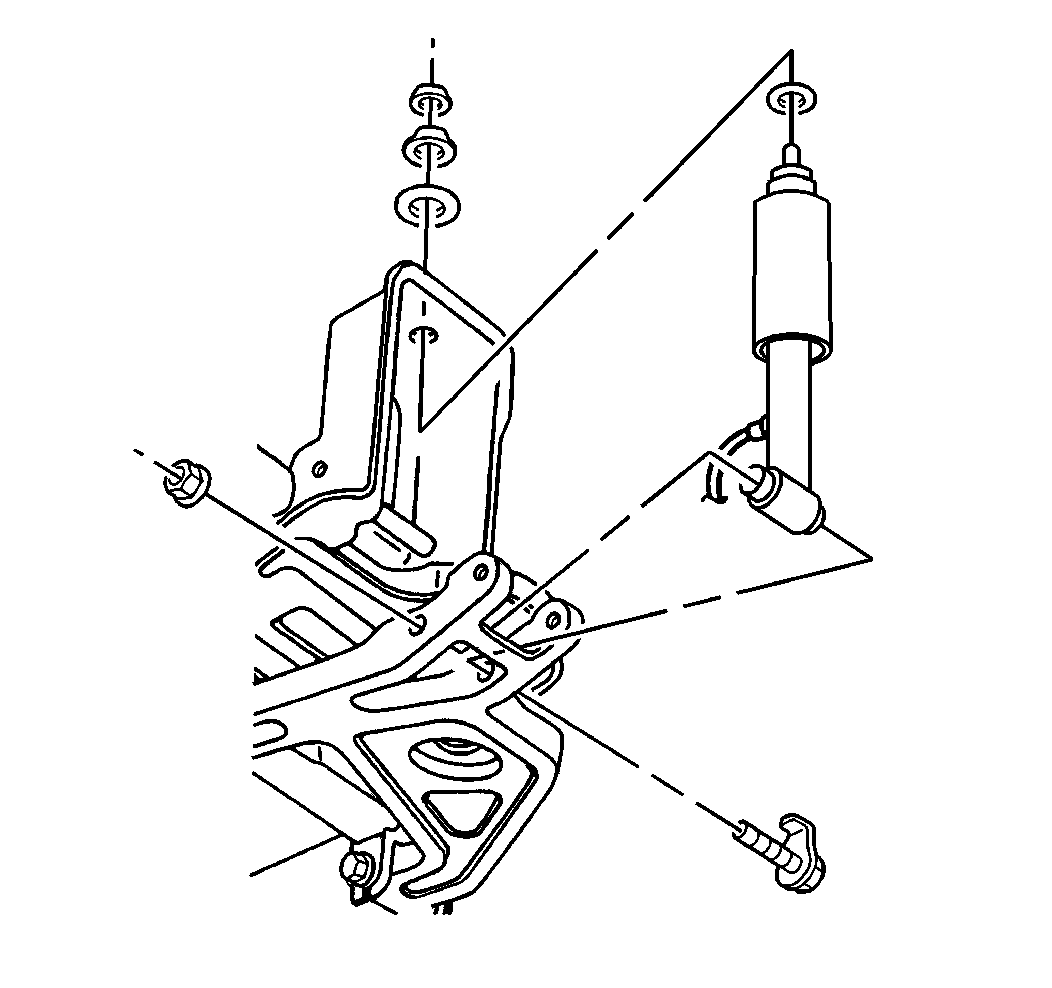
- Install the shock absorber lower attachment.
- Install the stabilizer link lower attachment.
- Remove the transmission jack. Place the jack under the outboard end of the lower control arm in order to bring the suspension to the suspension's design position. The inner control arm nuts must be tightened in the design position in order to reduce wind up in the bushings.
- Install the tire and wheel assemblies. Refer to Wheel Installation in Tires and Wheels.
Install the outboard control arm bolt and nut.
Notice: Use the correct fastener in the correct location. Replacement fasteners must be the correct part number for that application. Fasteners requiring replacement or fasteners requiring the use of thread locking compound or sealant are identified in the service procedure. Do not use paints, lubricants, or corrosion inhibitors on fasteners or fastener joint surfaces unless specified. These coatings affect fastener torque and joint clamping force and may damage the fastener. Use the correct tightening sequence and specifications when installing fasteners in order to avoid damage to parts and systems.
Tighten
Tighten the lower control arm outer nut to 102 N·m (75 lb ft).
Important: In order to insure proper orientation of the spring, rest the spring (without insulators) on a flat surface. The spring will stand up straight when resting on its lower end, but will lean or tip when resting on its top end.
Tighten
| • | Tighten the stabilizer link lower nut to 60 N·m (44 lb ft). |
| • | Tighten the shock absorber lower nut to 102 N·m (75 lb ft). |
| • | Tighten the lower control arm inner nuts to 102 N·m (75 lb ft). |
Important: Perform a rear wheel alignment if you loosened the inner lower control arm fasteners.
Control Arm Bushing Replacement Upper Control Arm
Removal Procedure
- Raise the vehicle. Refer to Lifting and Jacking the Vehicle in General Information.
- Remove the tire and wheel assembly. Refer to Wheel Removal .
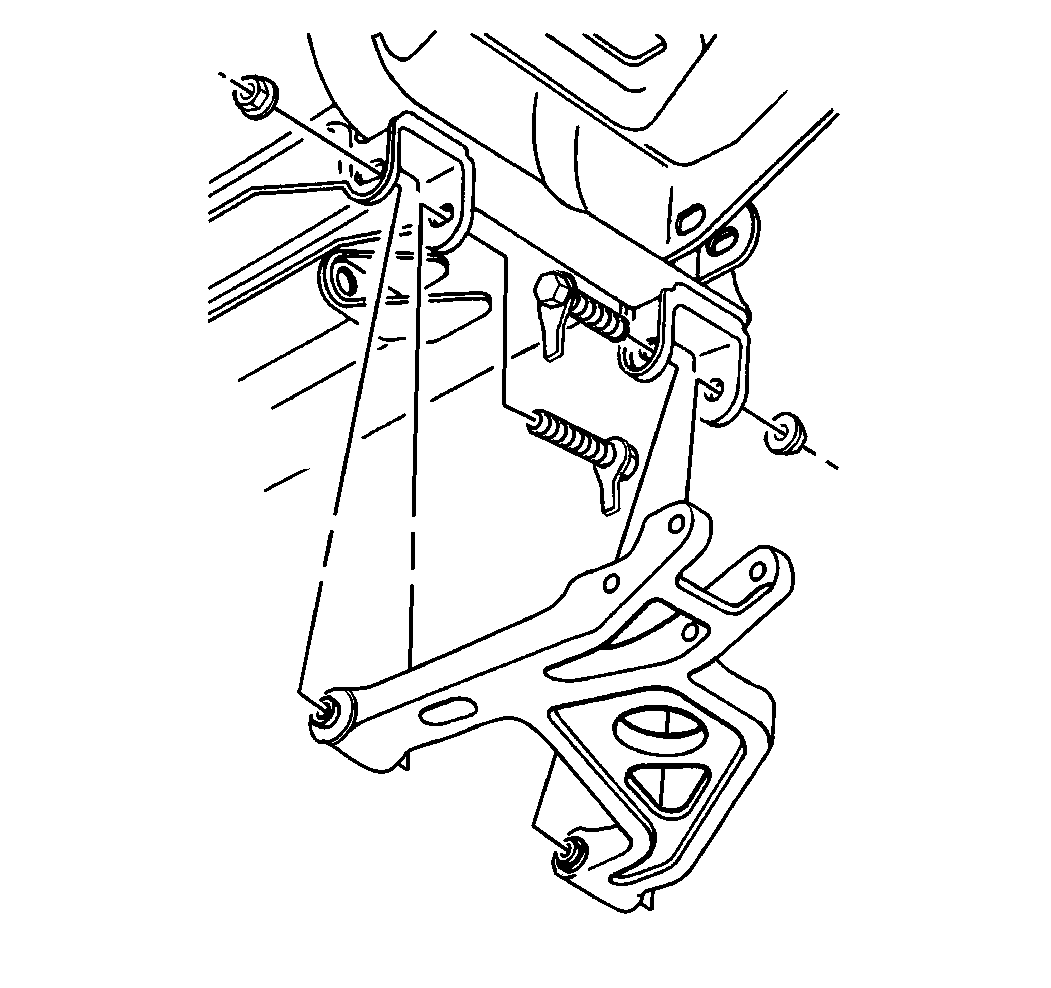
- Disconnect the electronic level control height sensor link.
- Disconnect the Road Sensing Suspension position sensor and bracket from the shock tower.
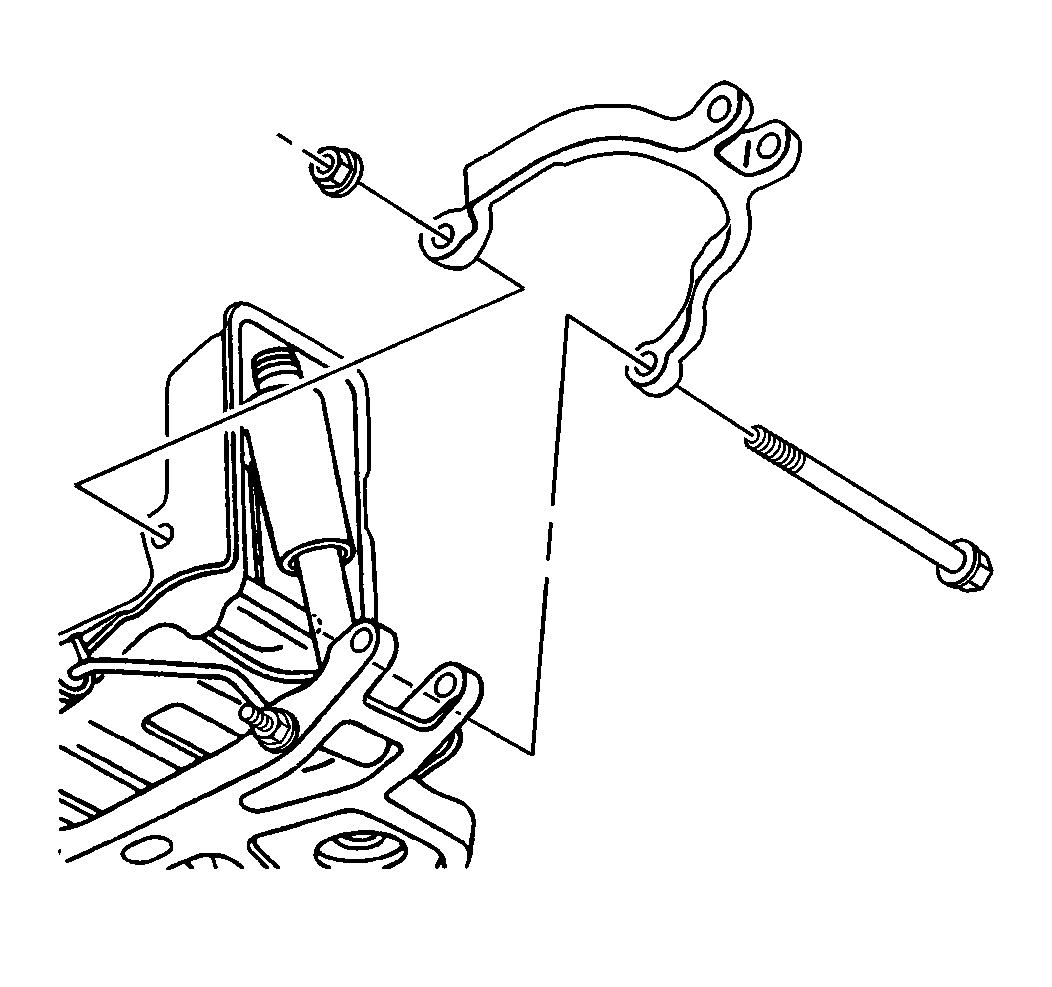
- Remove the inner and outer control arm bolts.
- Raise the control arm up over the shock tower in order to remove the control arm from the vehicle.
Installation Procedure
- Raise the control arm up over the shock tower in order to install the control arm in the vehicle.
- Install the inner and outer control arm bolts. Place the screw jack under the outboard end of the lower control arm in order to bring the suspension into design position. The inner control arm nuts must be tightened in design position in order to reduce the wind up in the bushings.
- Connect the Road Sensing Suspension position sensor bracket and sensor.
- Connect the electronic level control height sensor link.
- Install the tire and wheel assembly. Refer to Wheel Installation .
- Lower the vehicle.
Notice: Use the correct fastener in the correct location. Replacement fasteners must be the correct part number for that application. Fasteners requiring replacement or fasteners requiring the use of thread locking compound or sealant are identified in the service procedure. Do not use paints, lubricants, or corrosion inhibitors on fasteners or fastener joint surfaces unless specified. These coatings affect fastener torque and joint clamping force and may damage the fastener. Use the correct tightening sequence and specifications when installing fasteners in order to avoid damage to parts and systems.
Tighten
Tighten the upper control arm inner and outer nuts to 57 N·m
(42 lb ft).
