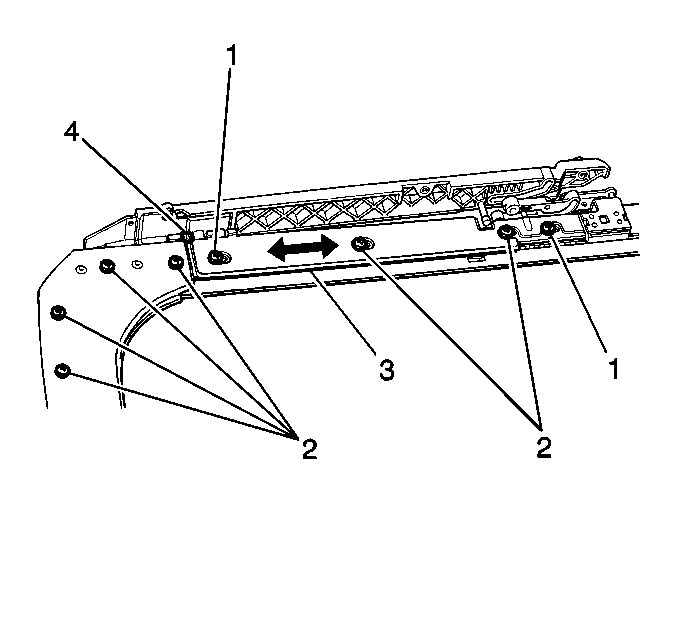
Ensure that the glass pane weather-strip seal has contact with the metal roof panel around the entire periphery of the seal when the sliding glass panel is in the closed position. Ensure that the weather-strip is not crushed at either of the following locations:
| • | The front of the panel |
| • | The rear of the panel |
Inspect for contact of the seal with the metal roof panel around the periphery of the seal. Insert one of the following components between the seal and the metal roof panel:
| • | A business card |
| • | A 0.015 in feeler gauge |
Drag the card or gauge around the entire seal contact area.
Ensure that the business card or the feeler gauge is making continuous contact between the seal and the metal roof panel around the entire seal contact area. If the gap is excessive at the front or rear of the panel, adjust the sliding glass panel in the fore/aft position.
- Fully open the sliding glass panel.
- Working from the top of the vehicle, note the position of the track assembly on the fore/aft adjustment scale.
- Loosen the track cover rail fasteners (2) on both sides of the sunroof module.
- For the fore/aft adjustment, loosen only those fasteners called out in the graphic.
- Slide the track cover rail on both sides forward or rearward, as needed 1 or 2 notches on the adjustment scale (4).
- Tighten the fasteners.
- Ensure that the following items are positioned evenly fore/aft:
- Close the sliding glass panel.
- Inspect the seal position again using a business card or feeler gauge.
- Repeat the adjustment procedure as needed in order to achieve the correct seal contact.


Notice: Use the correct fastener in the correct location. Replacement fasteners must be the correct part number for that application. Fasteners requiring replacement or fasteners requiring the use of thread locking compound or sealant are identified in the service procedure. Do not use paints, lubricants, or corrosion inhibitors on fasteners or fastener joint surfaces unless specified. These coatings affect fastener torque and joint clamping force and may damage the fastener. Use the correct tightening sequence and specifications when installing fasteners in order to avoid damage to parts and systems.
Tighten
Tighten the fasteners to 3 N·m (27 lb in).
| • | The left tracks |
| • | The right tracks |
Ensure that all of the fasteners are tight after the adjustment procedure.
