For 1990-2009 cars only
Rear Compartment Trim Panel Replacement VIN K
Removal Procedure
- Open the rear compartment lid.
- Remove the 4 fasteners for the cargo net.
- Remove the cargo net.
- Remove the rear compartment sill plate. Refer to Rear Compartment Sill Trim Plate Replacement .
- Remove the wheel nut.
- Remove the spare tire cover.
- Remove the jack holder and the jack.
- Remove the remote CD changer. Refer to Remote CD Changer Replacement in Entertainment.
- Remove the spare tire.
- Remove the 2 snap-in retainers from the rear compartment trim panel.
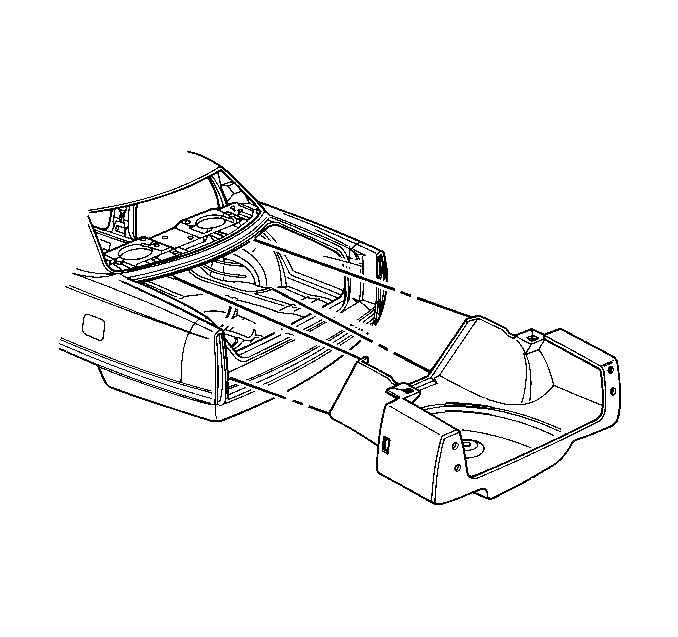
- Remove the rear compartment trim panel.

Installation Procedure
- Install the rear compartment trim panel.
- Install the 2 snap-in retainers of the rear compartment trim panel.
- Install the spare tire.
- Install the remote CD changer. Refer to Remote CD Changer Replacement in Entertainment.
- Install the jack holder and the jack.
- Install the spare tire cover.
- Install the wheel nut.
- Install the rear compartment sill plate. Refer to Rear Compartment Sill Trim Plate Replacement .
- Install the cargo net.
- Install the 4 fasteners for the cargo net.
- Close the rear compartment lid.

Rear Compartment Trim Panel Replacement VIN E
Removal Procedure
- Open the trunk.
- Remove the cargo net.
- Remove the rear compartment sill plate. Refer to Rear Compartment Sill Trim Plate Replacement .
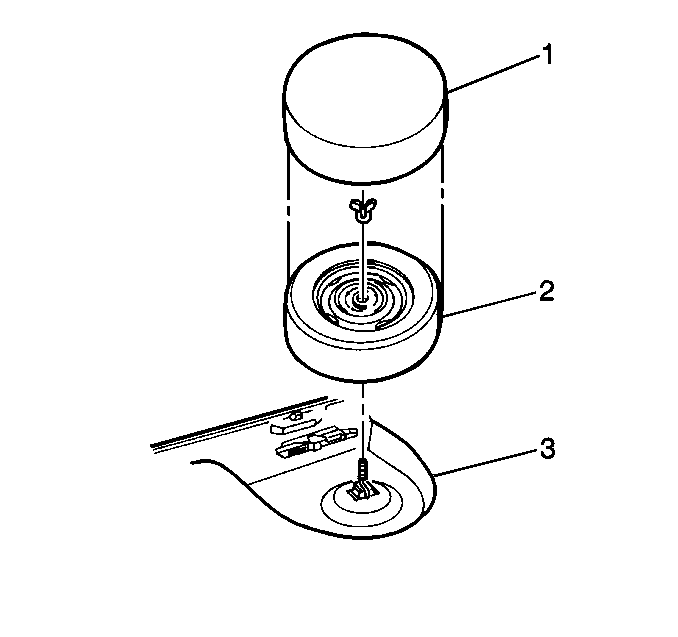
- Remove the spare tire cover (1).
- Remove the wheel nut.
- Remove the spare tire (2).
- Remove the jack retainer.
- Remove the remote CD changer, if necessary. Refer to Remote CD Changer Replacement in Entertainment.
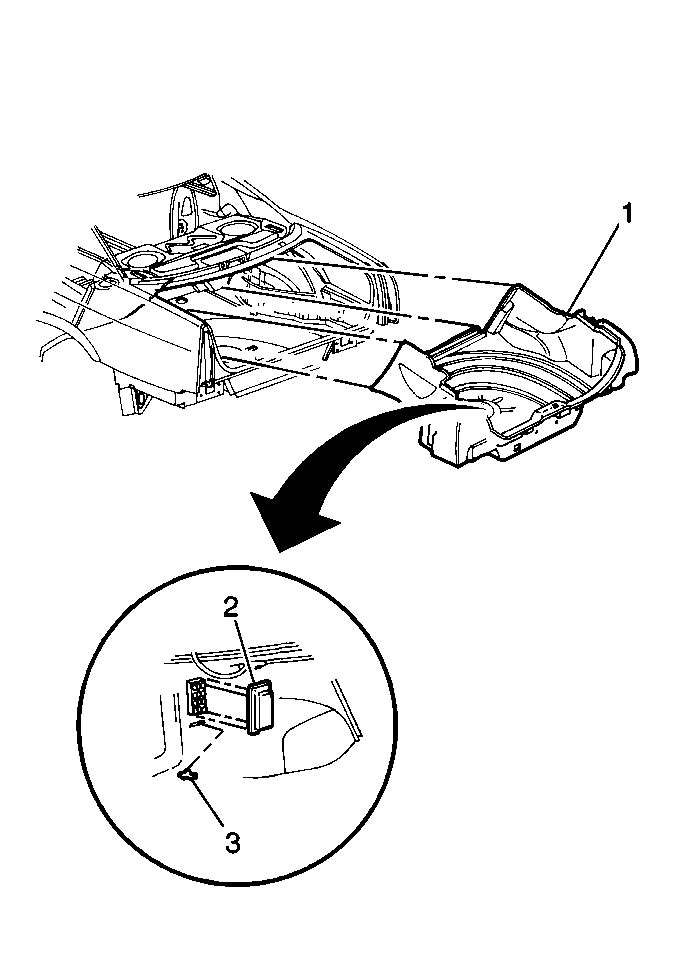
- Remove the 2 snap-in retainers of the rear compartment trim panel.
- Remove the rear compartment trim panel (1).


Installation Procedure
- Install the rear compartment trim panel (1).
- Install the 2 snap-in retainers of the rear compartment trim panel (1).
- Install the remote CD changer, if necessary. Refer to Remote CD Changer Replacement in Entertainment.
- Install the jack.
- Install the spare tire (2).
- Install the wheel nut.
- Install the spare tire cover (1).
- Install the rear compartment sill plate. Refer to Rear Compartment Sill Trim Plate Replacement .
- Install the cargo net retainers.
- Install the cargo net.
- Close the rear compartment lid.


Rear Compartment Trim Panel Replacement V4U
Removal Procedure
- Remove the rear compartment front side trim panel. Refer to Rear Compartment Front Trim Panel Replacement .
- Remove the rear compartment sill plate. Refer to Rear Compartment Sill Trim Plate Replacement .
- Remove the rear compartment right side trim panel. Refer to Rear Compartment Side Trim Replacement - Right Side .
- Remove the spare tire cover.
- Remove the spare tire and the jack.
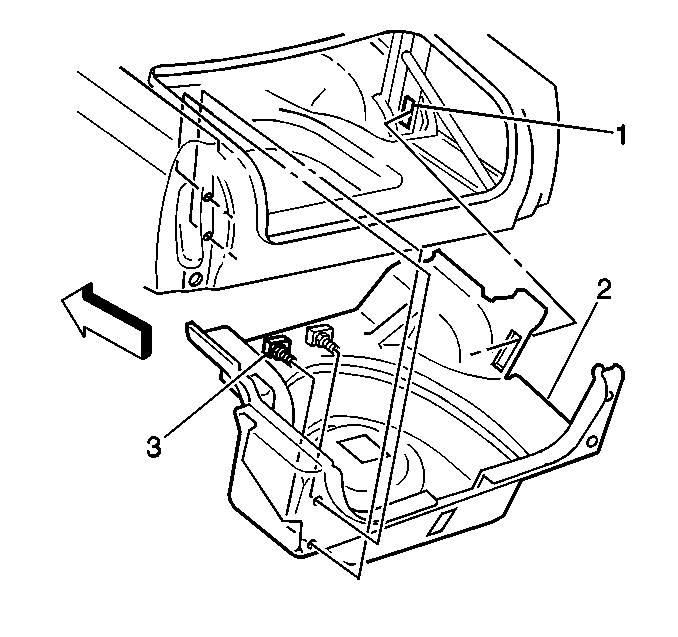
- Remove the fuse panel cover through the trim panel.
- Remove the fuel door manual release handle through the trim panel.
- Fold the left side inward.
- Lift the rear compartment trim panel (2) from the vehicle.

Installation Procedure
- Install the rear compartment trim panel (2) to the vehicle.
- Install the fuel door manual release handle through the trim panel.
- Install the fuse panel cover through the trim panel.
- Install the spare tire and the jack.
- Install the spare tire cover.
- Install the rear compartment right side trim panel. Refer to Rear Compartment Side Trim Replacement - Right Side .
- Install the rear compartment sill plate. Refer to Rear Compartment Sill Trim Plate Replacement .
- Install the rear compartment front side trim panel. Refer to Rear Compartment Front Trim Panel Replacement .

