For 1990-2009 cars only
Rocker Panel Molding Replacement DeVille
Removal Procedure
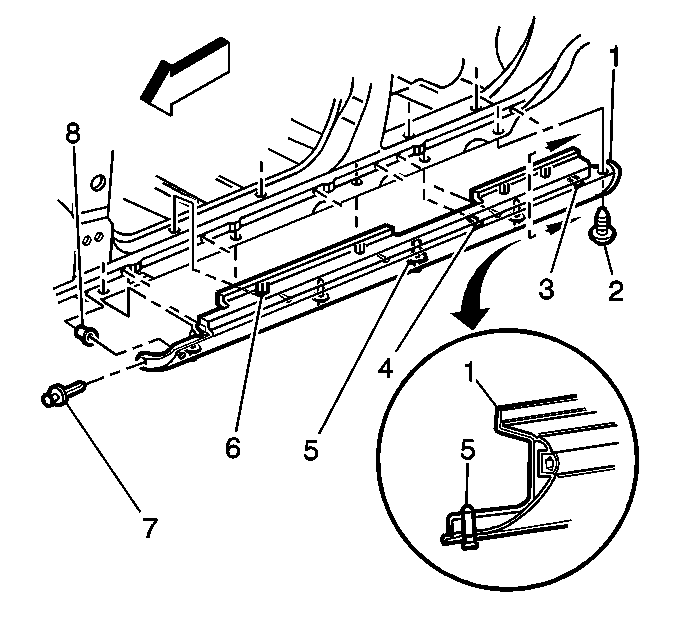
- Remove the push-in fastener (5) from the front wheelhouse area.
- Remove the 4 push-in fasteners at the lower edge of the rocker panel molding (1).
- Remove 1 self-tapping screw (2).
- Pull upward on the top edge of the rocker panel molding (1) in order to separate the molding (1) from the door sill.
- Pull outward on the molding in order to release the 5 push-in fasteners (3).
- Remove the molding (1) from the body.
- Remove the damaged fasteners from the body and the rocker panel molding (1).


Installation Procedure
- Install new fasteners (3) as required.
- Use the locator pin (4) in order to position the molding to the body.
- Press the top edge of the molding (1) onto the door sill.
- Press the molding in order to engage the fasteners.
- Install the fasteners along the lower edge of the molding.
- Install the screw (2).
- Install the push-in fastener (5) to the front wheelhouse area.


Rocker Panel Molding Replacement Eldorado
Removal Procedure
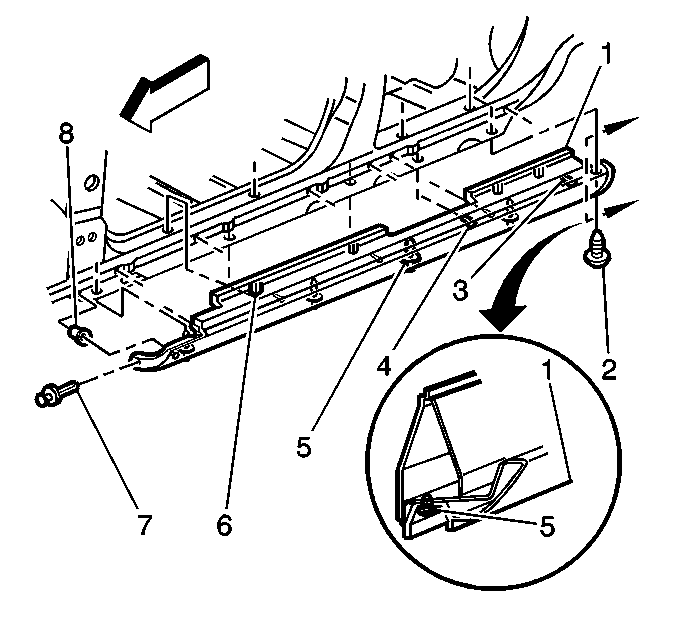
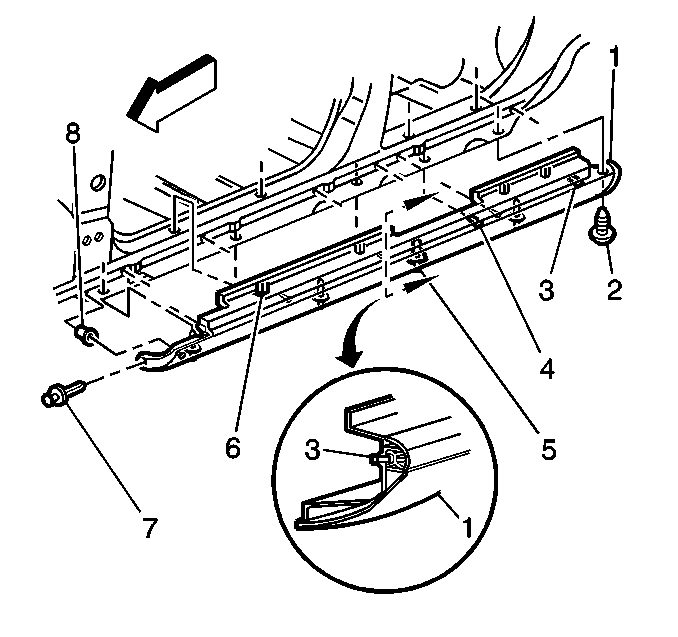
- Remove the screws (2) that retain the molding at the front and the rear wheel openings.
- Remove the 4 fasteners that retain the lower edge of the molding (3).
- Pull upward on the top edge of the molding in order to release the 3 clips.
- Pull the forward edge of the molding outward in order to release the retainer pin (1).
- Pull the rear edge of the molding outward in order to release the 2 retainers pins.
- Remove the rocker panel molding (3).
- Remove the damaged retainers from the body and the molding (3).

Installation Procedure
- Install new retainers (1) if needed.
- Install the rocker panel molding (3) to the body.
- Press the rear edge of the molding in order to seat the retainer pins.
- Press the forward edge of the molding in order to seat the retainer pin.
- Press the top edge of the molding (3) in order to sear the 3 clips.
- Install the 4 fasteners to the lower edge of the molding (3).
- Install the screws (2) in order to retain the molding at the front and the rear wheel openings.

