FASCIA OUTER BRIGHT MOLDINGS GAPPED (REPOSITION MOLDINGS)

SUBJECT: FASCIA OUTER MOULDINGS LOOSE OR GAPPED TO FASCIA AT RADIUS (REPOSITION OUTER MOULDINGS)
VEHICLES AFFECTED: 1992 "E" MODEL
Some 1992 Eldorados may experience a condition where the outer fascia bright mouldings are loose and/or gapped to the fascia at the inner corner radius. This condition may be caused by insufficient retention of the outer bright moulding. Revised mouldings with snap tabs added at the corners for improved retention are expected to be in production by January, 1992. Vehicles built after October have redesigned fascias to accept the new moulding with the additional snap tab.
To correct this condition use expandable foam to fill the cavity under the mouldings and bond the outer and centre mouldings together. You will need expandable foam, such as Kent Industries' two component Ure-Foam (P/N 10600) or equivalent, and a fairly stiff extension hose 7-10" long to fit on the end of the applicator/mixer.
NOTICE: If using an equivalent foam product, test the foam prior to performing these procedures to ensure no paint or other damage will result from use. Also ensure that the dried foam can be easily cleaned from the fascia and/or moulding surfaces if required.
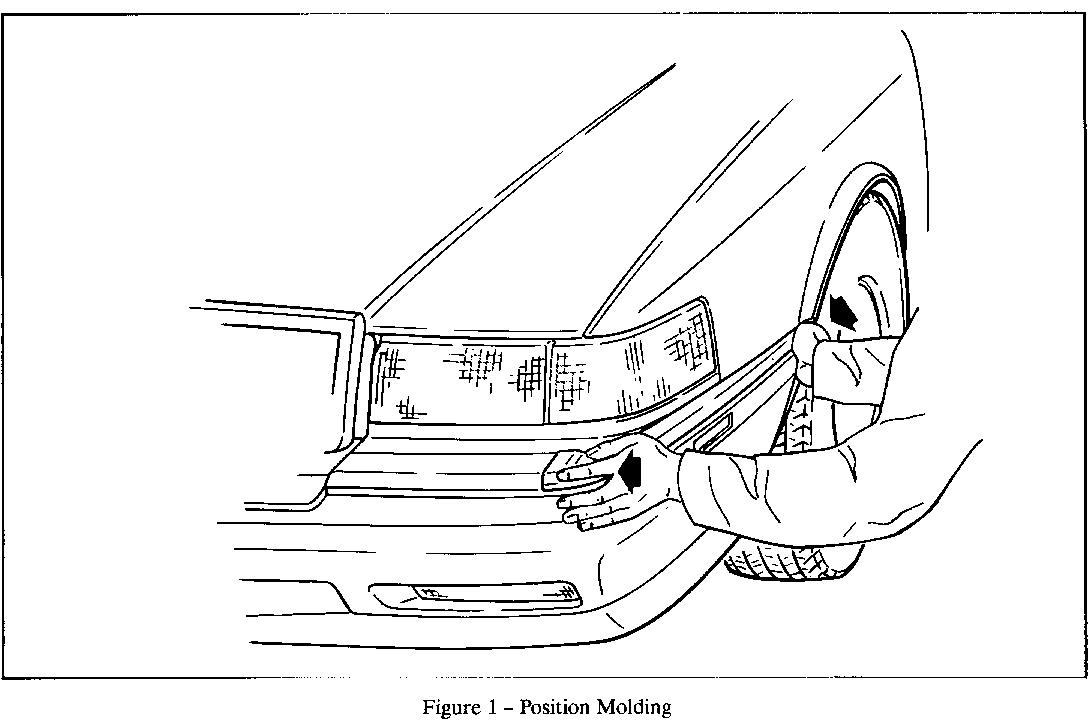
1. Properly position outer moulding. With one hand on end of outer moulding at wheel opening, carefully pull outer moulding toward centre moulding while pushing inward at moulding corner. Refer to Figure 1. Adjust as necessary to provide best fit to fascia.
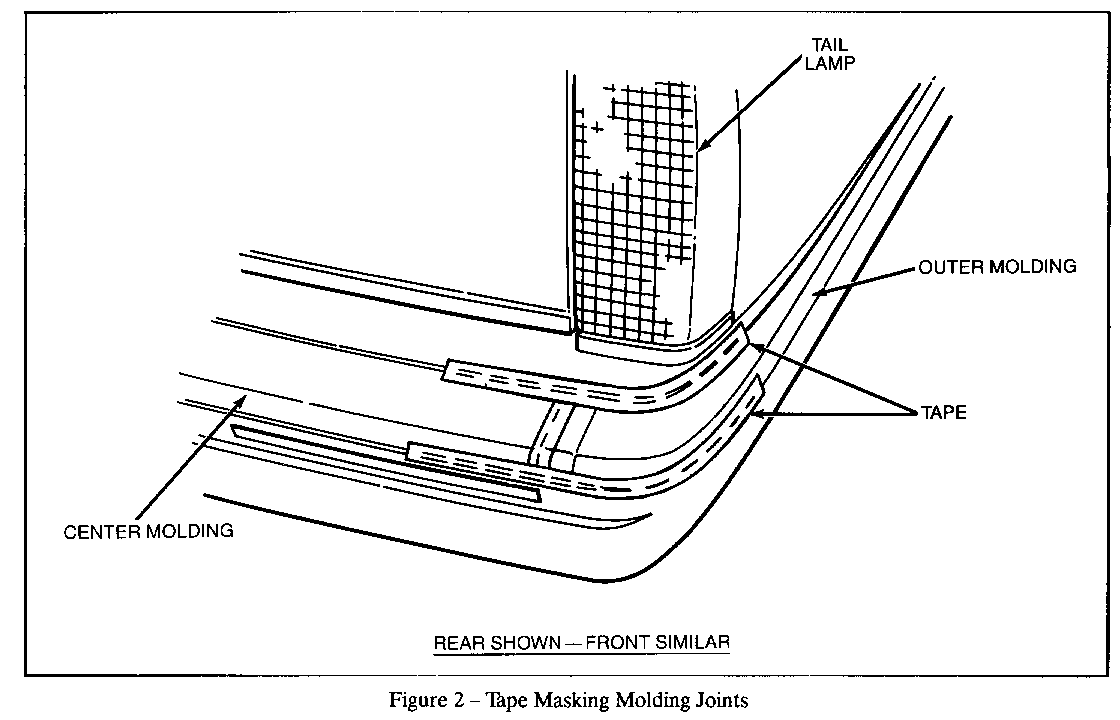
2. Tape joints to prevent foam from escaping between or around mouldings. First tape the joint between the outer and centre mouldings, then tape the front and back edges of each moulding to the fascia. Extend the taped area 6", to either side of where the mouldings join. Refer to Figure 2.
3. Hoist vehicle.
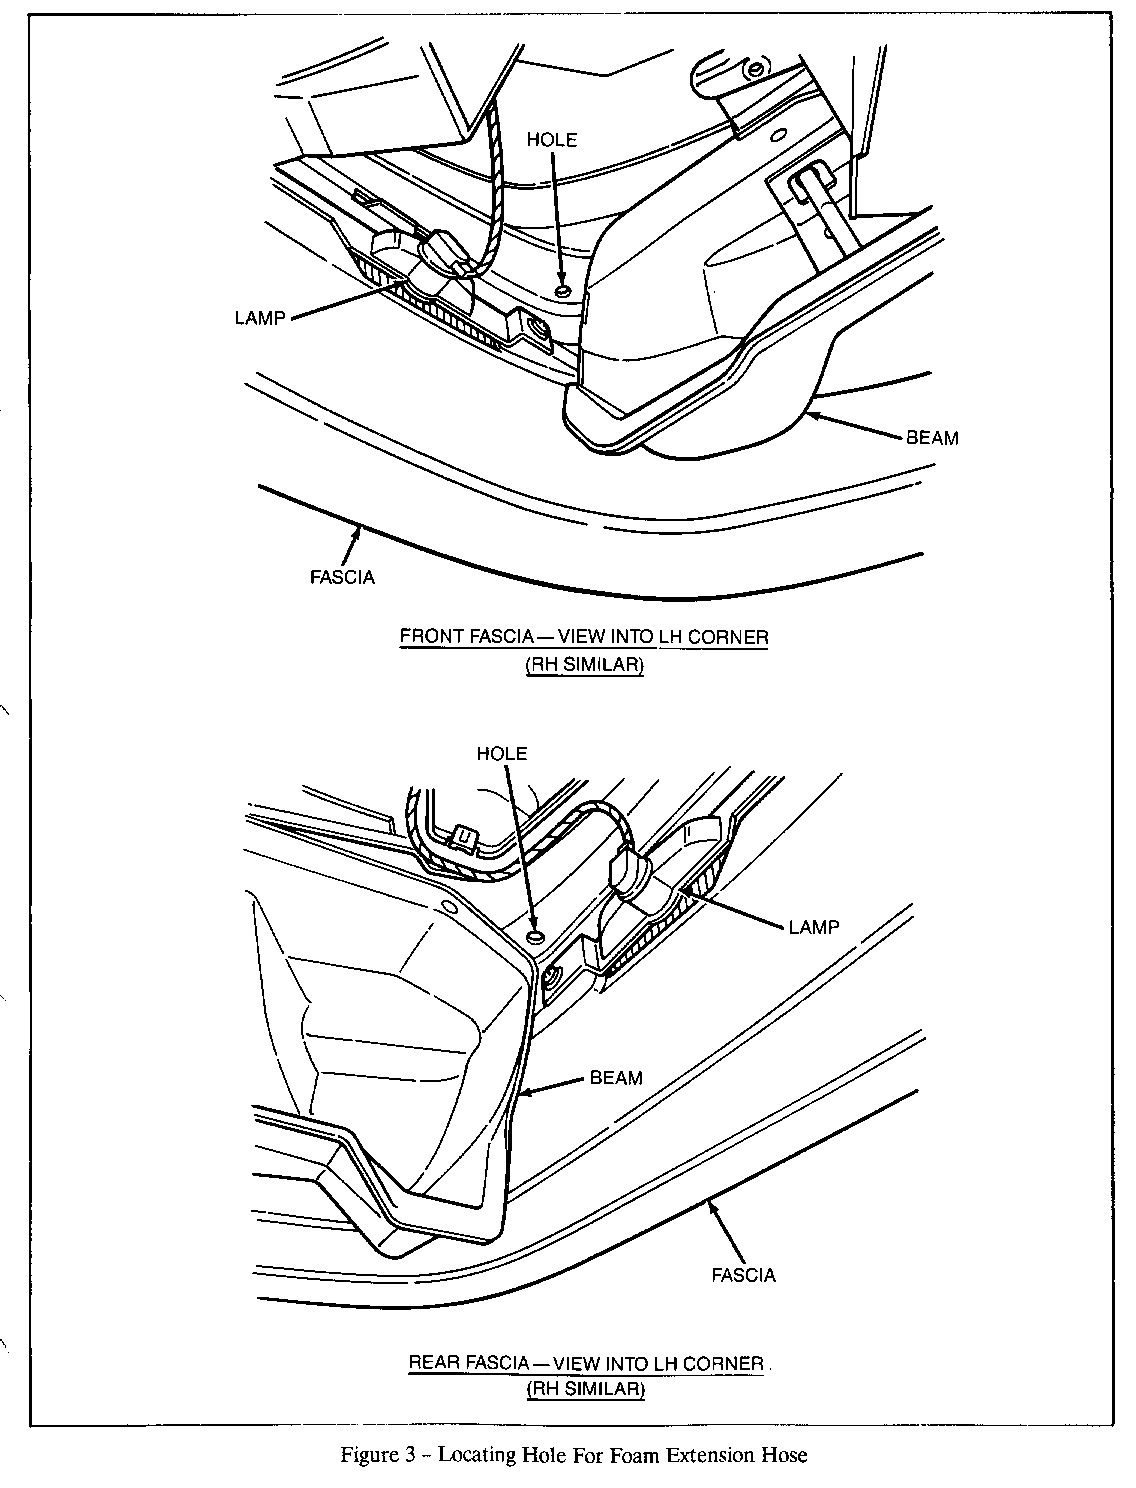
4. Carefully drill a small hole in the fascia underneath the outer moulding close to the bumper beam. Refer to Figure 3 for hole location on front and rear fascias. The hole diameter should be 1.5 to 2 times the diameter of the extension hose to allow proper hose positioning.
IMPORTANT: Drill all required holes at this time, front and rear, so that the foam may be applied with minimal waiting time between applications.
5. Prepare the expandable foam according to manufacturer's directions. Assemble the extension hose to the foam canister. The extension must be stiff enough to avoid kinking and allow proper positioning so the foam will be located correctly.
6. Squeeze a small amount of the foam onto a piece of cardboard or paper to get an idea of the foam expansion rate and the application time required to fill the cavity.
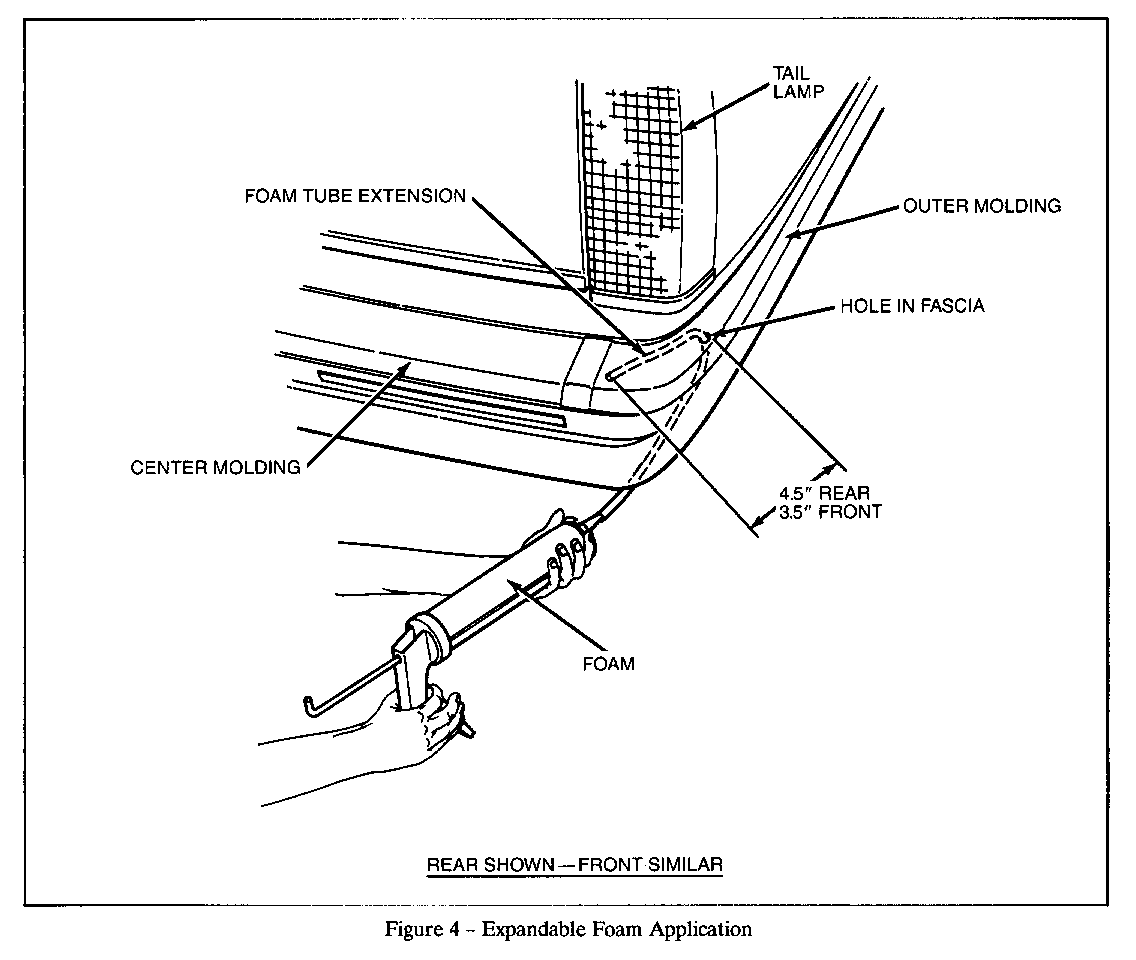
7. Feed the extension hose into the hole in the fascia, positioning the end at the moulding interface as shown in Figure 4. If repairing a rear fascia moulding, approximately 4.5" of the hose will be fed into the fascia (3.5" for a front moulding).
8. Apply foam to the cavity between the moulding and fascia. Allow sufficient application time to fill the cavity and expand to either side of the moulding joint. Continue to apply foam as the hose is slowly withdrawn from the fascia. Do not apply excessive foam or squeeze-out may occur where mouldings are not taped.
9. Continue to apply foam as extension hose is slowly removed from fascia.
10. Allow foam to cure according to manufacturer's directions.
11. Lower vehicle and remove tape from mouldings and fascia.
12. Clean up any excess foam according to manufacturer's recommendations.
WARRANTY INFORMATION VEHICLE SERIES Operation Description C I E K V ---------------------- -----------------
Fascia Outer Mouldings, Front-Rework .6 Fascia Outer Mouldings, Rear-Rework .6 Fascia Outer Mouldings, Front & Rear-Rework 1.0


General Motors bulletins are intended for use by professional technicians, not a "do-it-yourselfer". They are written to inform those technicians of conditions that may occur on some vehicles, or to provide information that could assist in the proper service of a vehicle. Properly trained technicians have the equipment, tools, safety instructions and know-how to do a job properly and safely. If a condition is described, do not assume that the bulletin applies to your vehicle, or that your vehicle will have that condition. See a General Motors dealer servicing your brand of General Motors vehicle for information on whether your vehicle may benefit from the information.
