Camshaft Cover Replacement Left
Removal Procedure
Tools Required
| • | J 38825 Water Pump Drive Pulley Remover |
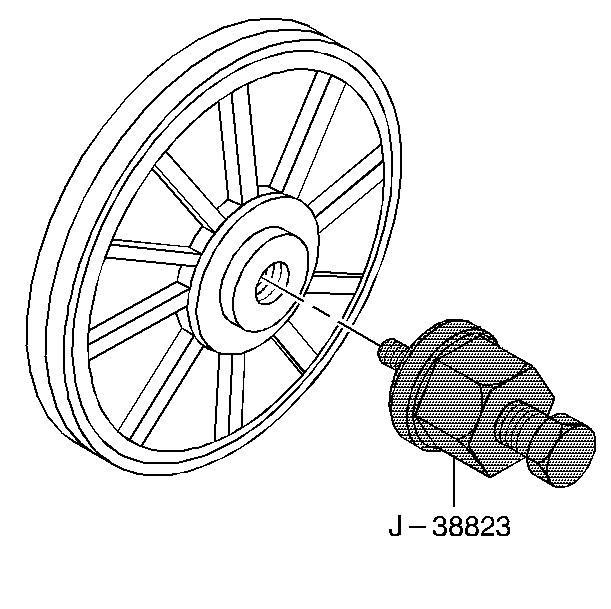
| • | J 38823 Water Pump Drive Pulley Installer |
- Disconnect the negative battery cable. Refer to
Caution: Unless directed otherwise, the ignition and start switch must be in the OFF or LOCK position, and all electrical loads must be OFF before servicing any electrical component. Disconnect the negative battery cable to prevent an electrical spark should a tool or equipment come in contact with an exposed electrical terminal. Failure to follow these precautions may result in personal injury and/or damage to the vehicle or its components.
in General Information. - Partially drain the coolant from the radiator. Refer to Draining and Filling the Engine Coolant in Engine Cooling.
- Disconnect the upper radiator hose at the water crossover. Refer to Radiator Hose Replacement in HVAC.
- Disconnect the spark plug wires.
- Remove the right side cooling fan. Refer to Fan Replacement in Engine Cooling.
- Disconnect the battery cable at the generator.
- Disconnect the cable harness clip at the cam cover. Place the cable out of the way.
- Disconnect the PCV fresh air tube from the cam cover.
- Remove the right and left torque struts.
- Disconnect the water pump drive belt.
- Remove the EGR tube.
- Remove the water pump pulley using J 38825 .
- Remove the camshaft seal retainer screws.
- Remove the camshaft seal.
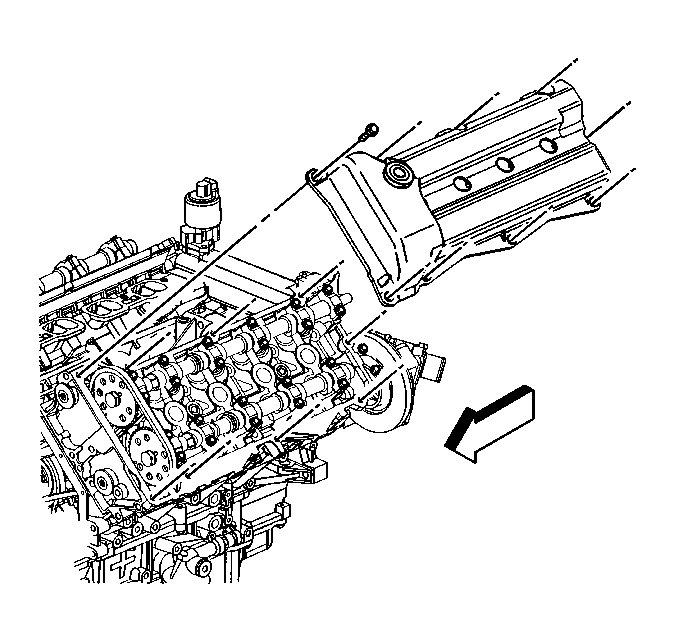
- Remove the cam cover screws.
- Remove the cam cover by moving the cam drive end of the cover up.
- Pivot the entire cover around the water pump drive shaft.
- Move the cover upward and pivoting such that the edge of the cover closely follows the left edge of the intake manifold cover.
- Discard the cover seal if there is any evidence of damage or if the seal comes out of the groove in the cover during removal. The spark plug seals may be reused if undamaged.


Installation Procedure
- Install the spark plug and cam cover seals as required.
- Insert the intake cam through the hole in the cam cover and using your fingers.
- Guide the cam cover up over the edge of the cylinder head.
- Work the cover into position by allowing the top edge of the cover to follow the left side edge of the intake manifold.
- Install the cam cover screws.
- Connect the battery cable clip to the front edge of the cam cover.
- Connect the battery cable at the generator
- Lubricate the seal lips.
- Install the camshaft seal to the end of the intake cam.
- Seal the screw threads with sealer GM P/N 1052080.
- Install the water pump pulley using J 38823 .
- Install the water pump drive belt. Refer to Drive Belt Replacement .
- Install the right and left torque struts. Refer to Engine Mount Strut Replacement .
- Connect the PCV fresh air tube.
- Install the RH fan. Refer to Fan Replacement in Engine Cooling.
- Connect the spark plug wires.
- Connect the upper radiator hose.
- Fill the engine coolant. Refer to Draining and Filling Engine Coolant in Engine Cooling.
- Connect the negative battery cable.


Important: Be careful to prevent the exposed section of the cam cover seal from being damaged by the edge of the cylinder head casting.

Tighten
Tighten the screws to 10 N·m (89 lb in).
Notice: Use the correct fastener in the correct location. Replacement fasteners must be the correct part number for that application. Fasteners requiring replacement or fasteners requiring the use of thread locking compound or sealant are identified in the service procedure. Do not use paints, lubricants, or corrosion inhibitors on fasteners or fastener joint surfaces unless specified. These coatings affect fastener torque and joint clamping force and may damage the fastener. Use the correct tightening sequence and specifications when installing fasteners in order to avoid damage to parts and systems.
Tighten
Tighten the screws to 1.1 N·m (10 lb in).


Important: Route the spark plug wires exactly as shown. If you do not route the wires as shown, a misfire or surge condition could occur.
Camshaft Cover Replacement Right
Removal Procedure
- Disconnect the negative battery cable. Refer to
Caution: Unless directed otherwise, the ignition and start switch must be in the OFF or LOCK position, and all electrical loads must be OFF before servicing any electrical component. Disconnect the negative battery cable to prevent an electrical spark should a tool or equipment come in contact with an exposed electrical terminal. Failure to follow these precautions may result in personal injury and/or damage to the vehicle or its components.
in General Information. - Raise the vehicle.
- Disconnect the exhaust manifold rear pipe at the converter. Position the converter out of the way.
- Lower the vehicle.
- Remove the tower-to-tower brace.
- Disconnect the four DIS wiring connectors and four mounting bolts.
- Remove the DIS and right bank spark plug wires.
- Disconnect the PCV Valve.
- Remove the purge canister solenoid from the rear of the cover one screw.
- Remove the three screws securing the wiring harness to the cover.
- Remove the cam cover screws.
- Support the front of the engine cradle.
- Remove the two mounting screws at the front of the cradle.
- Remove the right and left torque nuts.
- Lower the engine cradle for (or raise the vehicle) to provide clearance at the rear of the engine compartment.
- Remove the cam cover.
- Discard the cover seal if it is damaged or if it was pulled from the groove in the cover during removal. Reuse the spark plug seals if undamaged.


Installation Procedure
- Install the spark plug and cam cover seals as required.
- Install the cam cover.
- Install the cover screws.
- Raise the engine cradle into position and install two mounting bolts.
- Install the right and left torque struts. Adjust to provide zero preload as described in this section. Refer to Engine Mount Strut Replacement .
- Secure the wiring harness to the cam cover with three screws.
- Secure the purge canister solenoid with one screw.
- Connect the PCV valve.
- Install the spark plug wires and secure the DIS to the cam cover with four screws.
- Connect the DIS electrical connectors.
- Install the tower-to-tower brace.
- Raise the vehicle.
- Connect the Exhaust Manifold Rear Pipe to the catalytic converter with two bolts.
- Connect the negative battery cable.

Tighten
Tighten the screws to 10 N·m (89 lb in).
Notice: Use the correct fastener in the correct location. Replacement fasteners must be the correct part number for that application. Fasteners requiring replacement or fasteners requiring the use of thread locking compound or sealant are identified in the service procedure. Do not use paints, lubricants, or corrosion inhibitors on fasteners or fastener joint surfaces unless specified. These coatings affect fastener torque and joint clamping force and may damage the fastener. Use the correct tightening sequence and specifications when installing fasteners in order to avoid damage to parts and systems.
Tighten
Tighten the bolts to 100 N·m (74 lb ft).

Tighten
Tighten the bolts to 25 N·m (18 lb ft).
