For 1990-2009 cars only
Removal Procedure
- Remove the headliner. Refer to Headlining Trim Panel Replacement in Interior Trim.
- Remove the rear quarter trim panels. Refer to Rear Quarter Upper Trim Panel Replacement in Interior Trim.
- Cut the tie straps from the drain hoses.
- Remove the tape from the drain hose.
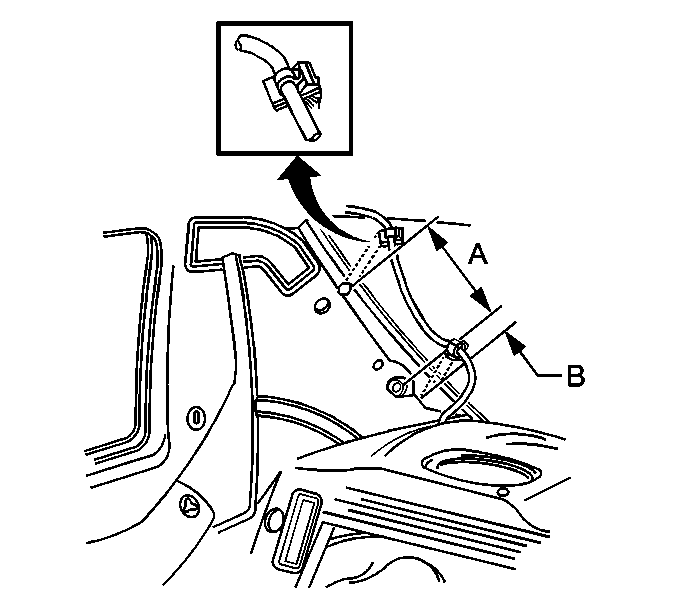
- Remove the rear upper drain hose from the retaining clips.
- Remove the rear compartment trim panel. Refer to Rear Compartment Front Trim Panel Replacement in Body Rear End.
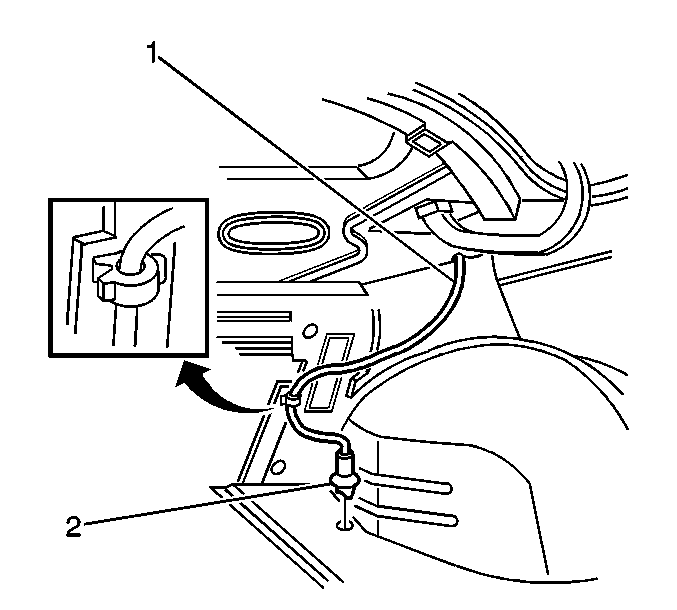
- Remove the rear lower drain hose from the retaining clips.
- Remove the rear drain hose (2) from the floorpan.


Installation Procedure
- Secure the rear drain hose (2) into the floorpan.
- Clip the rear lower drain hose (1) into the retention clip.
- Install the drain hose through the rear shelf panel to the "C" pillar.
- Install the rear compartment trim panel. Refer to Rear Compartment Front Trim Panel Replacement in Body Rear End.
- Clip the rear upper drain hoses into position.
- Ensure the lower retention clip is 0.078 mm (2 in) (B) below and rearward of the trim slot.
- Ensure the upper retention clip is 2.36 cm (6 in) (A) above the lower retention clip.
- Apply new adhesive tape in 2 places, in order to secure the drain hose.
- Install and secure the new tie straps.
- Install the headliner. Refer to Headlining Trim Panel Replacement in Interior Trim.
- Install the rear quarter trim panels. Refer to Rear Quarter Upper Trim Panel Replacement in Interior Trim.


Important: When installing the drain hose tie straps, position the tie straps in order to maintain clearance between the tie straps and the headliner.
