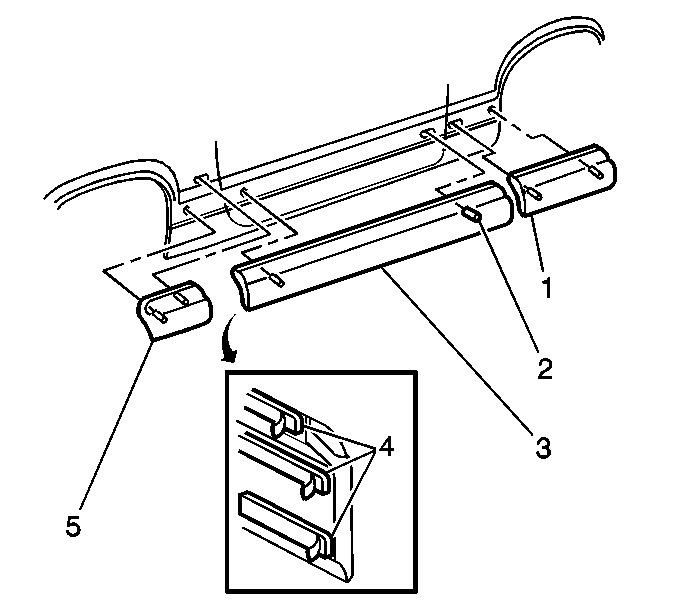
Tools Required
J 25070 Heat Gun
This procedure is for moldings that have not been damaged. Do not use this procedure if the molding is dented or was improperly pried from the body panel.
Adhesive body side moldings attach with a combination of clips and adhesive tape. Loosen the adhesive prior to disengagement of the molding from the clips. If removed carefully, you may reuse the body side moldings.
- Thoroughly wash the repair area with Liquid Wash and Wax GM P/N 1052870 or an equivalent.
- Remove all traces of the adhesive from the body panel and the back of the molding.
- Mark the proper position of the molding with a length of masking tape.
- Warm the body panel, using the J 25070 , to a minimum of 21°C (70°F).
- Apply a piece if gray double-coated foam tape 3M P/N 06380 or an equivalent to the molding.
- Close the door prior to installing the molding.
- Align the molding to the tape guideline on the body panel.
- Care must be taken to prevent the adhesive tape from coming in contact with the body before the pins are aligned.
- Align the 2 pins (2) on the molding with the 2 guide holes in the door.
- Secure the molding to the body.
- Apply hand pressure for 30 seconds to the entire length of the molding in order to secure the molding to the body.
- Remove the masking tape guideline.
- Clean tape residue from the body if present.

Wipe the area dry with a clean lint-free cloth.
Use varnish makers and painters (VM&P) naphtha or isopropyl alcohol.
Use the adjacent moldings (1,5) as a guide.
Important: Peel the backing (4) from the molding just prior to installation. Be careful not to touch the adhesive with your hands or allow to come in contact with dirt or foreign material.
