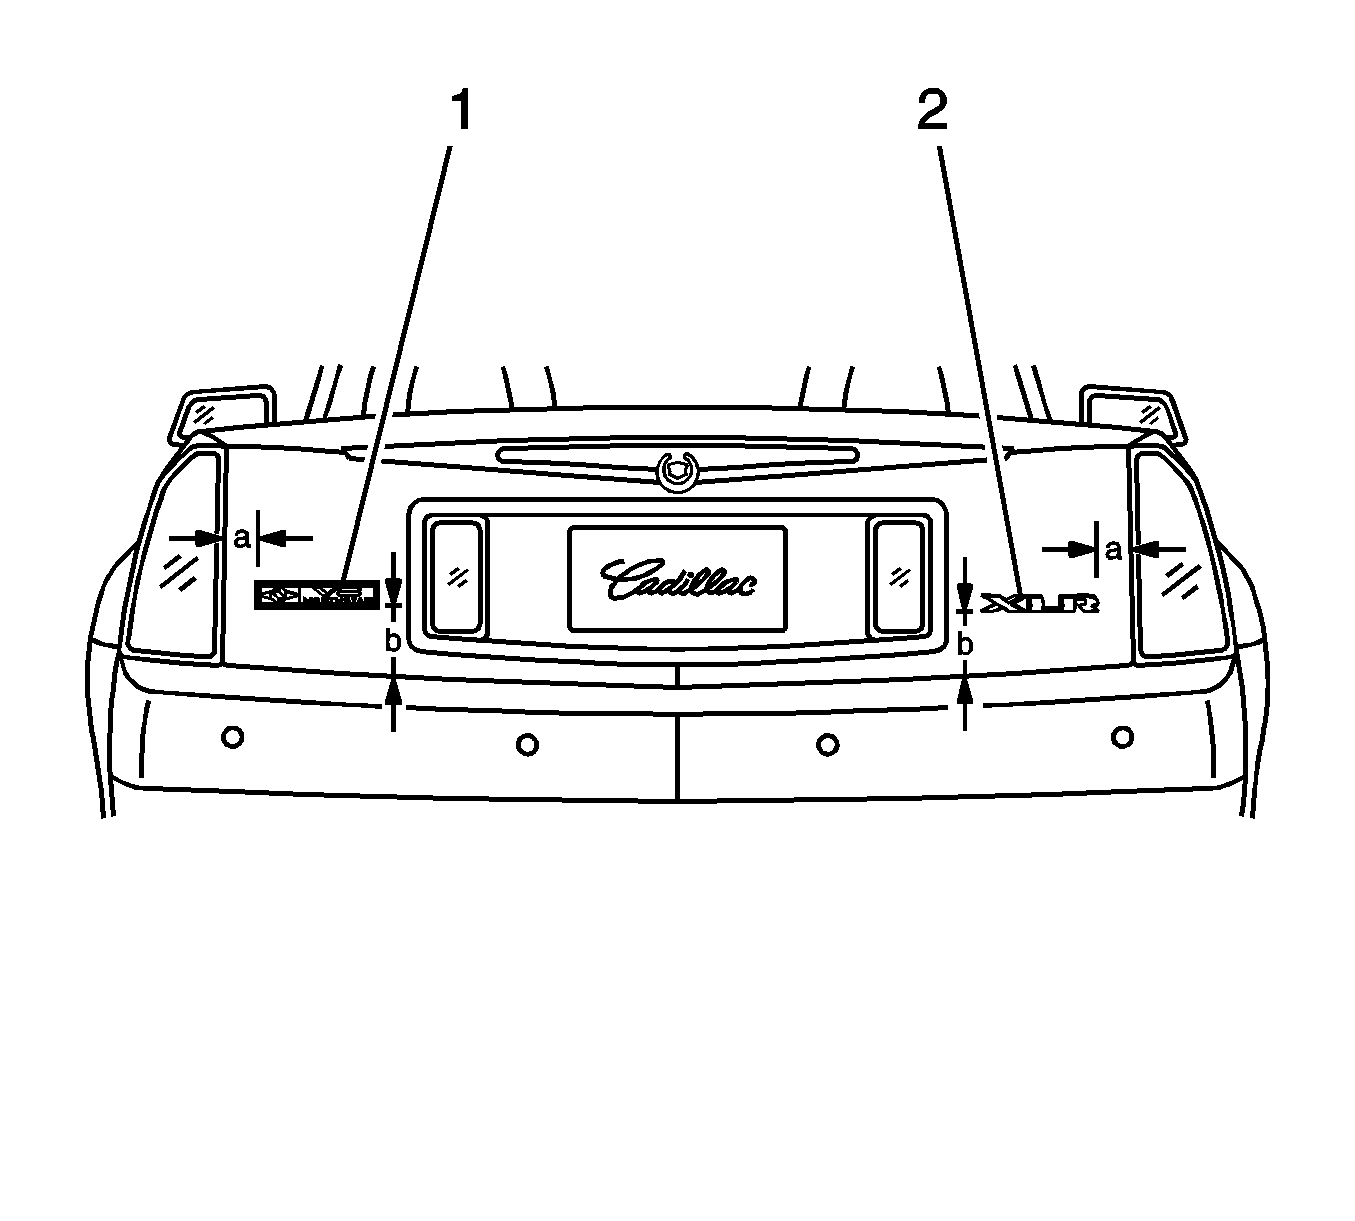
Rear Compartment Lid Emblem/Nameplate Replacement V8
Tools Required
J 25070
Heat Gun
Removal Procedure

- When replacing an emblem/nameplate, do the following:
| 1.1. | Use tape to protect the mounting surface during removal. |
| 1.2. | Use tape for alignment marks for installation of the emblem/nameplate. |
- To remove an emblem/nameplate, heat the emblem/nameplate using a
J 25070
.
- Apply the heat using a circular motion for about 30 seconds holding the
J 25070
approximately 152 mm (6 in) from the surface.
Notice: Use a plastic, flat-bladed tool to prevent paint damage when removing
an emblem/name plate.
- Use a plastic, flat-bladed tool to remove the emblem/nameplate from the panel surface.
Installation Procedure
- Ensure that the temperature of the emblem/nameplate is approximately 29-32°C (85-90°F).
Important: Do not touch the adhesive backing on the emblem/nameplate.
- Remove the protective liner from the back of the emblem/nameplate.
- Heat the mounting surface to approximately 27-41°C (80-105°F) using the
J 25070
, if necessary.

- Position the V8 Northstar emblem (1) on the driver side:
| • | To the left side of the rear compartment lid |
| • | (a) 67 mm (2.6 in) from the left edge of the rear compartment lid |
| • | (b) 86 mm (3.4 in) from the bottom edge of the rear compartment lid |
- Position the XLR emblem (2) on the passenger side:
| • | To the right side of the rear compartment lid |
| • | (a) 60 mm (2.4 in) from the right edge of the rear compartment lid |
| • | (b) 86 mm (3.4 in) from the bottom edge of the rear compartment lid |
- Apply equal pressure along the emblem/nameplate to uniformly bond the item to the mounting surface.
- Remove the protective tape from the mounting surface.


