For 1990-2009 cars only
Removal Procedure
- Remove the radiator. Refer to Radiator Replacement in Engine Cooling.
- Remove the A/C condenser. Refer to Condenser Replacement in HVAC Systems with A/C - Automatic.
- Remove the lower intake manifold. Refer to Intake Manifold Replacement .
- Remove the valve lifter pushrod guide. Refer to Valve Lifter Replacement .
- Remove the engine front cover and the crankshaft position reluctor ring. Refer to Engine Front Cover Replacement .
- Remove the timing chain and sprockets. Refer to Timing Chain and Sprocket Replacement .
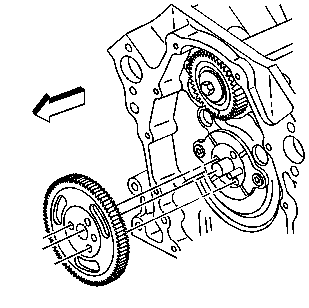
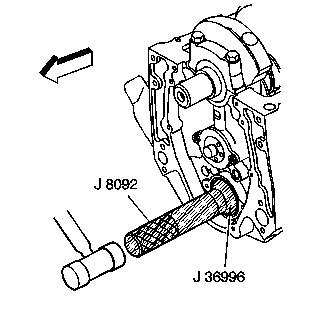
- Remove the balance shaft. Refer to Balance Shaft Removal .
- Clean all sealing surfaces. Refer to Balance Shaft Clean and Inspect .


Installation Procedure
- Install the balance shaft. Refer to Balance Shaft Installation .
- Install the timing chain and the camshaft sprocket. Refer to Timing Chain and Sprocket Replacement .
- Install the crankshaft position reluctor ring and the front cover. Refer to Crankshaft Position Sensor Reluctor Ring Replacement .
- Install the valve lifter pushrod guide. Refer to Valve Lifter Replacement .
- Install the lower intake manifold. Refer to Intake Manifold Replacement .
- Install the A/C condenser. Refer to Condenser Replacement in HVAC Systems with A/C - Automatic.
- Install the radiator. Refer to Radiator Replacement in Engine Cooling.


Important: When the timing marks on the camshaft and the crankshaft sprocket are aligned, the engine is at top dead center for cylinder number four. In order to install the distributor align the crankshaft balancer marks with the front cover marks for top dead center cylinder number one.
