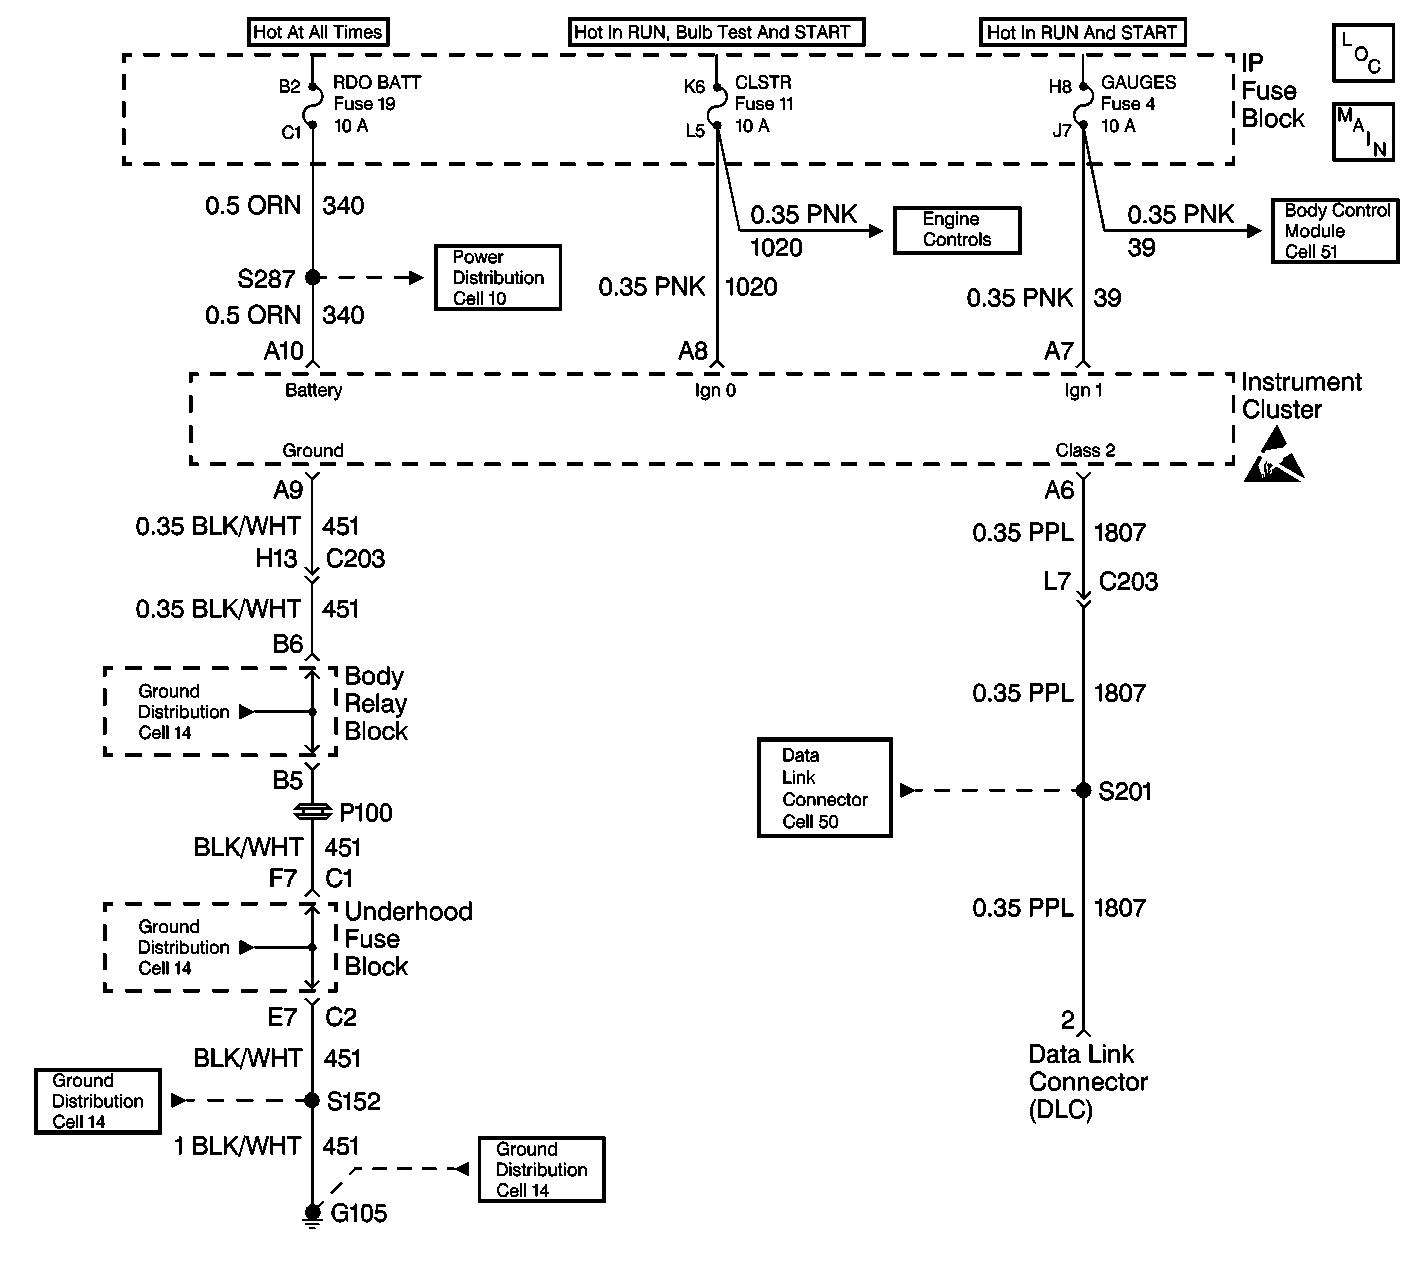
Circuit Description
The IPC monitors the Class 2 messages and compares them to the inputs from the various sensors and gauges. The cluster also monitors the ignition switch position based on the ignition signal inputs. The cluster has a built in microprocessor. The microprocessor performs a self-test on power up.
Conditions for Clearing the MIL/DTC
| • | A history diagnostic trouble code (DTC) will clear after 100 consecutive ignition cycles without a fault present. |
| • | Use a scan tool in order to clear the history and current DTC(s). |
Diagnostic Aids
| • | Verify that the following fuses are OK: |
| - | RDO BATT |
| - | CLSTR |
| - | ILLUM |
| - | GAUGES |
| • | The IPC performs a self-check on power up. Turn the ignition switch to the RUN position and observe the conditions listed in the Cluster Power-up Function Check Table. |
| • | A scan tool reads Class 2 messages with the ignition switch in the RUN position. |
| • | Use a scan tool in order to test for DTCs. |
Test Description
The number(s) below refer to the step number(s) on the diagnostic table.
-
This step inspects the IPC circuits for power and ground.
-
This step inspects the integrity of the Class 2 bus and all of the associated modules.
-
This is the IPC self test.
-
This step checks the operation of the PRNDL.
Step | Action | Value(s) | Yes | No | ||||||||||||||||||||||||
|---|---|---|---|---|---|---|---|---|---|---|---|---|---|---|---|---|---|---|---|---|---|---|---|---|---|---|---|---|
1 | Did you perform the IPC System Check? | -- | Go to Step 2 | |||||||||||||||||||||||||
2 | Inspect all IPC power and ground feeds. Refer to Instrument Cluster Inoperative . Is the diagnostic test complete? | -- | Go to Step 3 | -- | ||||||||||||||||||||||||
3 |
Are any of the modules on the Class 2 serial data link not communicating? | -- | Go to Step 4 | Go to Data Link Communications System Check in Data Link Communications | ||||||||||||||||||||||||
4 |
Important: Do not start the engine or move the automatic transmission shifter from the PARK position.
Are the power-up indications correct? | -- | Go to Step 5 | Go to Applicable Diagnostic Table | ||||||||||||||||||||||||
5 |
Does the indicator correspond to the shift lever positions? | -- | Go to Step 6 | Go to Automatic Transmission System Check in Automatic Transmission | ||||||||||||||||||||||||
6 | Inspect for DTCs with the scan tool. Are any DTCs present? | -- | Go to Applicable Diagnostic Table |
