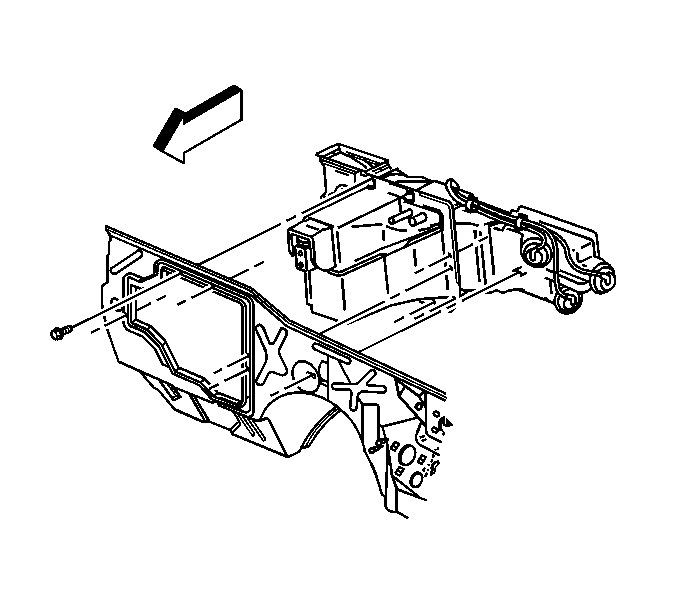
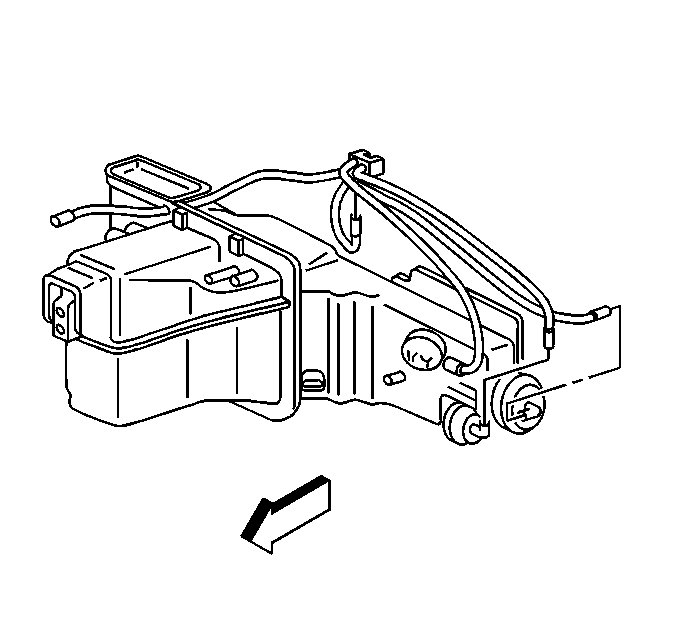
Removal Procedure
- Drain the cooling system. Refer to Cooling System Draining and Filling in Engine Cooling.
- Recover the refrigerant. Refer to Refrigerant Recovery and Recharging .
- Remove the evaporator tube from the evaporator.
- Raise and support the vehicle. Refer to Lifting and Jacking the Vehicle in General Information.
- Remove the HVAC module assembly bolts that are located on the passenger side of the vehicle.
- Lower the vehicle.
- Disconnect the heater hoses from the heater core.
- Remove the accumulator bolt (2) from the HVAC module assembly.
- Remove the instrument panel carrier. Refer to Instrument Panel Carrier Replacement in Instrument Panel, Gages and Console.
- Remove the floor air outlet. Refer to Floor Air Outlet Replacement .
- Disconnect the wiring harness from the HVAC module assembly.
- Disconnect the electrical connections from the following locations:
- Remove the interior HVAC module assembly retaining bolts
- Remove the PCM and bracket. Reposition the PCM.
- Disconnect vacuum harness from the HVAC module assembly.
- Remove the temperature cable from the HVAC module assembly.
- Remove the remaining HVAC module assembly retaining bolts from under the hood.
- Remove the cross vehicle support bar.
- Remove the kick panels.
- Pull back the carpet.
- Remove the interior HVAC module assembly bolts.
- Remove the HVAC module assembly from the vehicle.
Remove the condenser tube from the evaporator.

| • | The blower motor |
| • | The blower resistor |


Important: DO NOT tilt the HVAC module assembly or coolant may leak out.
Installation Procedure
- Install the HVAC module assembly to the vehicle.
- Install the interior HVAC module assembly retaining bolts.
- Install hinge pillar trim. Refer to Body Hinge Pillar Trim Panel Replacement in Interior Trim.
- Install cross vehicle support bar.
- Install the HVAC module assembly retaining bolts under the hood.
- Install the temperature control cable to the HVAC module assembly.
- Install the PCM and the PCM bracket.
- Connect the electrical connections to the following locations:
- Connect the wiring harness to the HVAC module assembly.
- Install the floor air outlet. Refer to Floor Air Outlet Replacement .
- Install the IP carrier. Refer to Instrument Panel Carrier Replacement Refer to in Instrument Panel, Gages and Console.
- Raise and support the vehicle. Refer to Lifting and Jacking the Vehicle in General Information.
- Install the accumulator bolt (2) to the HVAC module assembly.
- Lower the vehicle.
- Install the remaining HVAC module assembly bolts.
- Connect the heater hoses to the heater core.
- Connect the evaporator tube to the evaporator.
- Evacuate and charge the A/C system. Refer to Refrigerant Recovery and Recharging .
- Fill the cooling system. Refer to Cooling System Draining and Filling in Engine Cooling.

Notice: Use the correct fastener in the correct location. Replacement fasteners must be the correct part number for that application. Fasteners requiring replacement or fasteners requiring the use of thread locking compound or sealant are identified in the service procedure. Do not use paints, lubricants, or corrosion inhibitors on fasteners or fastener joint surfaces unless specified. These coatings affect fastener torque and joint clamping force and may damage the fastener. Use the correct tightening sequence and specifications when installing fasteners in order to avoid damage to parts and systems.
Tighten
Tighten the bolts to 2 N·m (18 lb in).

Tighten
Tighten the bolts to 2 N·m (18 lb in).
Connect the vacuum harness to the HVAC module assembly.

Notice: Use the correct fastener in the correct location. Replacement fasteners must be the correct part number for that application. Fasteners requiring replacement or fasteners requiring the use of thread locking compound or sealant are identified in the service procedure. Do not use paints, lubricants, or corrosion inhibitors on fasteners or fastener joint surfaces unless specified. These coatings affect fastener torque and joint clamping force and may damage the fastener. Use the correct tightening sequence and specifications when installing fasteners in order to avoid damage to parts and systems.
Tighten
Tighten the bolts to 1.8 N·m (16 lb in).
| • | The blower motor |
| • | The blower resistors |

Tighten
Tighten the bolt to 8 N·m (71 lb in).
Tighten
Tighten the HVAC module assembly bolts to 2 N·m (18 lb in).
Tighten
Tighten the fittings to 24 N·m (18 lb ft).
