For 1990-2009 cars only
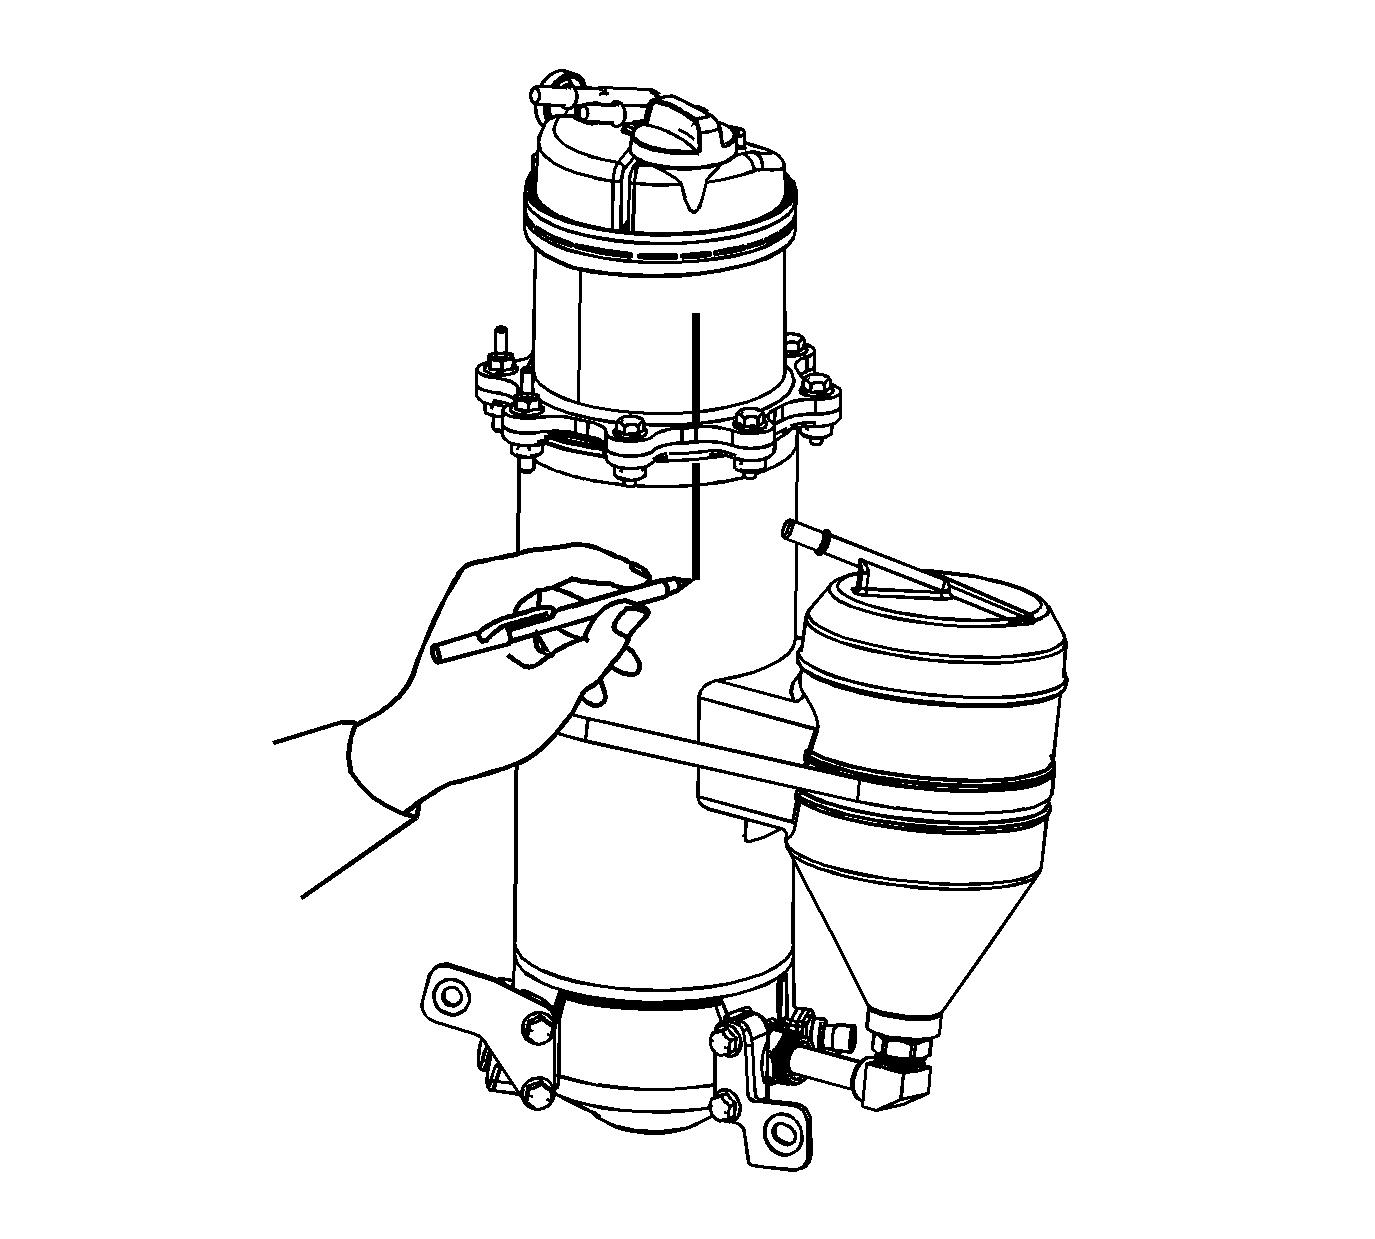
- Prior to disassembly, mark the upper and lower portions of the large tank for proper reassembly. Mark the tank on the area below the oil fill cap.
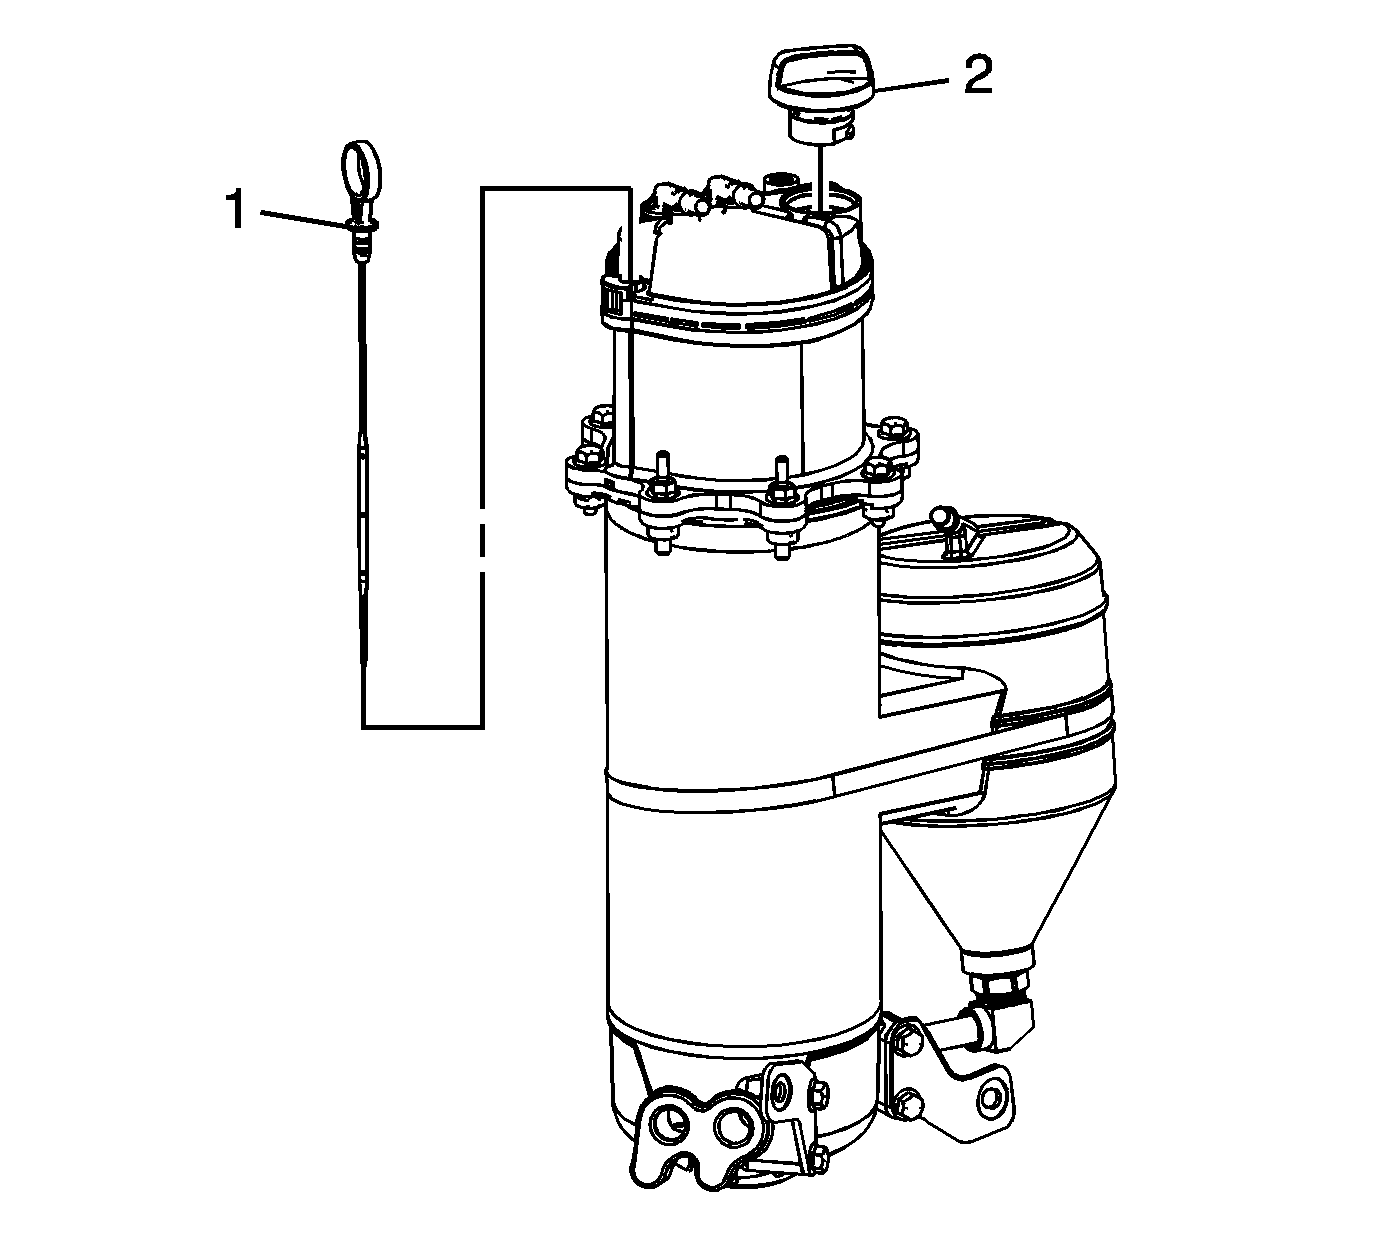
- Remove the oil level indicator (1) and oil fill cap (2).
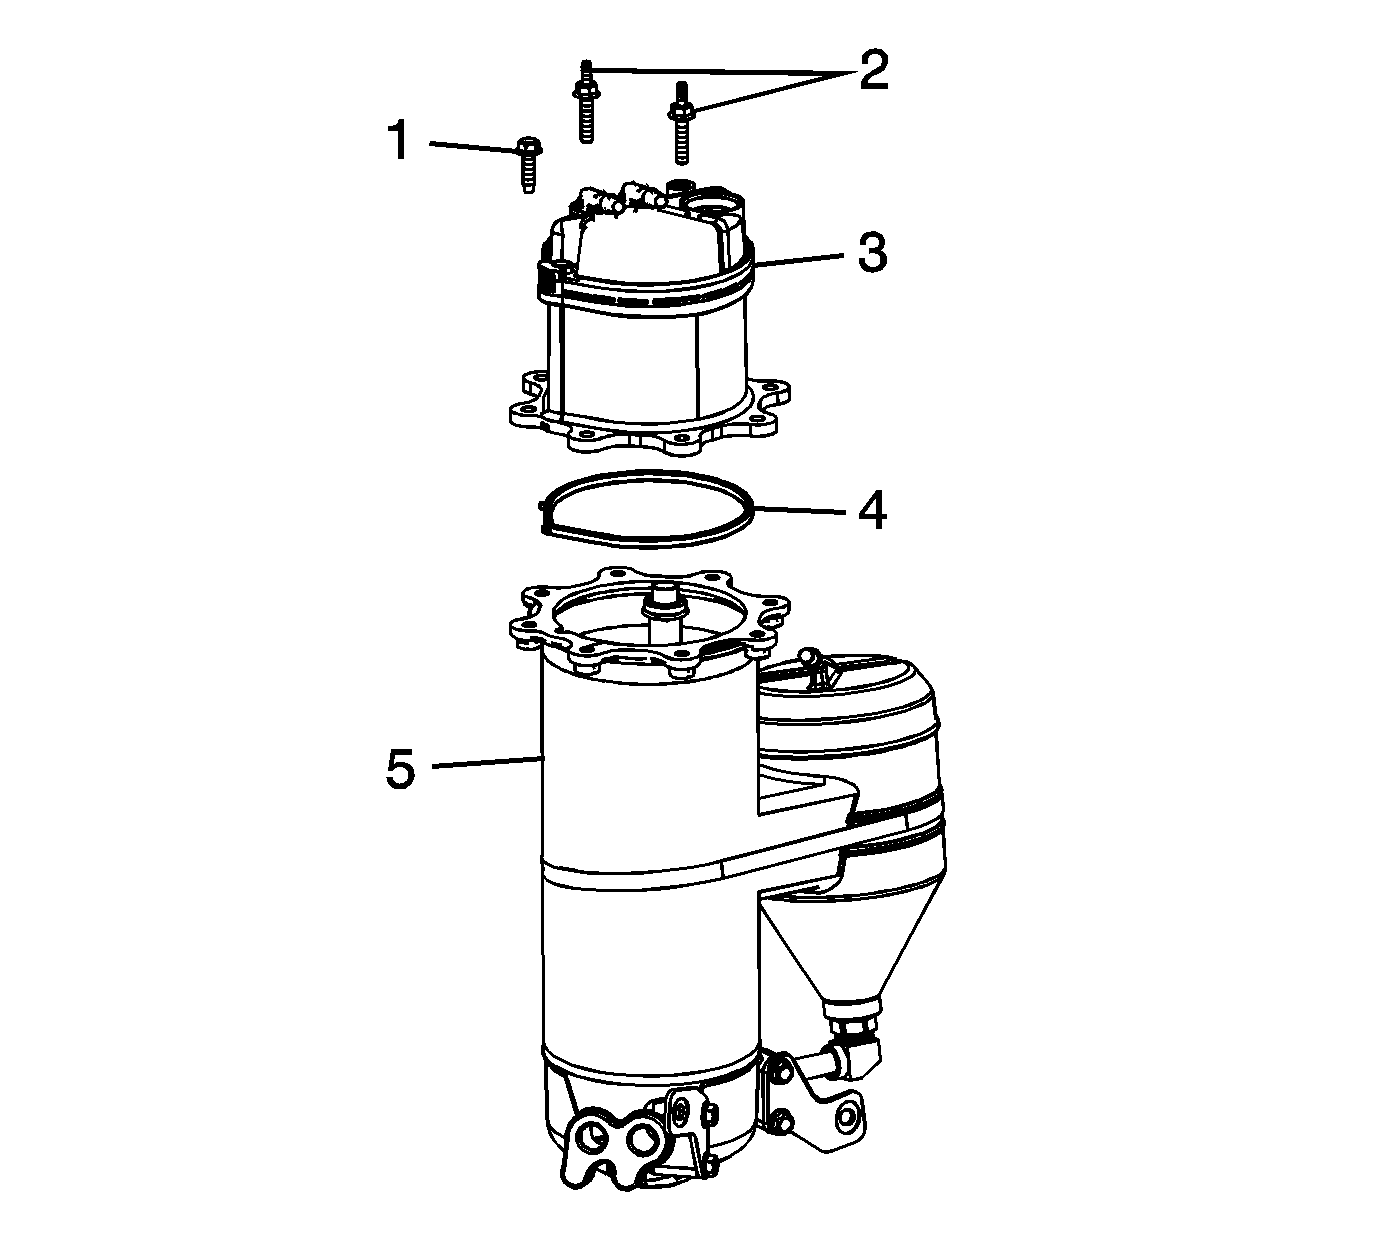
- Remove the bolts (1) and bolt/studs (2) from the large tank. Note the locations of the bolt/studs for reassembly.
- Separate the upper (3) and lower (5) portions of the large tank.
- Remove the O-ring seal (4).
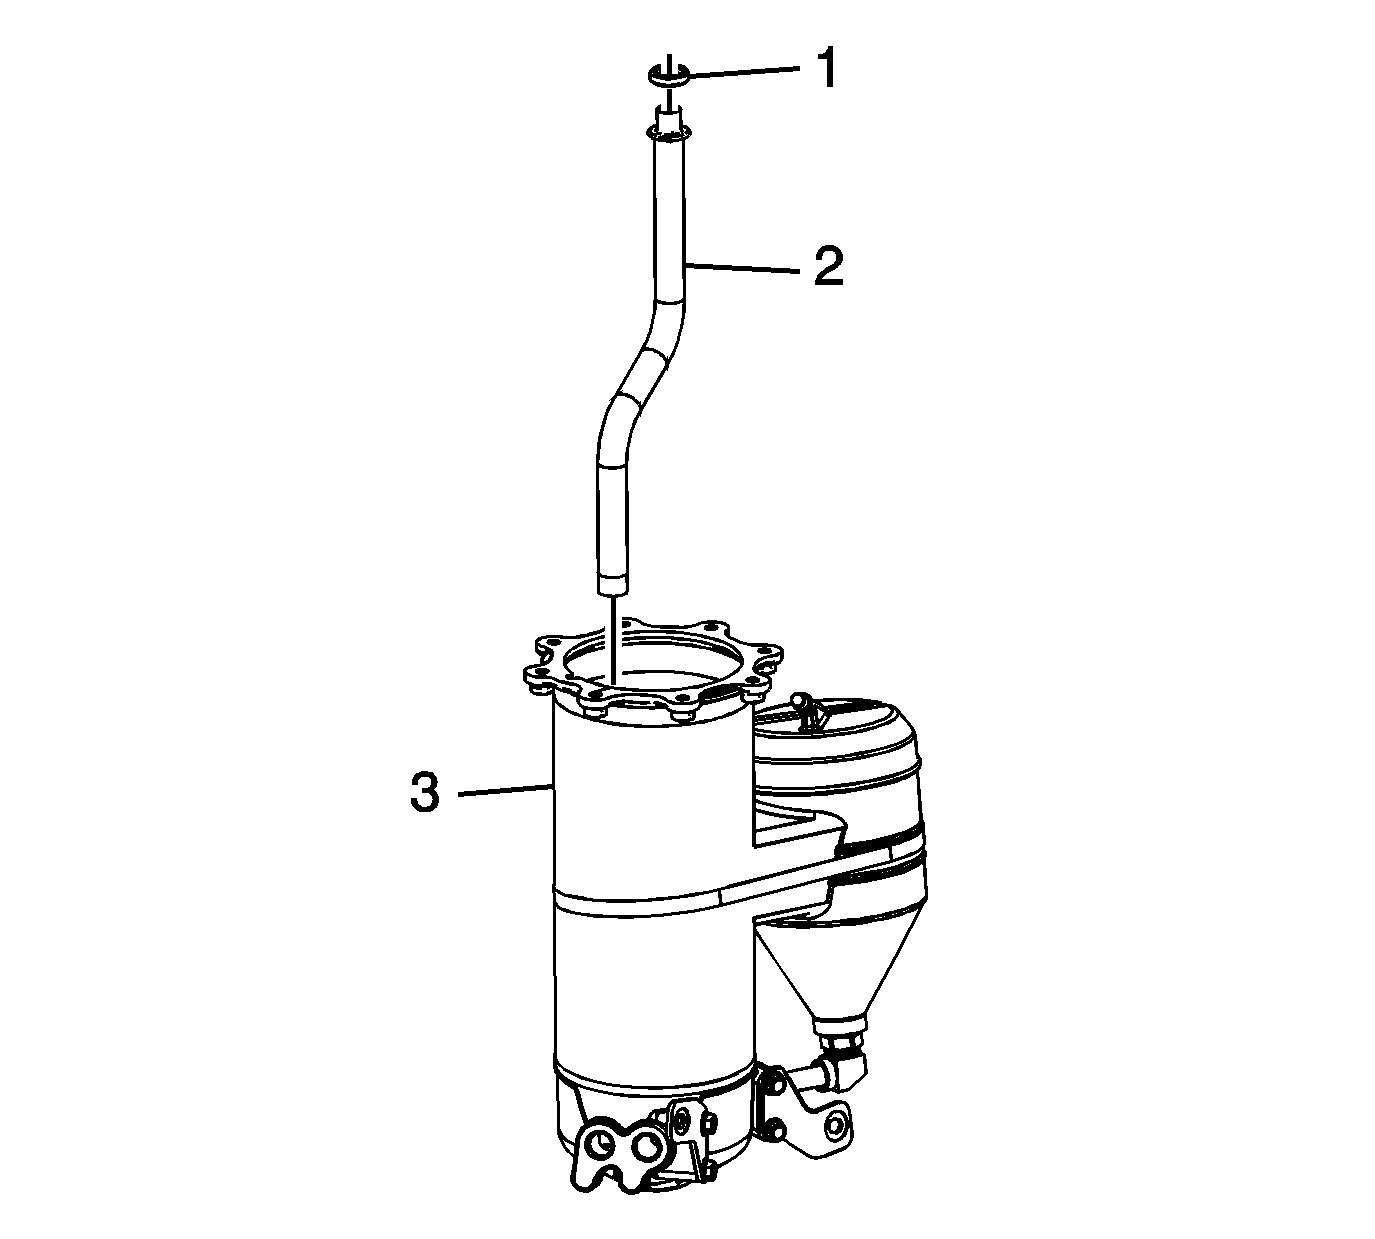
- Remove the tube (2) from the large tank (3).
- Remove the O-ring (1) from the tube.
- Remove the screen (1) from the tank (2). Reaching inside and into the bottom of the tank, pull the screen into the tank in order to remove.
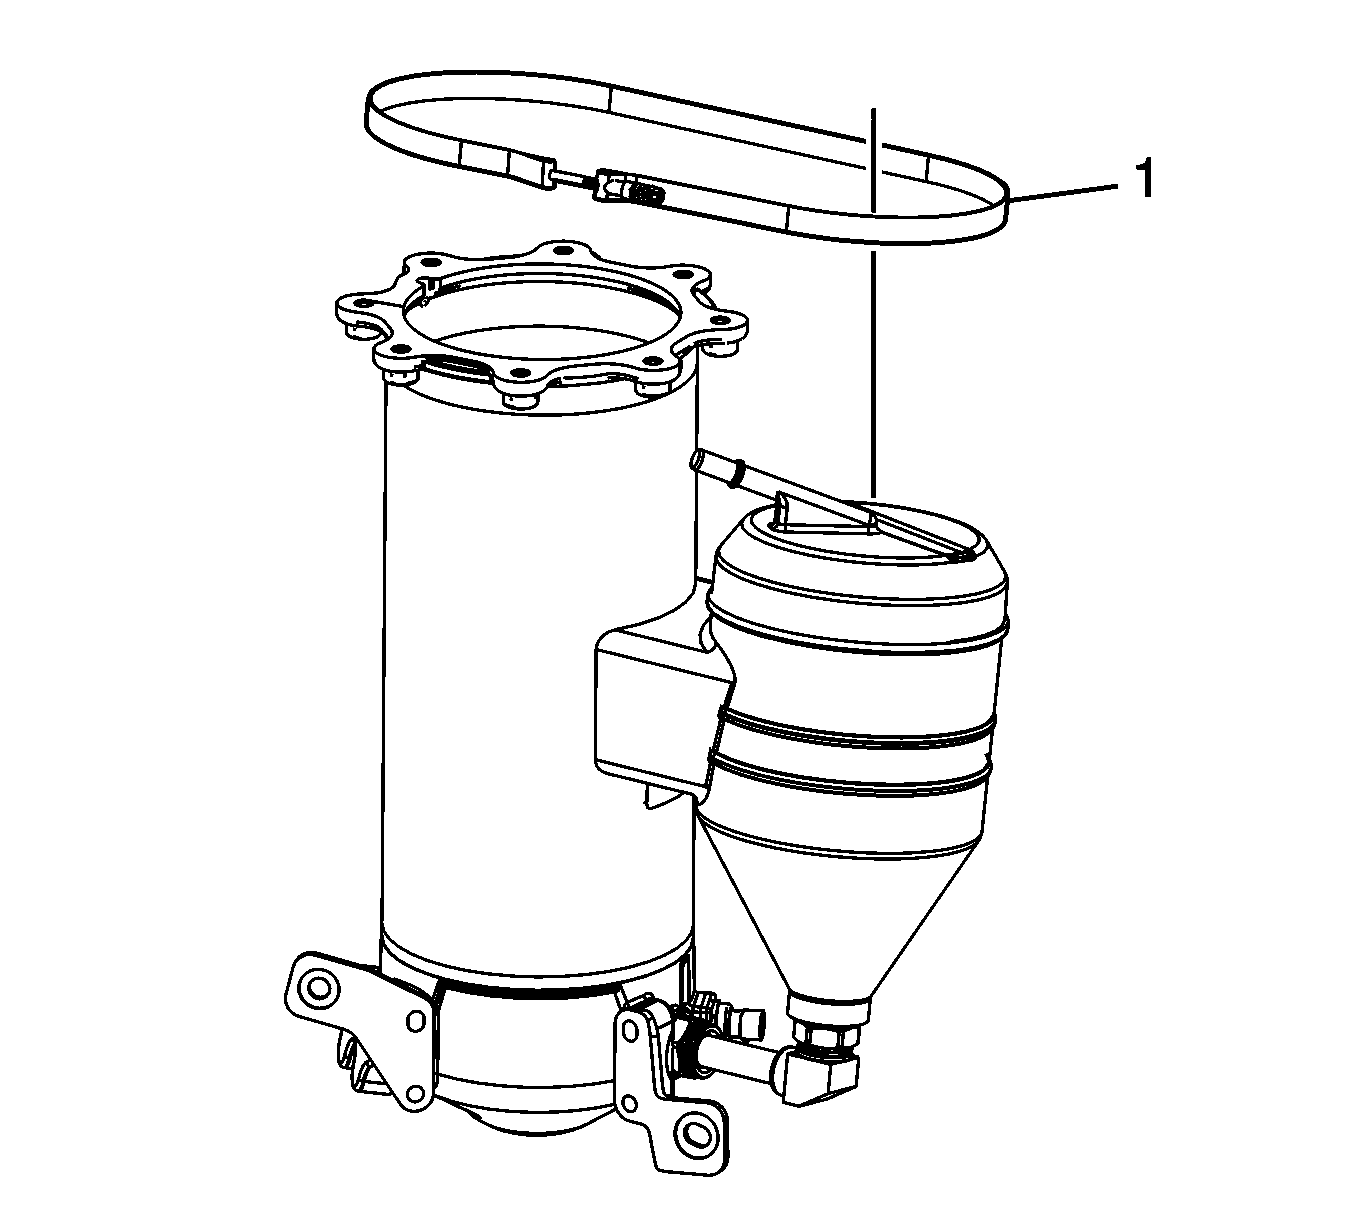
- Loosen and remove the clamp (1) in order to separate the large tank from the small oil tank.
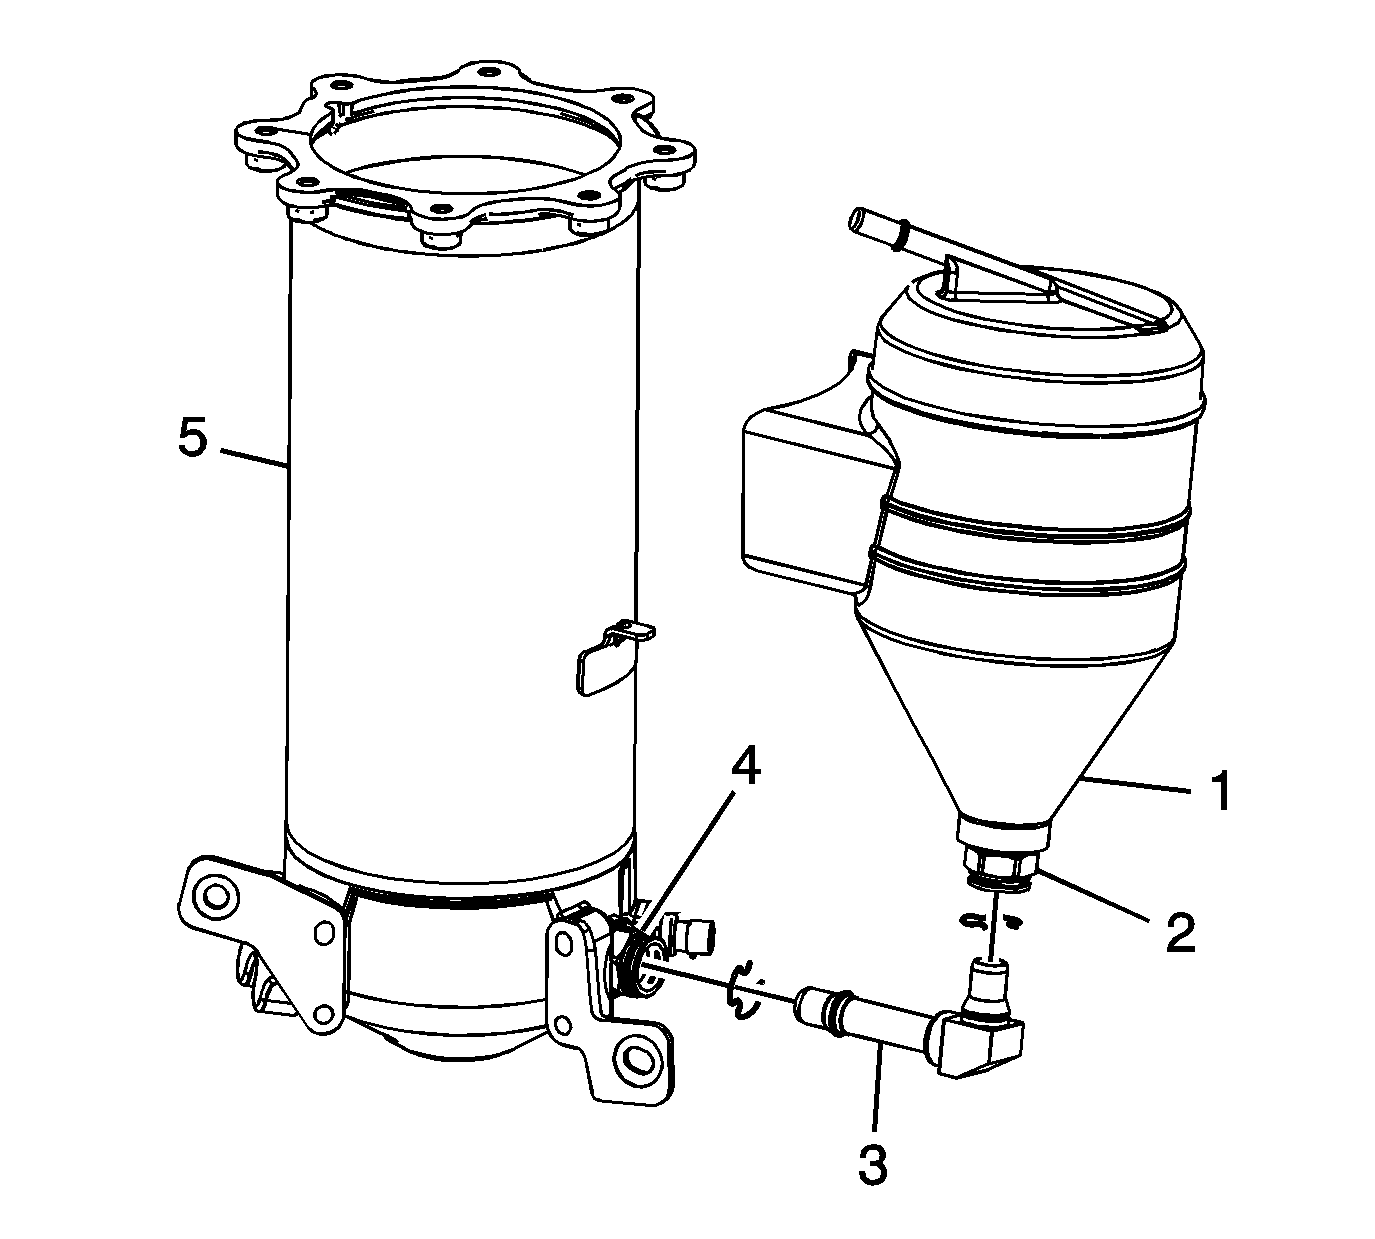
- Remove the retaining clips from the transfer tube fittings (2 and 4).
- Remove the transfer tube (3) and separate the large tank (5) from the small tank (1).
- Remove the fittings (2 and 4) from the tanks as required.
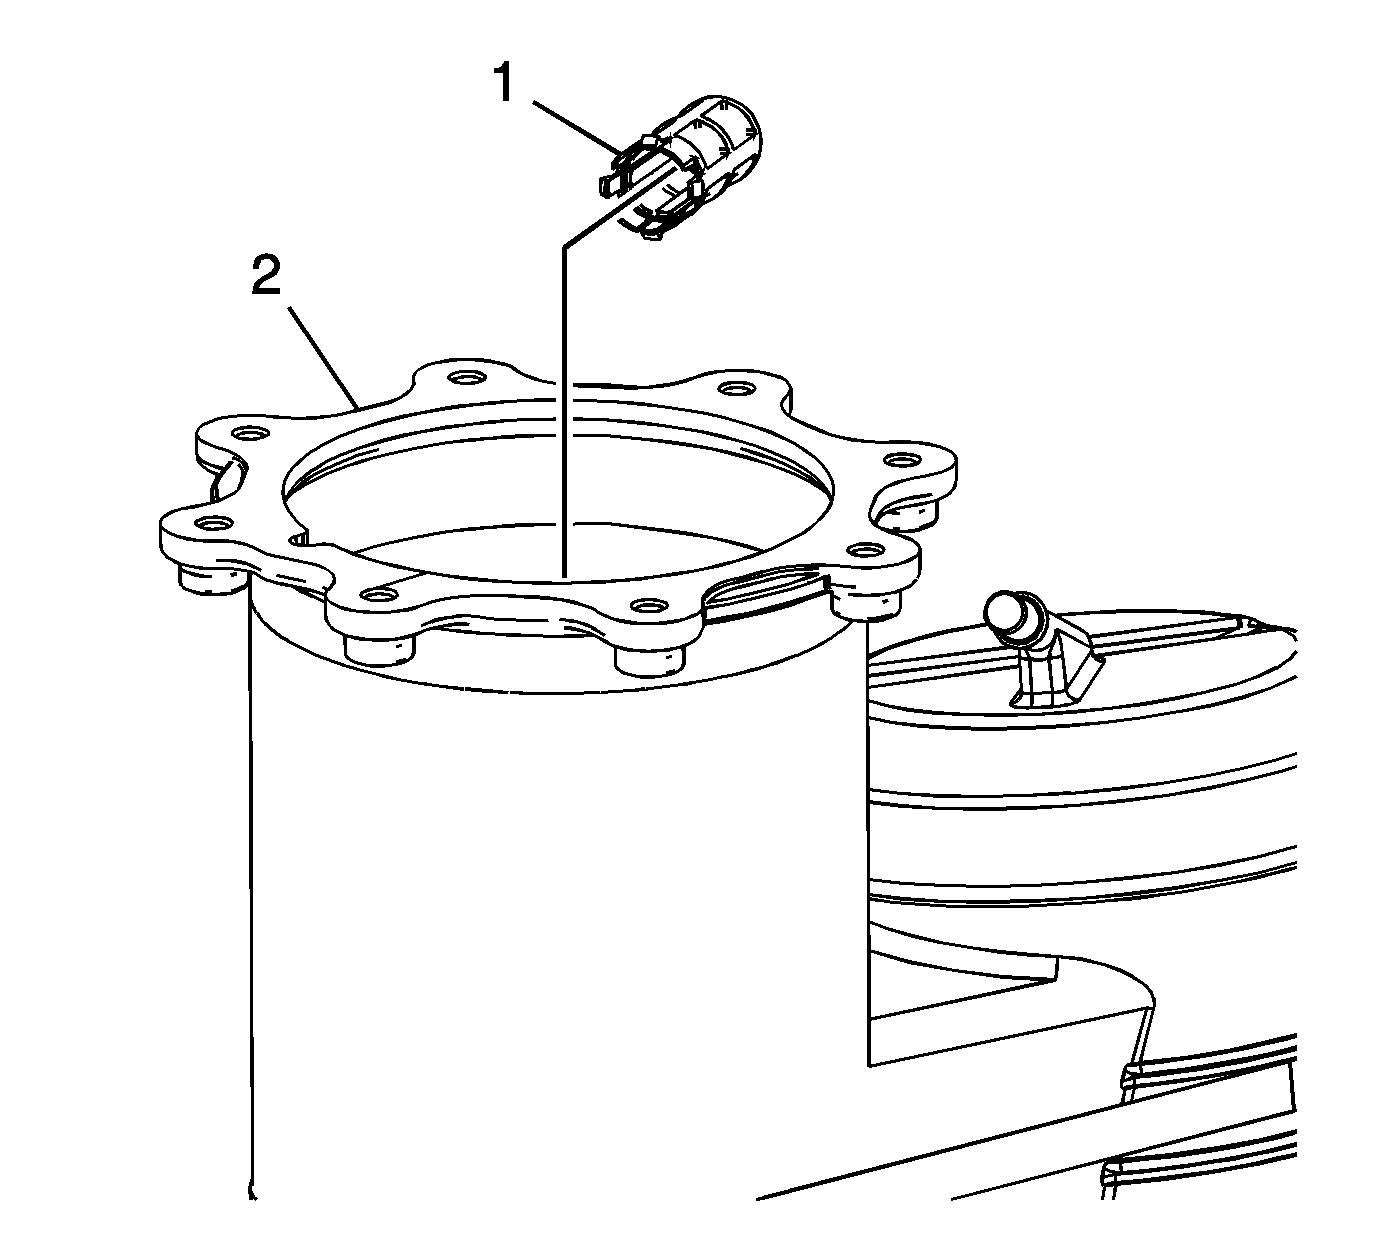
The screen locking tabs may break upon removal from the oil tank. If the screen cannot be properly cleaned or has a broken locking tab, replace with a new screen.
