Removal Procedure
- Remove all the related panels and the components, including the suspension crossmember.
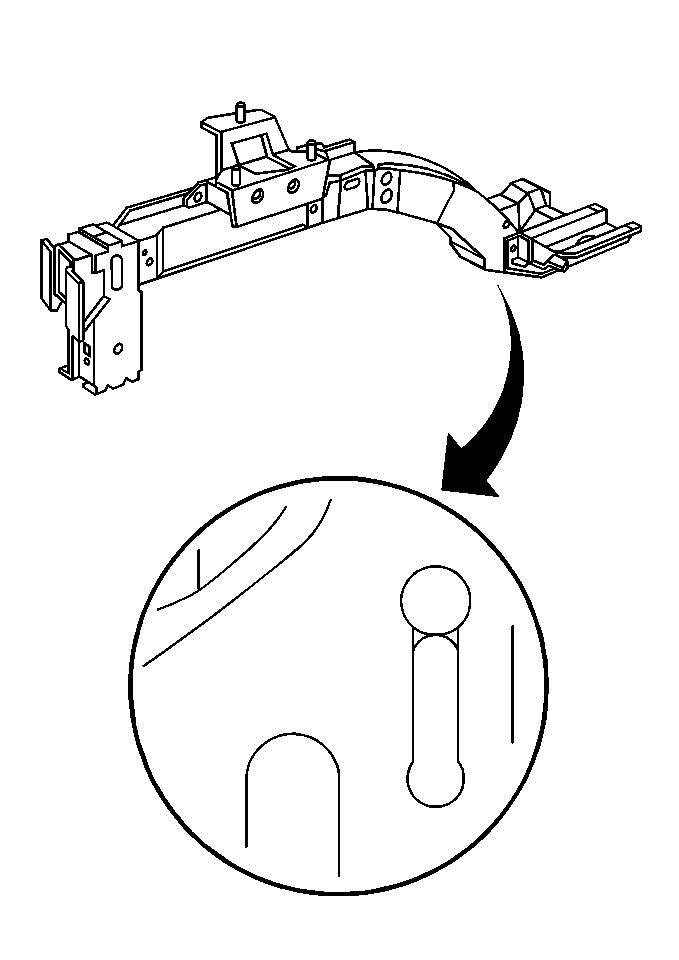
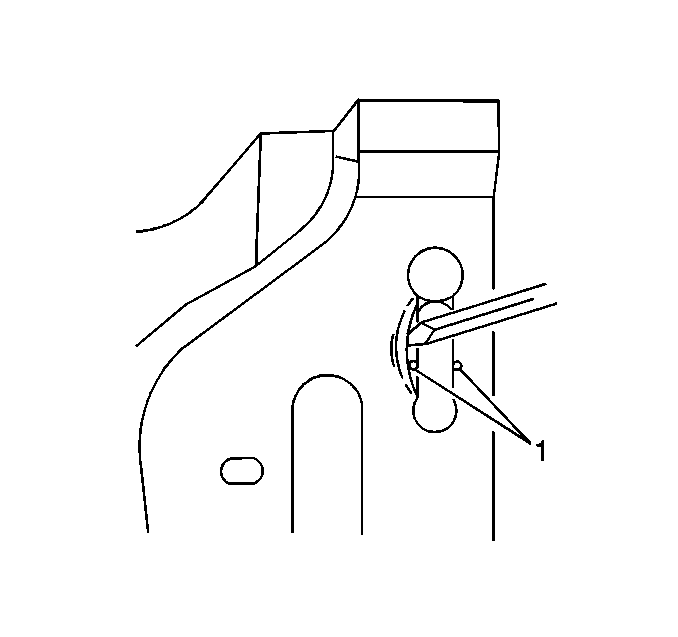
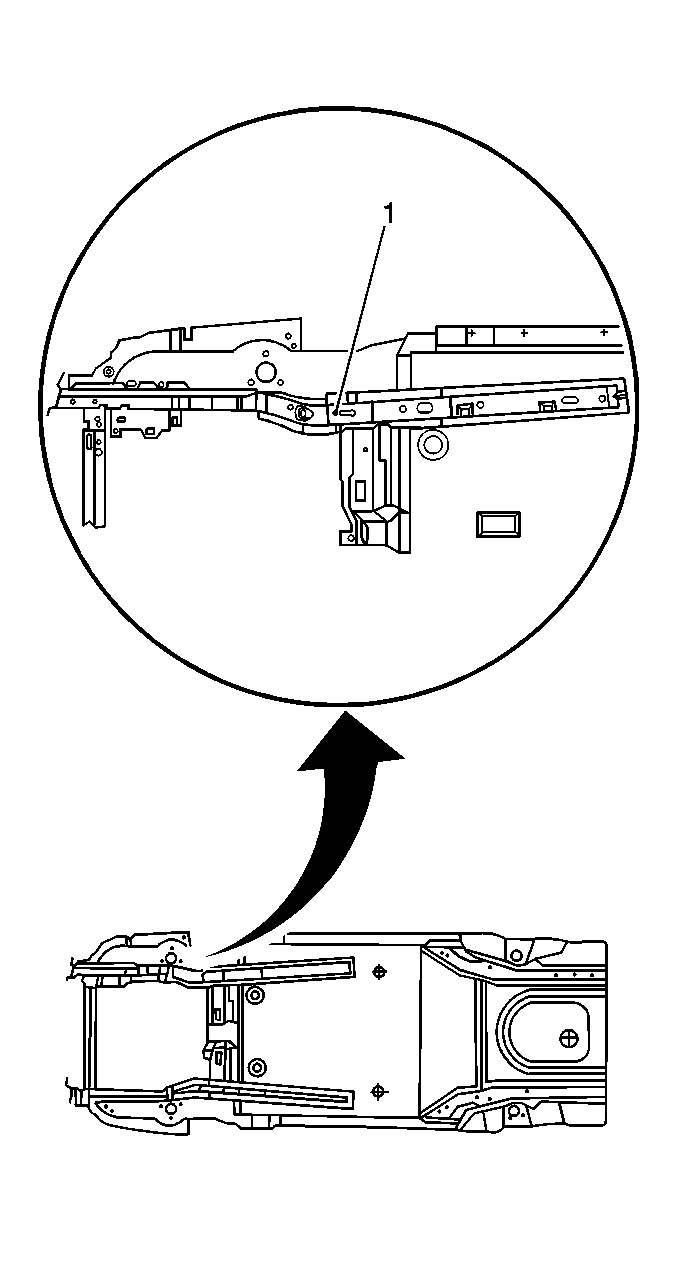
- Insert a pry bar between the torque box closeout panel and the lower rail in order to locate the 2 factory welds that secure the cagenut and for access to the lower rail surface (1).
- Bend the metal outward enough to expose the 2 factory welds.
- Mark the torque box area according to locations of the hidden welds.
- Straighten the torque box closeout panel.
- Center the punch and drill through the marked locations with a 10 mm (3/8 in) drill bit.
- Wrap a wire through the cagenut in order to keep the cagenut from sliding down into the rail.
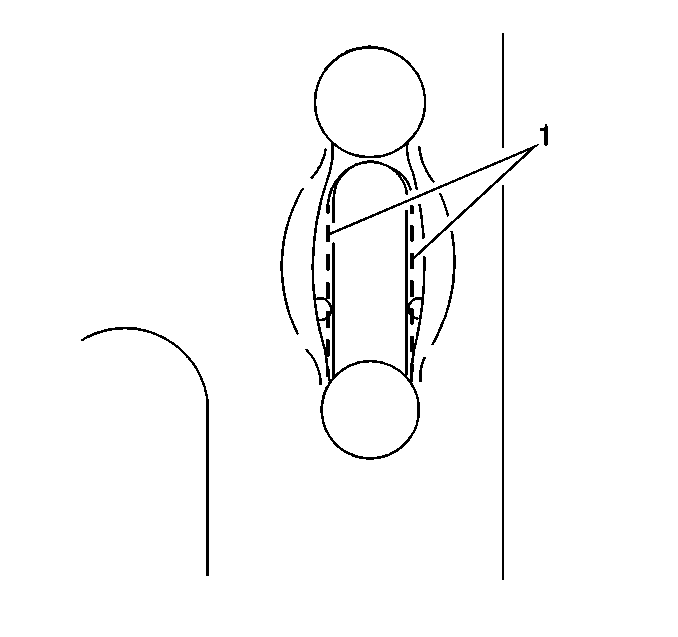
- Rotate the damaged cageneut bracket. Remove the cagenut bracket through the rail slot (1).

Important: The following procedure was developed in order to repair stripped or damaged cagenuts when full lower rail replacement is not necessary. The procedure allows the cagenuts to be serviced from the underside of the vehicle. This is done by gaining access to and drilling out the hidden welds holding the cagenut bracket in place. The damaged cagenut and bracket can then be removed through the rail slot.


Important: If the rail slot is too narrow to remove the cagenut bracket, slightly grind the edges of the gap in order to make the rail slot wider. Do not remove more than 2 mm of metal from either side of the slot. Use care not to cut the wire holding the cagenut bracket.
Installation Procedure
- Prep the weld areas for installation as noted from the original part.
- Wrap a wire through the new cagenut and install the cagenut and bracket through the rail slot (1).
- Position the new cagenut bracket. Inspect the fit using the body dimensions.
- Plug weld the cagenut bracket in place as noted from original locations. Completely fill the holes drilled in the torque box.
- Clean and prepare the welded surfaces.
- Prime the plug welds using two-part catalyzed primer.
- Apply anti-corrosion protection materials, as necessary.
- Install the suspension crossmember.
- Install all the related panels and components.
Important: You may need to temporarily secure the new cagenut bracket to the rail using the crossmember mounting bolt.
Important: Grind the welds flush with the torque box surface to ensure proper fit of the suspension crossmember.

Important: Prior to refinishing, refer to GM 4901MD-99 Refinish Manual for recommended products. Do not combine paint systems. Refer to paint manufacturer's recommendations. For further information or to order manual, please call 1-800-269-5100.
Notice: Use the correct fastener in the correct location. Replacement fasteners must be the correct part number for that application. Fasteners requiring replacement or fasteners requiring the use of thread locking compound or sealant are identified in the service procedure. Do not use paints, lubricants, or corrosion inhibitors on fasteners or fastener joint surfaces unless specified. These coatings affect fastener torque and joint clamping force and may damage the fastener. Use the correct tightening sequence and specifications when installing fasteners in order to avoid damage to parts and systems.
Tighten
Tighten the 6 suspension crossmember fasteners to 130 N·m
96 lb ft).
