For 1990-2009 cars only
Removal Procedure
Tools Required
| • | J 41790-A Compressor Holding Tool |
| • | J 42136 A/C Lip Seal Remover |
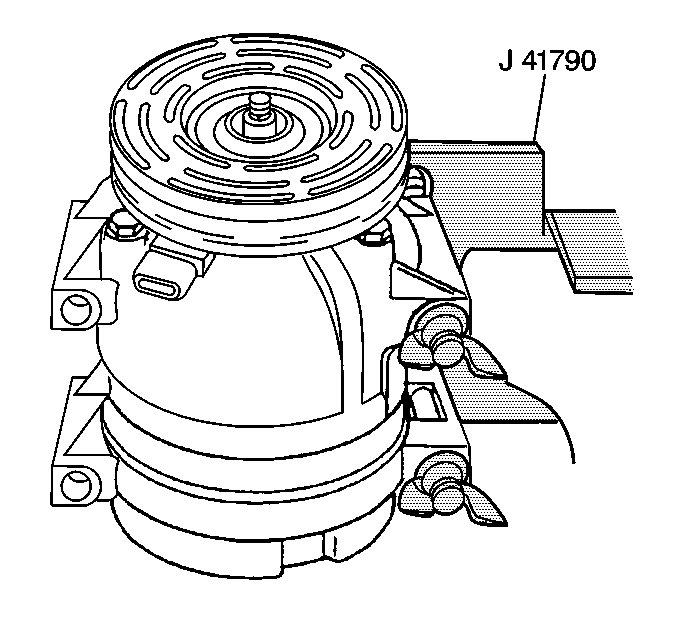
- Remove the compressor from the vehicle. Refer to Air Conditioning Compressor Replacement .
- Place the compressor on the J 41790-A Compressor Holding Tool.
- Remove the compressor clutch plate and hub assembly. Refer to Compressor Clutch Plate and Hub Assembly .
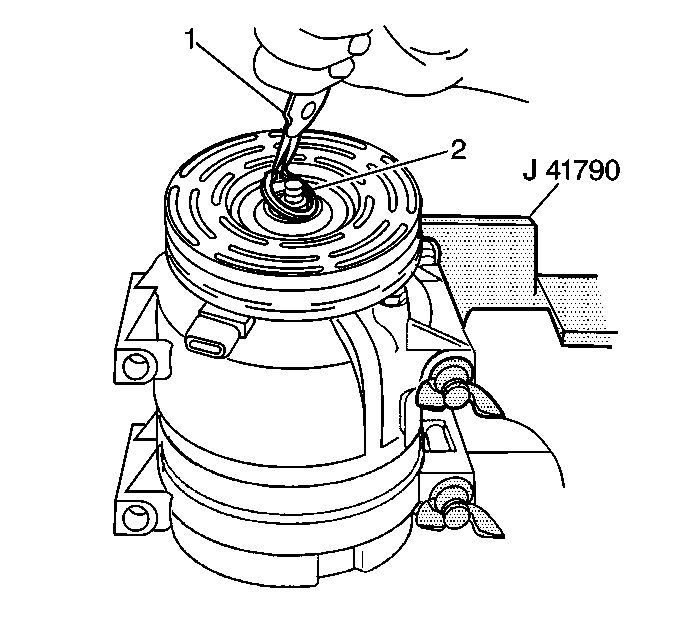
- Remove the compressor shaft seal retainer ring (2), using internal snap ring pliers (1).
- To keep any dirt or foreign material from getting into the compressor, thoroughly clean the following components:
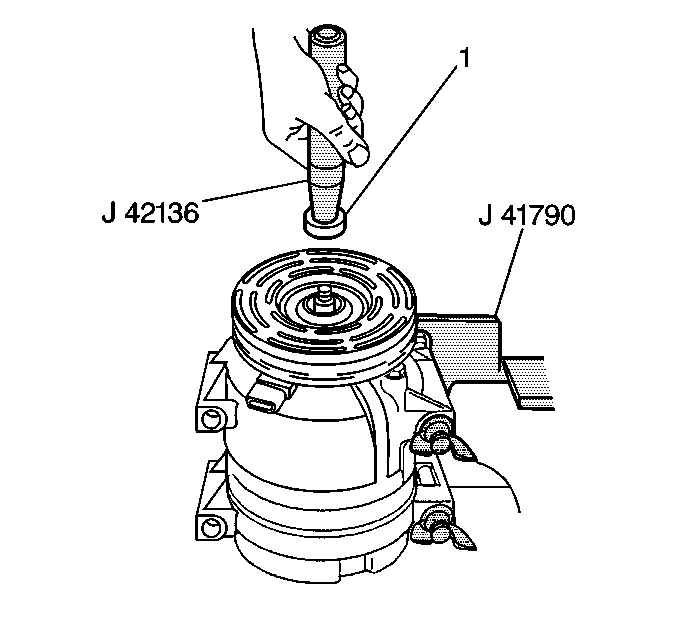
- Fully engage the lip of the J 42136 into the recessed portion of the seal (1) the turning the handle clockwise.
- Remove the compressor shaft seal from the compressor with a rotary pulling motion.
- Recheck the shaft and inside of the compressor neck for dirt or foreign material and make sure these areas are perfectly clean before installing the new compressor shaft seal.
| • | The inside of the compressor neck area surrounding the shaft |
| • | The exposed portion of the compressor shaft seal |
| • | The compressor shaft |
| • | The O-ring groove |
Installation Procedure
Tools Required
| • | J 9625-A Leak Test Adaptor |
| • | J 42136 A/C Lip Seal Remover |
| • | J 34614 Shaft Seal Protector |
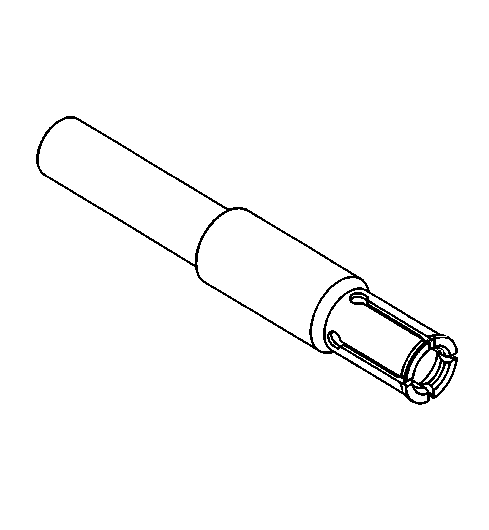
- Dip the new compressor shaft seal (1) in clean 525 viscosity refrigerant oil and assemble the seal onto the J 42136 , by turning the handle clockwise.
- Install the J 34614 onto the compressor shaft.
- Using a rotary motion, slide the new compressor shaft seal onto the compressor shaft until the seal is fully seated.
- Remove the J 34614 by turning the handle counter clockwise.
- Install a new compressor shaft seal retaining ring (2), using internal snap ring pliers (1).
- Leak test the compressor, using J 9625-A Leak Test Adapter.
- Recover the refrigerant. Refer to Refrigerant Recovery and Recharging .
- Remove and clean any excess oil resulting from installing the new seal parts from the shaft and inside the compressor neck.
- Install the compressor clutch plate and hub assembly. Refer to Compressor Clutch Plate and Hub Assembly .
- Remove the compressor from the J 41790-A Compressor Holding Tool.
- Install the compressor into the vehicle. Refer to Air Conditioning Compressor Replacement .
Make sure that the chamfer side of the retaining ring is facing up and that the retaining ring snaps into the groove.
| 6.1. | Install the J 9625-A onto the compressor and pressurize the suction and high-side of the compressor with R-134a. |
| 6.2. | Temporarily install the shaft nut. |
| 6.3. | With the compressor in a horizontal position, rotate the compressor shaft in the normal direction of rotation, several turns by hand. |
| 6.4. | Leak test the seal area and repair if necessary. |
| 6.5. | Remove the shaft nut. |
