For 1990-2009 cars only
Rear Compartment Side Trim Panel Replacement Coupe
Removal Procedure
- Open and support the rear lift window.
- Remove the strut. Refer to Rear Compartment Lift Window Strut Replacement in Body Rear End.
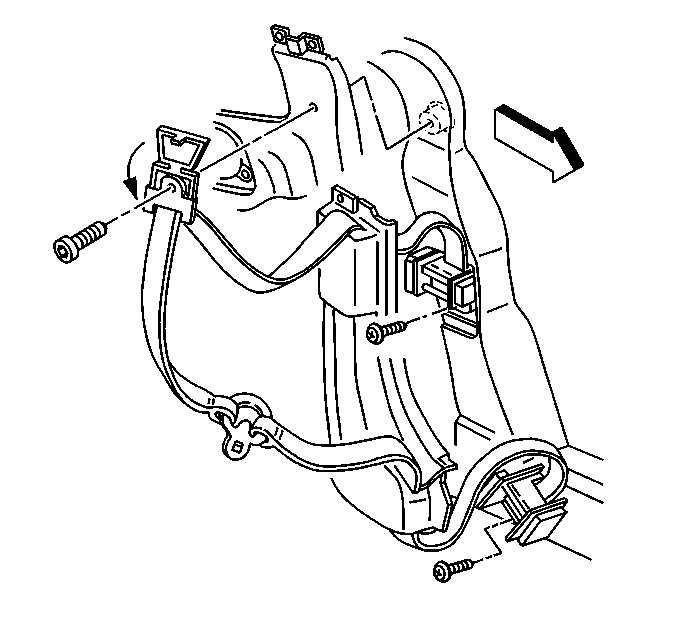
- Uncover the upper seat belt guide bolt by pushing up at the belt edge of the bolt cover.
- Remove the seat belt guide bolt.
- Remove the roof lift off panel.
- Remove the rear roof bow interior trim panel. Refer to Rear Roof Bow Trim Panel Replacement .
- Remove the fasteners securing the rear roof bow weatherstrip to the lock pillar.
- Remove the push-in fastener securing the top of the side trim panel.
- Remove the speaker grille from the side trim panel.
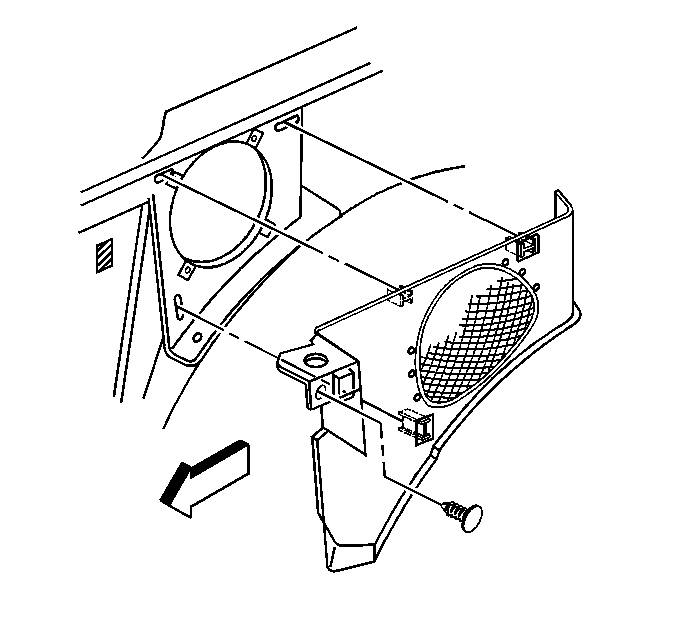
- Remove the fir tree push-in retainer from the rear of the grille opening.
- Remove the side trim panel.


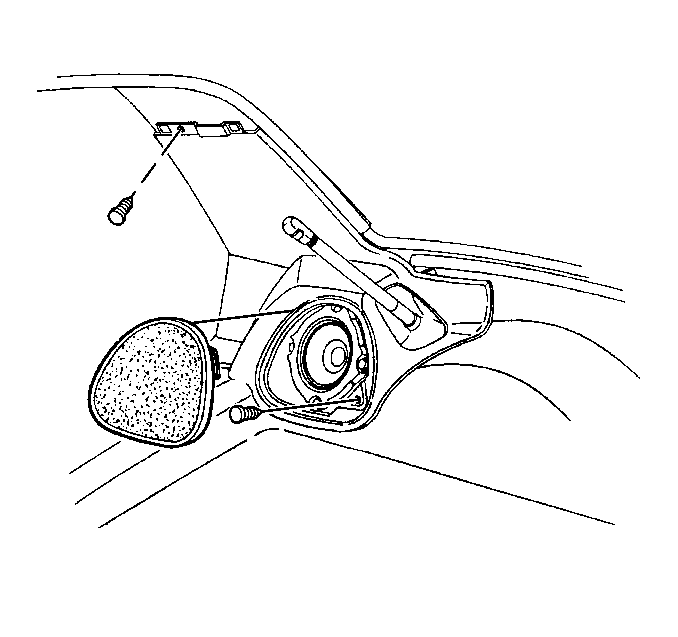
| 9.1. | Pry out the middle of the forward edge first. |
| 9.2. | Pry out the top or the middle of the rear edge. |
| 9.3. | Lift the grille up out of the panel. |
Installation Procedure
- Position the side trim panel to the lock pillar.
- Secure the panel with the push-in fastener and hook and loop fasteners.
- Install the fir tree push-in retainer to the rear of the speaker grill opening.
- Insert the lower tab of the grille into the opening and snap the grille in place.
- Install the seat belt guide bolt and cover.
- Install the strut. Refer to Rear Compartment Lift Window Strut Replacement in Body Rear End.
- Install the push-in fasteners attaching the weatherstrip to the lock pillar.
- Install the rear roof bow interior trim panel and the roof lift off panel. Refer to Rear Roof Bow Trim Panel Replacement .
- Remove the support and close the lift window.
Notice: Use the correct fastener in the correct location. Replacement fasteners must be the correct part number for that application. Fasteners requiring replacement or fasteners requiring the use of thread locking compound or sealant are identified in the service procedure. Do not use paints, lubricants, or corrosion inhibitors on fasteners or fastener joint surfaces unless specified. These coatings affect fastener torque and joint clamping force and may damage the fastener. Use the correct tightening sequence and specifications when installing fasteners in order to avoid damage to parts and systems.
Tighten
Tighten the seat belt guide bolt to 46 N·m (34 lb ft).
Rear Compartment Side Trim Panel Replacement Convertible
Removal Procedure
- Open the folding top stowage lid.
- Remove the push pin from the front of the side trim panel.
- Pull the panel from the housing.
Installation Procedure
- Position the side trim panel with the front edge of the panel under the lock pillar flange.
- Install the push pin attaching the panel to the lock pillar.
- Align the panel clips to the holes in the housing.
- Press the panel at the clip locations to secure the clips.
