Removal Procedure
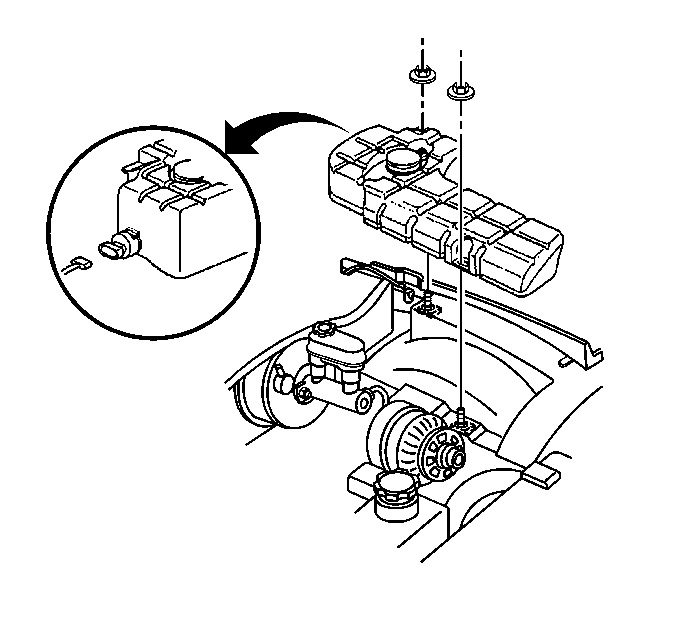
- Remove the washer solvent container retaining nuts.
- Lift the washer solvent container from the left wheelhouse.
- Disconnect the electrical connections and the washer hose from the container.
- Plug the washer pump outlet.
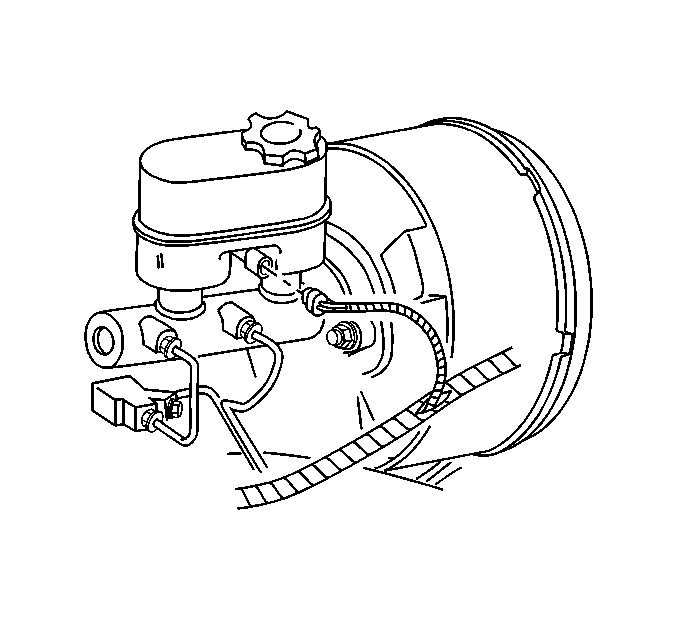
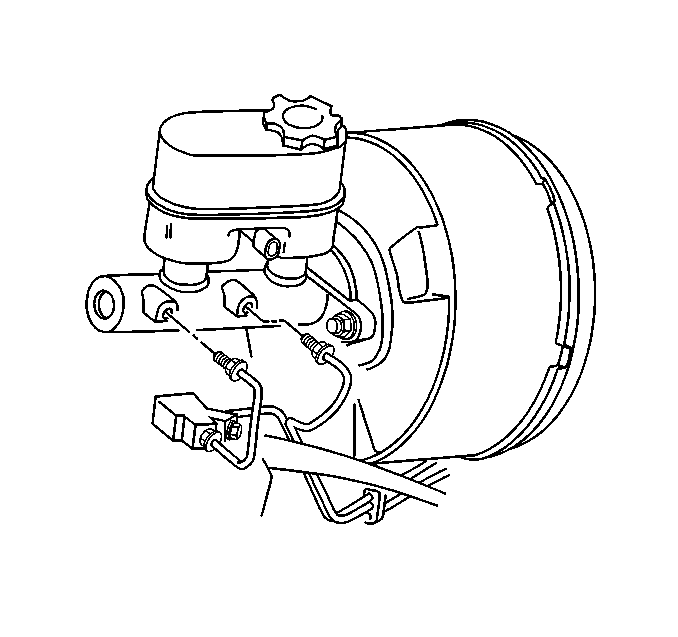
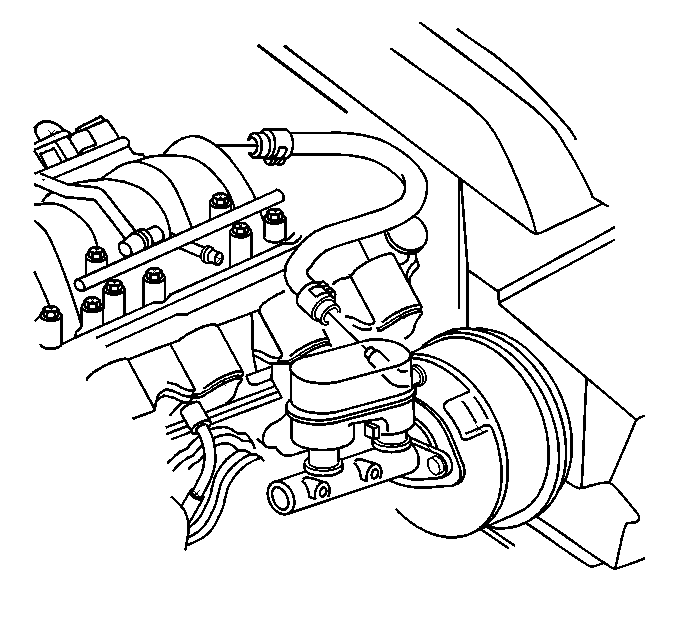
- Disconnect the electrical connector from the brake fluid level switch.
- Remove the brake pipes from the master cylinder.
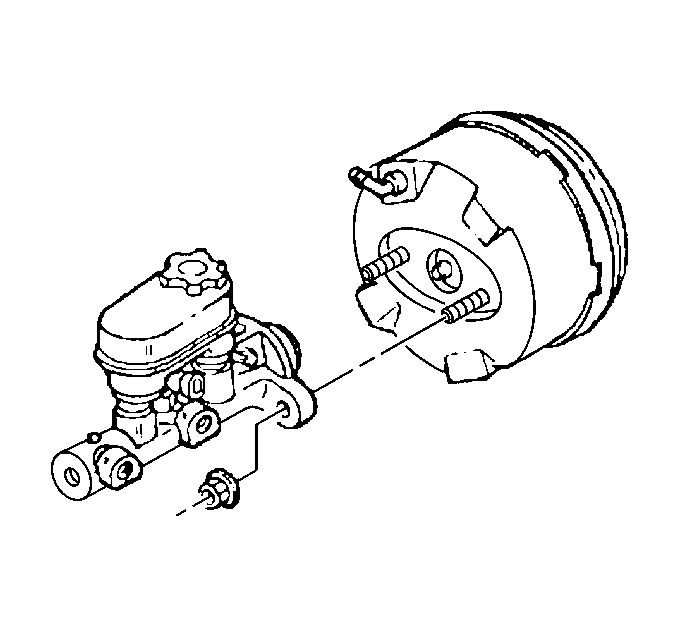
- Remove the nuts securing the master cylinder to the brake booster.
- Remove the master cylinder from the brake booster.
- Disconnect the brake booster vacuum check valve hose from the booster.
- Remove the instrument panel lower trim panel. Refer to Driver Knee Bolster Panel Replacement in Instrument Panel, Gauges and Console.
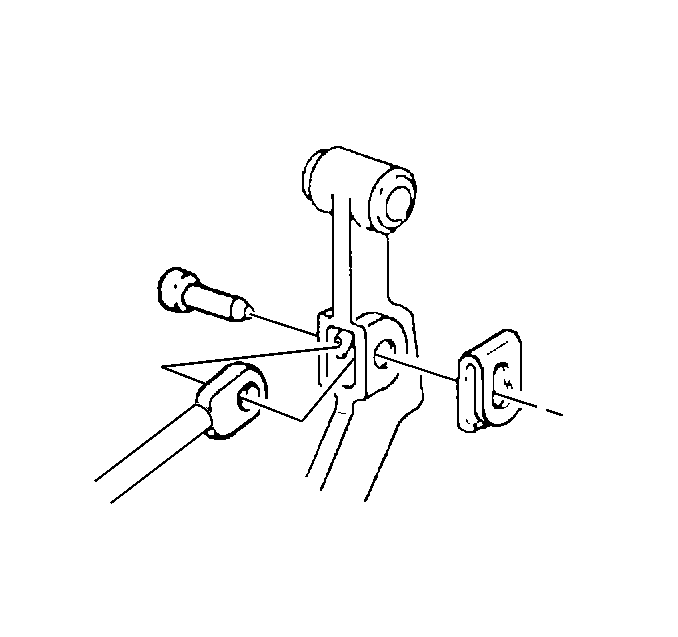
- Remove the input push rod retaining clip and pin from the brake pedal.
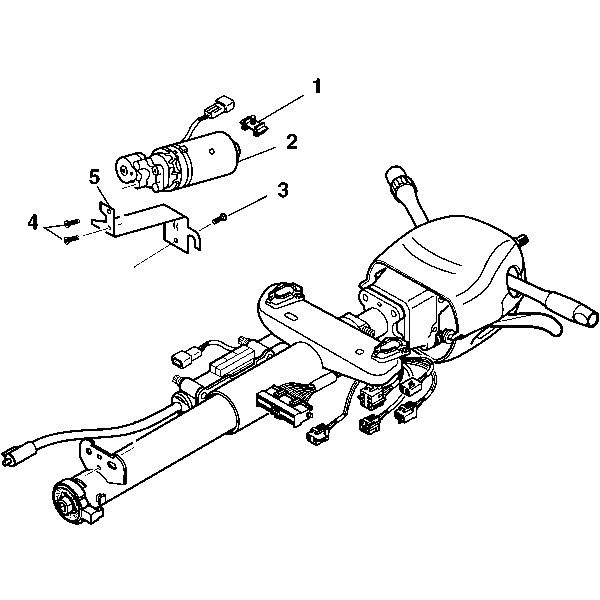
- Remove the screw (3) from the telescoping column motor mounting bracket (5), if equipped.
- Position the motor assembly to the right of the steering column.
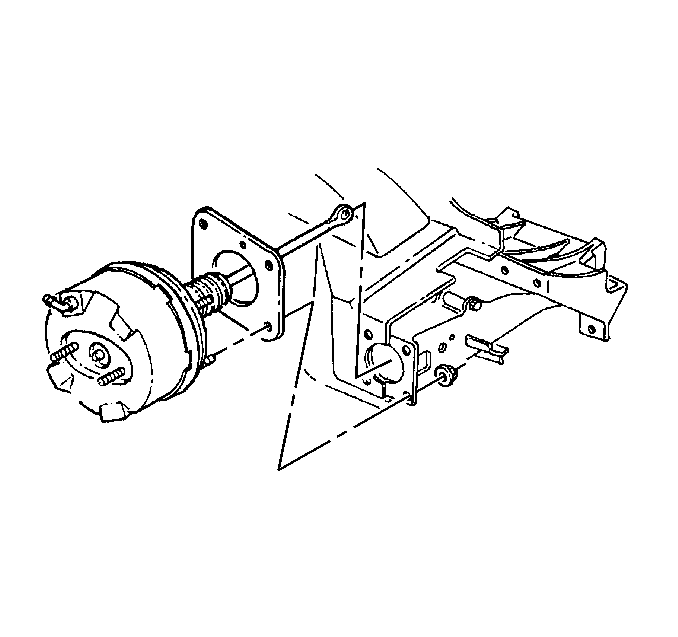
- Remove the brake booster mounting nuts and washers from the studs.
- Remove the brake booster and seal from the front of dash.
- Inspect the booster seal and sealing surfaces for damage. Replace if necessary.
Installation Procedure
- Lubricate all friction parts with Delco Brake Lube (GM P/N 12377969), or equivalent.
- Install the seal and brake booster to the front of dash.
- Install brake booster mounting nuts and washers on to the studs.
- Lubricate the input push rod pin with Delco Brake Lube (GM P/N 12377969).
- Install the brake booster pushrod, brake pedal pin, washer, and retainer to the brake pedal. Verify proper engagement of the retainer to the brake pedal by rotating the retainer.
- Reposition the telescoping column motor assembly to the steering column, if equipped.
- Install the screw (3) to the motor mounting bracket (5).
- Install the instrument panel lower trim panel. Refer to Driver Knee Bolster Panel Replacement in Instrument Panel, Gauges and Console.
- Connect the brake booster vacuum check valve hose to the brake booster.
- Install the master cylinder to the brake booster.
- Install the master cylinder retaining nuts.
- Install the brake pipes to the master cylinder.
- Connect the electrical connector to the brake fluid level switch.
- Connect the electrical connector and the washer hose to the washer solvent container.
- Install washer solvent container to the wheelhouse.
- Install the washer solvent container retaining nuts.
- Bleed brake system as necessary. Refer to Hydraulic Brake System Bleeding .

Notice: Use the correct fastener in the correct location. Replacement fasteners must be the correct part number for that application. Fasteners requiring replacement or fasteners requiring the use of thread locking compound or sealant are identified in the service procedure. Do not use paints, lubricants, or corrosion inhibitors on fasteners or fastener joint surfaces unless specified. These coatings affect fastener torque and joint clamping force and may damage the fastener. Use the correct tightening sequence and specifications when installing fasteners in order to avoid damage to parts and systems.
Tighten
Tighten the brake booster mounting nuts to 27 N·m (19 lb ft).


Tighten
Tighten the screw to 7 N·m (62 lb in)


Tighten
Tighten the master cylinder retaining nuts to 29 N·m (21 lb ft).

Tighten
Tighten the brake pipe tube nuts to the master cylinder to 24 N·m
(17 lb ft).


Tighten
Tighten the washer solvent container nuts to 7.5 N·m (66 lb in).
