Removal Procedure
- Recover the refrigerant. Refer to Refrigerant Recovery and Recharging
- Remove the upper radiator support. Refer to Radiator Support Replacement
- Remove the front evaporator tube to condenser retaining bolt.
- Disconnect the front evaporator tube from the condenser, discard the O-ring
- Reposition the front evaporator tube.
- Raise and suitably support the vehicle. Refer to Lifting and Jacking the Vehicle
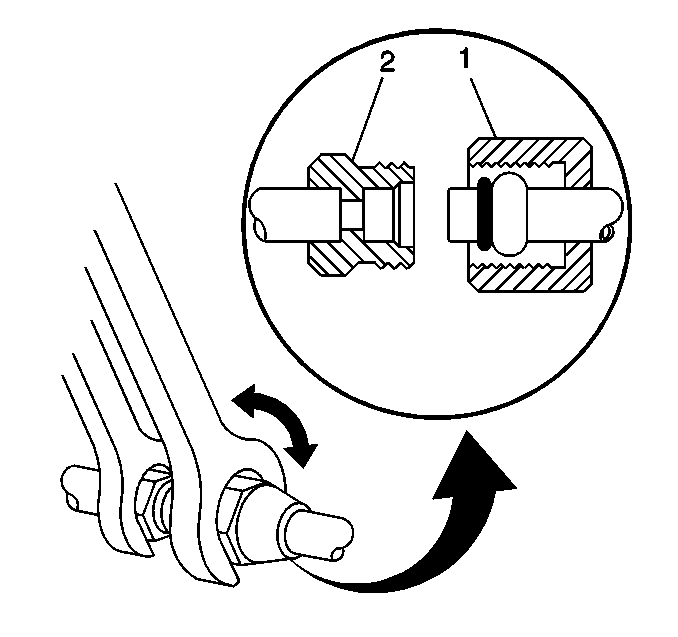
- Using a back-up wrench on the condenser fitting (2), loosen the compressor hose fitting (1) from the condenser.
- Disconnect the compressor hose from the condenser, discard the O-ring.
- Lower the vehicle; leaving the vehicle on the hoist.
- Carefully raise the condenser along the radiator just enough to release the condenser tabs (1) from the radiator slots (2) and the condenser tube from the tube retainer (3).
- Carefully separate the condenser from the radiator.
- Remove the condenser from the vehicle.
- Inspect the condenser insulators along the LH and RH front edges of the condenser for wear or damage.

Important: Cap or tape the open evaporator tube and the condenser immediately to prevent contamination.
Important: Prior to removal, take note of the compressor hose routing and orientation between the compressor and condenser.

Important: Cap or tape the open compressor hose and the condenser immediately to prevent contamination.


Installation Procedure
- Replacement condenser will come without refrigerant oil.
- If installing a replacement condenser, add 30 ml (1 oz) of refrigerant oil in the condenser.
- Replace the condenser insulators (2), if necessary:
- Position the condenser into the vehicle.
- Carefully join the condenser to the radiator so that the condenser is above the installed position.
- Carefully lower the condenser along the radiator to secure the condenser tabs (1) to the radiator slots (2) and the condenser tube to the tube retainer (3).
- Raise the vehicle.
- Route the compressor hose to the condenser as noted prior to removal.
- Remove the cap or tape from the compressor hose and the condenser.
- Using a lint-free clean, dry cloth, carefully clean the sealing surfaces of the compressor hose and the condenser.
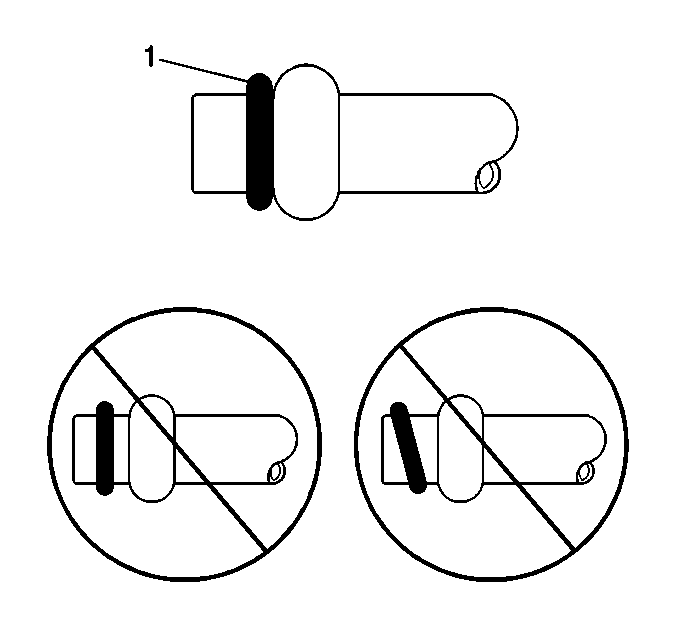
- Lightly coat the new O-ring (1) with mineral base 525 viscosity refrigerant oil.
- Carefully slide the new O-ring seal (1) onto the compressor hose until seated.
- Install the compressor hose to the condenser.
- Align the compressor hose to the condenser as noted prior to removal.
- Using a back-up wrench on the condenser fitting (2), secure the compressor hose fitting (1) to the condenser.
- Lower the vehicle.
- Remove the cap or tape from the front evaporator tube and the condenser.
- Using a lint-free clean, dry cloth, carefully clean the sealing surfaces of the evaporator tube and the condenser.
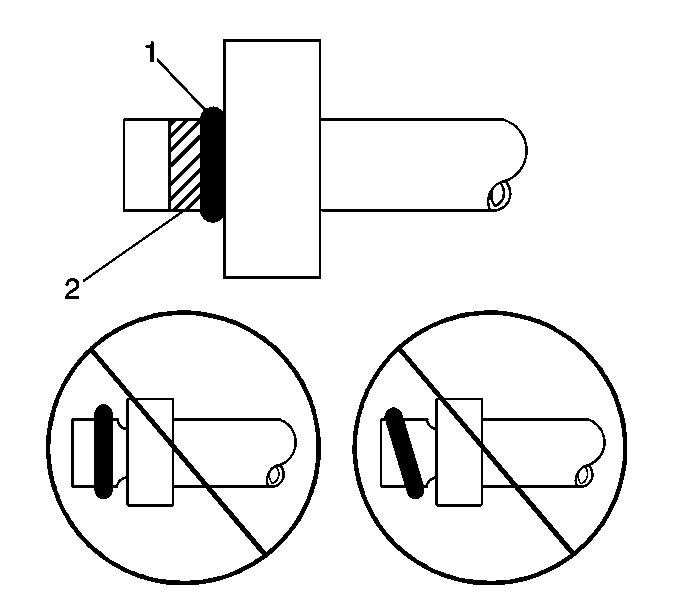
- Lightly coat the new O-ring seal (1) with mineral base 525 viscosity refrigerant oil.
- Carefully slide the new O-ring seal (1) onto the front evaporator tube until seated.
- Install the front evaporator tube to the condenser.
- Install the evaporator tube to condenser retaining bolt.
- Install the upper radiator support. Refer to Radiator Support Replacement
- Evacuate and charge the refrigerant system. Refer to Refrigerant Recovery and Recharging
- Check the condenser joints for leaks. Refer to Leak Testing


| 3.1. | Remove all traces of the old insulators. |
| 3.2. | Using isopropyl alcohol, or equivalent, wipe clean the front surface of the condenser LH and RH edges. |
| 3.3. | Remove the paper backing (1) from the new insulators (2). |
| 3.4. | Align and install the insulators (2) while keeping a gap (3) of 1 mm (0.039 in) between the insulators (2) and the inner edges of the condenser, as shown. |


Important: DO NOT allow any of the mineral base 525 viscosity refrigerant oil on the O-ring seal to enter the refrigerant system.


Notice: Use the correct fastener in the correct location. Replacement fasteners must be the correct part number for that application. Fasteners requiring replacement or fasteners requiring the use of thread locking compound or sealant are identified in the service procedure. Do not use paints, lubricants, or corrosion inhibitors on fasteners or fastener joint surfaces unless specified. These coatings affect fastener torque and joint clamping force and may damage the fastener. Use the correct tightening sequence and specifications when installing fasteners in order to avoid damage to parts and systems.
Tighten
Tighten the compressor hose fitting to the condenser to 24 N·m
(17 lb ft).

Important: DO NOT allow any of the mineral base 525 viscosity refrigerant oil on the O-ring seal to enter the refrigerant system.
Leave a light coating of the refrigerant oil to remain on the evaporator tube in the area indicated (2) ONLY.

Tighten
Tighten the evaporator tube to condenser retaining bolt to 27 N·m
(20 lb ft).
