Antenna Cable Replacement Windshield
Removal Procedure
- Remove the LH door sill plate. Refer to Door Sill Plate Replacement in Interior Trim.
- Remove the LH lock pillar trim. Refer to Body Lock Pillar Trim Panel Replacement in Interior Trim.
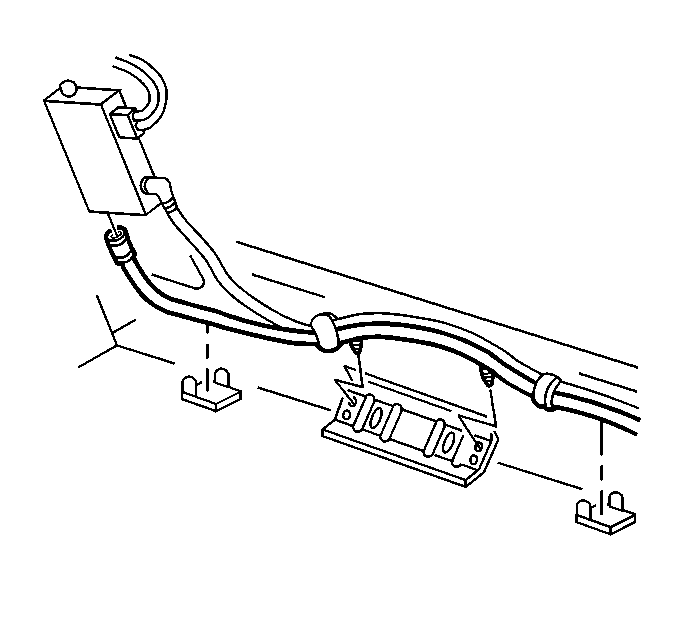
- Disconnect the front windshield antenna coaxial cable from the antenna module.
- Release the I/P wiring harness from the body retaining clips.
- Remove the I/P wiring harness push-in retainers from the floor panel support.
- Separate the front windshield antenna coaxial cable from the radio control coaxial cable and the I/P wiring harness.
- Remove the I/P LH lower insulator panel. Refer to Instrument Panel Insulator Panel Replacement in Instrument Panel, Gauges and Console.
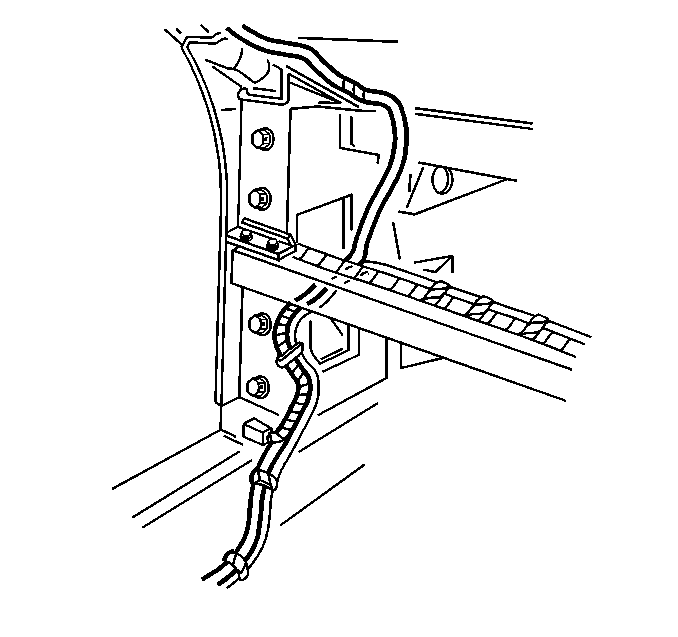
- Remove the coaxial cable from the insulation tape along the hinge pillar.
- Remove the windshield side garnish moldings. Refer to Windshield Side Garnish Molding Replacement in Stationary Windows.
- Remove the sunshades. Refer to Sunshade Replacement in Interior Trim.
- Remove the windshield upper garnish molding. Refer to Windshield Upper Garnish Molding Replacement in Stationary Windows.
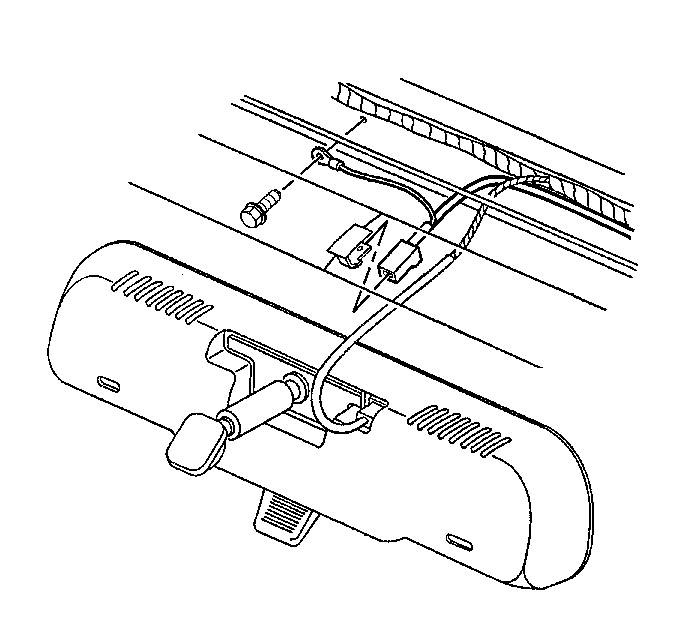
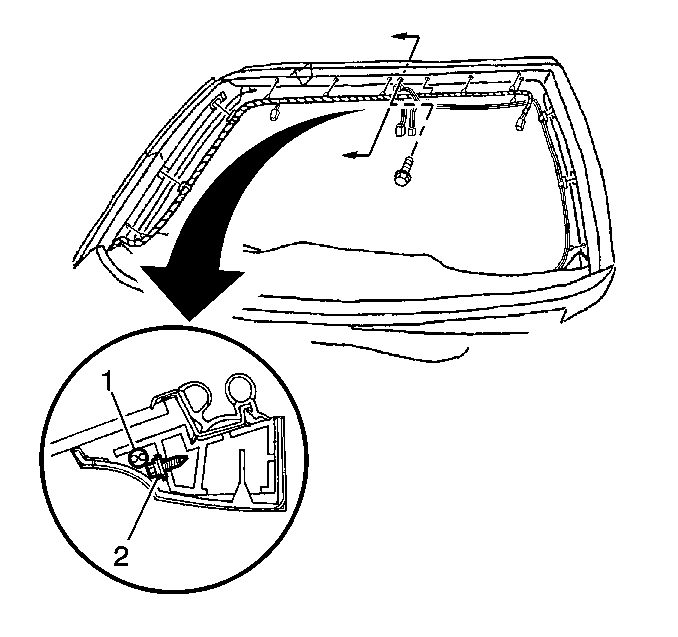
- Disconnect the coaxial cable from the front windshield antenna connector.
- Remove the bolt retaining the coaxial cable ground wire to the windshield frame.
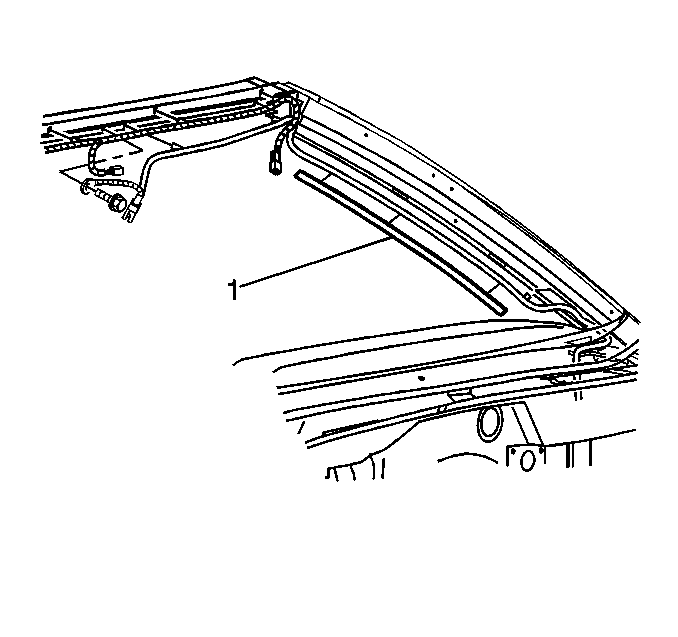
- Remove the tape (1) retaining the coaxial cable to the windshield frame.
- Remove the coaxial cable from the vehicle.
Installation Procedure
- Install the front windshield antenna cable coaxial cable into position in the vehicle.
- Install new tape (1) to retain the coaxial cable to the windshield frame.
- Connect the coaxial cable to the front windshield antenna connector.
- Install the coaxial cable to windshield frame ground wire bolt.
- Check that the I/P harness (1), which runs along the windshield frame, is positioned as shown in relation to the ground wire bolt (2).
- Install the windshield upper garnish molding. Refer to Windshield Side Garnish Molding Replacement in Stationary Windows.
- Install the sunshades. Refer to Sunshade Replacement in Interior Trim.
- Install the windshield side garnish moldings. Refer to Windshield Upper Garnish Molding Replacement in Stationary Windows.
- Install the coaxial cable to the insulation tape along the hinge pillar.
- Install the I/P LH lower insulator panel. Refer to Instrument Panel Insulator Panel Replacement in Instrument Panel, Gauges and Console.
- Tape the front windshield antenna coaxial cable to the radio control antenna coaxial cable and the I/P wiring harness.
- Install the I/P wiring harness push-in retainers to the floor panel support.
- Secure the I/P wiring harness to the body retaining clips.
- Connect the coaxial cable to the antenna module.
- Install the LH lock pillar trim. Refer to Body Lock Pillar Trim Panel Replacement in Interior Trim.
- Install the LH door sill plate. Refer to Door Sill Plate Replacement in Interior Trim.


Notice: Use the correct fastener in the correct location. Replacement fasteners must be the correct part number for that application. Fasteners requiring replacement or fasteners requiring the use of thread locking compound or sealant are identified in the service procedure. Do not use paints, lubricants, or corrosion inhibitors on fasteners or fastener joint surfaces unless specified. These coatings affect fastener torque and joint clamping force and may damage the fastener. Use the correct tightening sequence and specifications when installing fasteners in order to avoid damage to parts and systems.
Tighten
Tighten the front windshield antenna coaxial cable
ground wire bolt to 1.8 N·m (16 lb in).


Antenna Cable Replacement Rear Lift Window
Removal Procedure
- Remove the rear roof bow interior trim panel. Refer to Rear Roof Bow Trim Panel Replacement in Interior Trim.
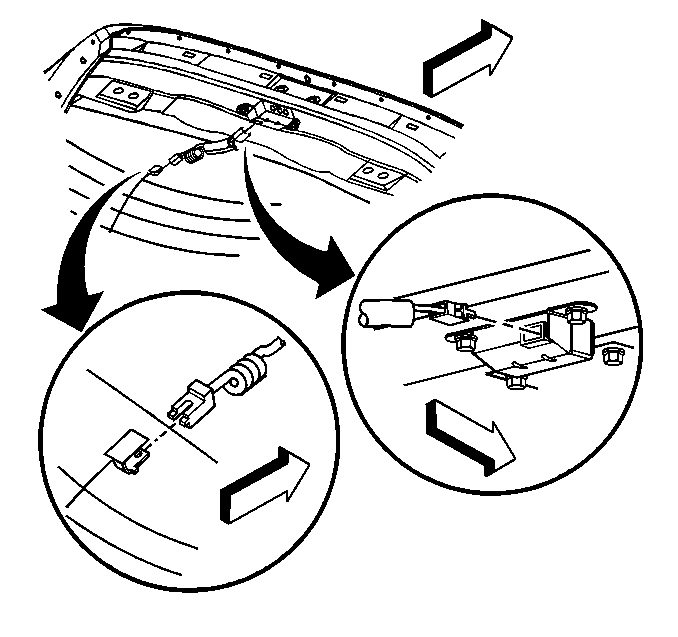
- Disconnect the rear lift window antenna cable from the antenna buffer.
- Carefully disconnect the rear lift window antenna cable from the rear lift window antenna connector.
- Remove the rear lift window antenna cable.
Installation Procedure
- Carefully connect the rear lift window antenna cable to the rear lift window antenna connector.
- Connect the rear lift window antenna cable to the antenna buffer.
- Install the rear roof bow interior trim panel. Refer to Rear Roof Bow Trim Panel Replacement in Interior Trim.

Important: When installing the rear roof bow interior trim panel, ensure that the rear lift window antenna cable is seated in the slot along the rear edge of the trim panel.
