For 1990-2009 cars only
Removal Procedure
- Remove the console. Refer to Console Replacement in Instrument Panel, Gauges and Console.
- Remove the IP accessory trim plate. Refer to Instrument Panel Accessory Trim Plate Replacement in Instrument Panel, Gauges and Console.
- Remove the driver knee bolster trim panel. Refer to Driver Knee Bolster Panel Replacement in Instrument Panel, Gauges and Console.
- Remove the IP compartment. Refer to Instrument Panel Compartment Replacement in Instrument Panel, Gauges and Console.
- Remove the IP upper trim pad. Refer to Instrument Panel Upper Trim Pad Replacement in Instrument Panel, Gauges and Console.
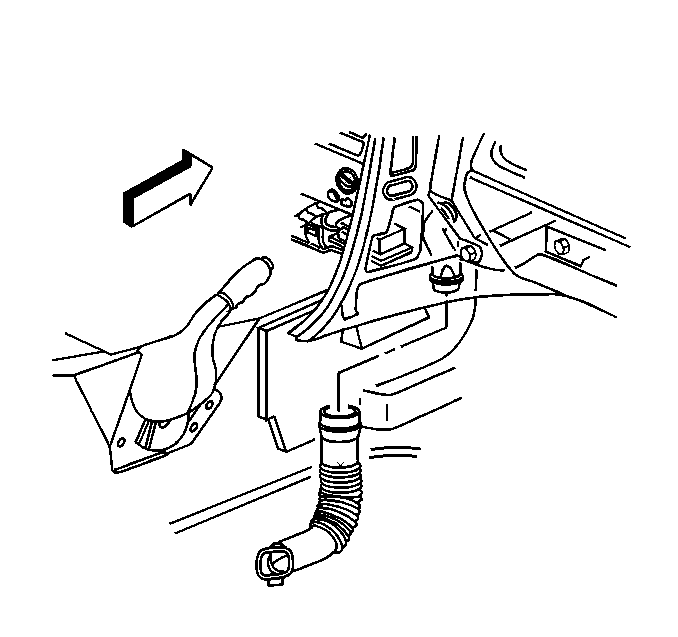
- Pull the front floor carpet away from the RH side of the driveline tunnel to access the floor air outlet - inner.
- Release the floor air outlet - inner from the floor air outlet lower duct - RH rear.
- Release the floor air outlet lower duct - RH rear from the floor air outlet duct - RH rear, then remove the duct.
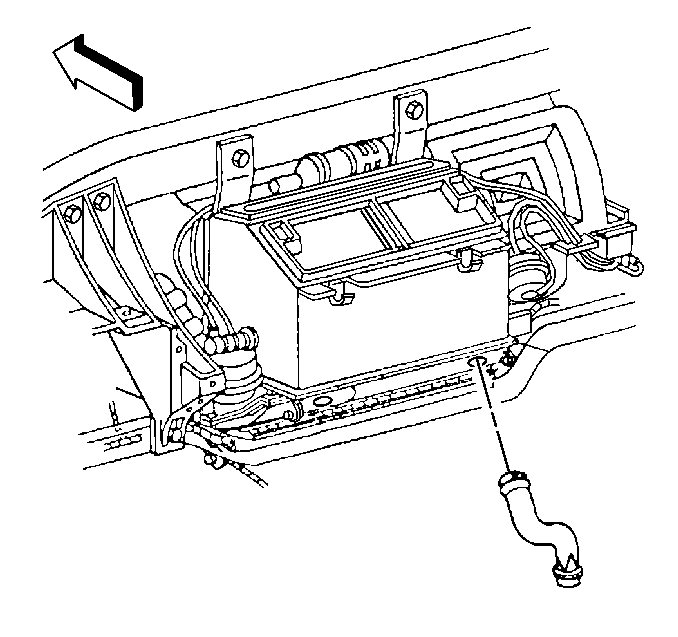
- Using a flat bladed screwdriver, CAREFULLY release the floor air outlet duct - RH rear from the HVAC module.
- Lower the duct down between the IP center support bracket and the side of the driveline tunnel, then remove the duct.

Use a twisting motion to release the floor outlet from the floor duct.
Use a twisting motion to release the lower duct from the duct.

Installation Procedure
- Insert the floor air outlet duct - RH rear up between the IP center support bracket and the side of the driveline tunnel, then position the duct to the HVAC module.
- Align the floor duct to the HVAC module, then push firmly and evenly to secure the duct.
- Position and secure the floor air outlet lower duct - RH rear to the floor air outlet duct - RH rear.
- Secure the floor air outlet - inner to the floor air outlet lower duct - RH rear.
- Position the front floor carpet to the RH side of the driveline tunnel.
- Install the IP upper trim pad. Refer to Instrument Panel Upper Trim Pad Replacement in Instrument Panel, Gauges and Console.
- Install the IP compartment. Refer to Instrument Panel Compartment Replacement in Instrument Panel, Gauges and Console.
- Install the driver knee bolster trim panel. Refer to Instrument Panel Upper Trim Pad Replacement in Instrument Panel, Gauges and Console.
- Install the IP accessory trim plate. Refer to Instrument Panel Accessory Trim Plate Replacement in Instrument Panel, Gauges and Console.
- Install the console. Refer to Console Replacement in Instrument Panel, Gauges and Console.


Use a twisting motion to secure the lower duct to the duct.
Use a twisting motion to secure the floor outlet to the floor duct.
