Removal Procedure

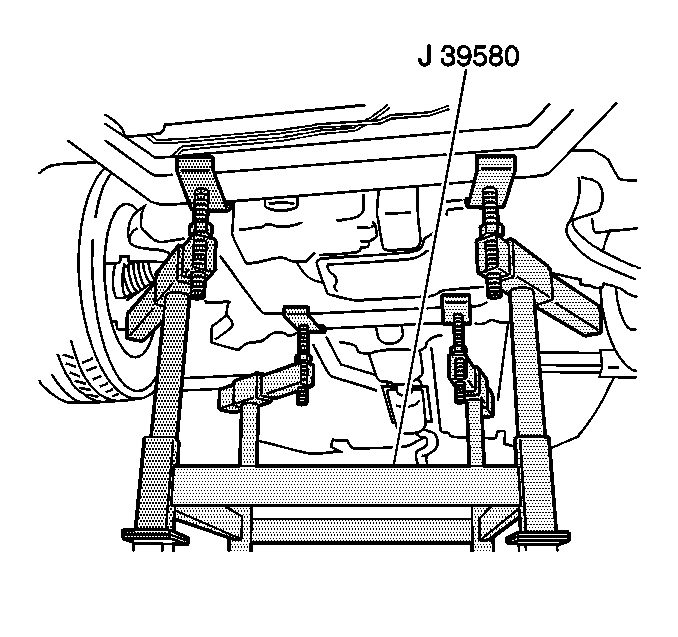
- Install J 39580
under the frame near the cage (crossmember)
nut that you are replacing.
- Remove and DISCARD the frame bolt.
- If you are replacing the FRONT cage (crossmember) nut, remove
the front impact bar in order to gain access. Refer to
Front Bumper Impact Bar Replacement
in Bumpers.
If you are replacing the REAR cage (crossmember) nut, perform the following
steps in order to gain access
| • | Pull back the carpet and the sound deadener in order to provide
access to the floor pan sheet metal. |

| • | Locate the area directly
above the cage (crossmember) nut. |

- Use a cutoff wheel in
order to cut a 100 mm (4 in) square access door.
- Pry the access door open.

- Use a chisel in order
to break the spot welds (1) on one side of the frame crossmember nut retainer
(3).
- Lift one side of the frame crossmember nut retainer.
- Remove the frame crossmember nut (2).
Installation Procedure

- Install the frame crossmember
nut (2).
- Install and weld the frame crossmember nut retainer (3) to the
original position.
- Weld the frame crossmember nut retainer to the original position.
- Clean the repair area.
- Apply corrosion protection to the repair area. Refer to
Anti-Corrosion Treatment and Repair
in Paint /
Coatings.
- If you are replacing the REAR cage (crossmember) nut, perform
the following steps:
| 6.1. | Pry the access door back to the original position. |
| 6.2. | Stitch weld the access door closed. |
| 6.3. | Use a grinder in order to remove any rough edges. |
| 6.5. | Move the sound deadener and the carpet back to the original position. |
Notice: Use the correct fastener in the correct location. Replacement fasteners
must be the correct part number for that application. Fasteners requiring
replacement or fasteners requiring the use of thread locking compound or sealant
are identified in the service procedure. Do not use paints, lubricants, or
corrosion inhibitors on fasteners or fastener joint surfaces unless specified.
These coatings affect fastener torque and joint clamping force and may damage
the fastener. Use the correct tightening sequence and specifications when
installing fasteners in order to avoid damage to parts and systems.
| 6.7. | Install the NEW
frame rear bolt. |
Tighten
Tighten the NEW frame REAR bolt to 160 N·m (118 lb ft).
- If you are replacing the FRONT cage (crossmember) nut, perform
the following steps:
| 7.1. | install the NEW frame front bolt. |
Tighten
Tighten the NEW frame FRONT bolt to 160 N·m (118 lb ft).
- Remove the utility stand.


