Removal Procedure
- Relieve the fuel pressure. Refer to Fuel Pressure Relief in Engine Controls - 1.0L.
- Disconnect the negative battery cable.
- Raise and support the vehicle. Refer to Lifting and Jacking the Vehicle in General Information.
- Drain the engine coolant. Refer to Cooling System Draining and Filling in Engine Cooling.
- Place a drain pan beneath the engine oil pan to catch the escaping oil.
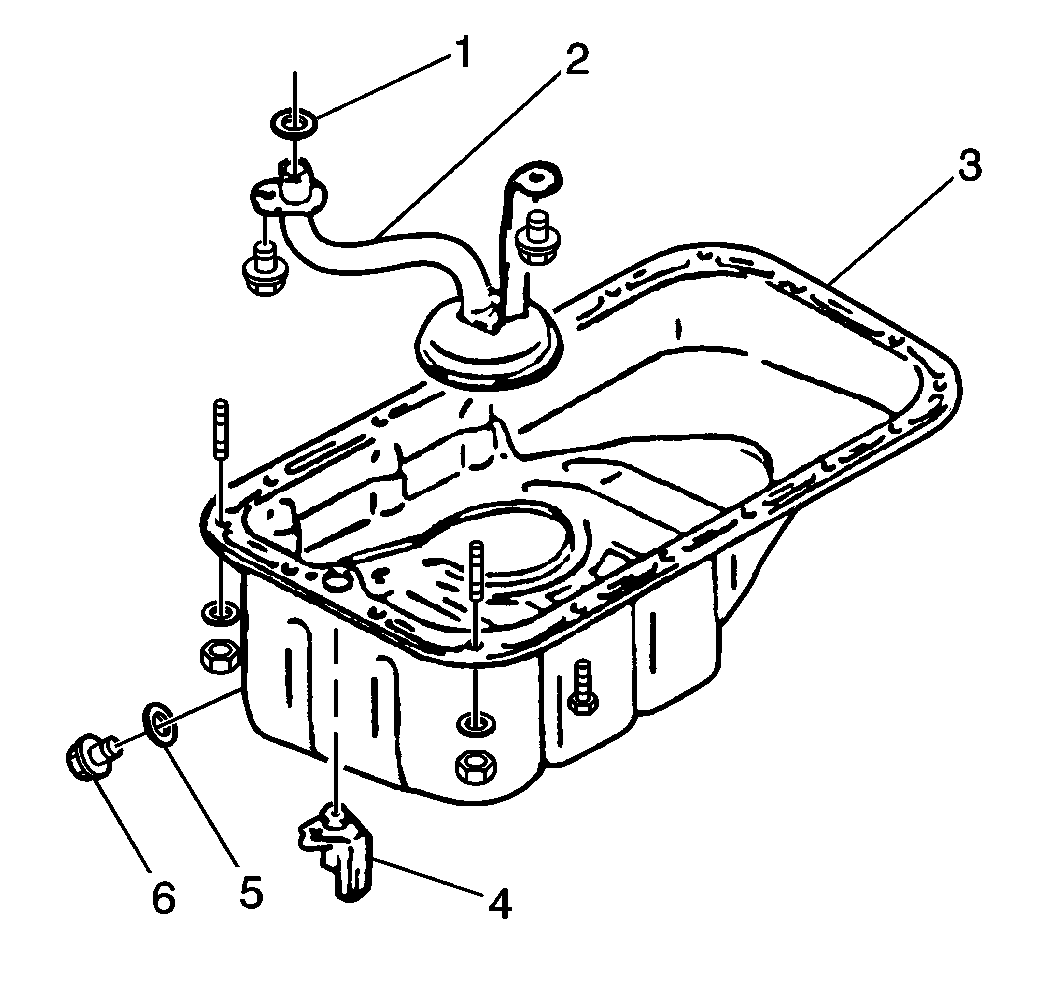
- Remove the engine oil drain plug and gasket in order to catch the escaping oil.
- Remove the fourteen bolts and two nuts and the engine oil pan from the vehicle.
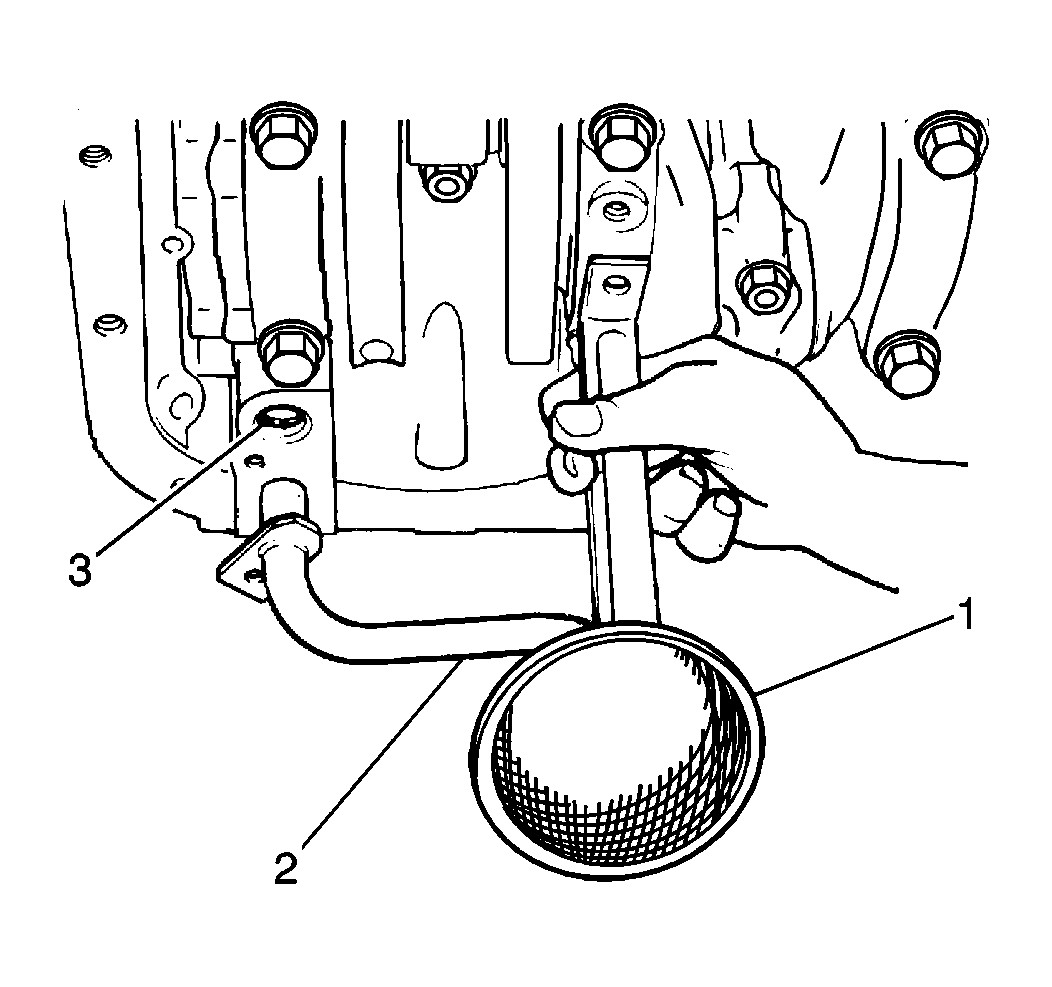
- Remove the oil pump strainer bracket bolt, the oil pump strainer bolt and the oil pump strainer (2) from the cylinder block.
- Remove the oil pump strainer seal (3).
- Lower the vehicle.
- Remove the timing belt and the belt tensioner Refer to Timing Belt Tensioner Replacement .
- Remove the intake manifold and the Throttle Body Fuel Injection (TBI) Unit. Refer to Intake Manifold Replacement .
- Remove the exhaust manifold from the cylinder head. Refer to Exhaust Manifold Replacement .
- Remove the distributor from the cylinder head. Refer to Distributor Replacement in Engine Electrical.
- Remove the following components from the cylinder head:
- Remove the following components from the cylinder block.
- Remove the rod bearing caps.
- Install a piece of hose over the threads of the rod bolts (1).
- Remove the piston and the connecting rod assembly out through the top of the cylinder bore.
Caution: Unless directed otherwise, the ignition and start switch must be in the OFF or LOCK position, and all electrical loads must be OFF before servicing any electrical component. Disconnect the negative battery cable to prevent an electrical spark should a tool or equipment come in contact with an exposed electrical terminal. Failure to follow these precautions may result in personal injury and/or damage to the vehicle or its components.
| • | The four nuts |
| • | The seal washers |
| • | the cylinder head cover |
Important:
• Mark the cylinder number on all of the pistons, connecting rods
and connecting rod bearing caps. • When disassembling, keep all of the parts in order by the cylinder
and return them to the correct cylinder.
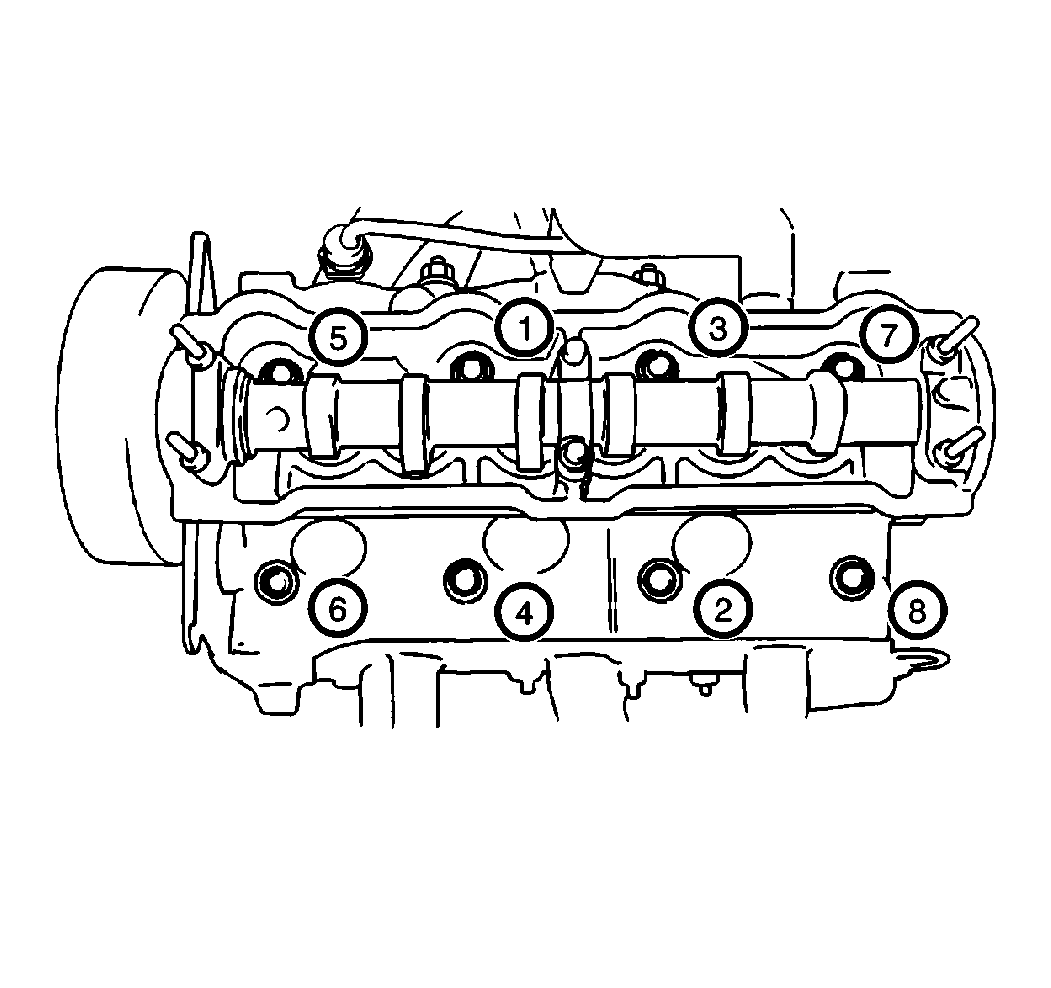
| • | The eight cylinder head bolts |
| • | The cylinder head with the gasket |
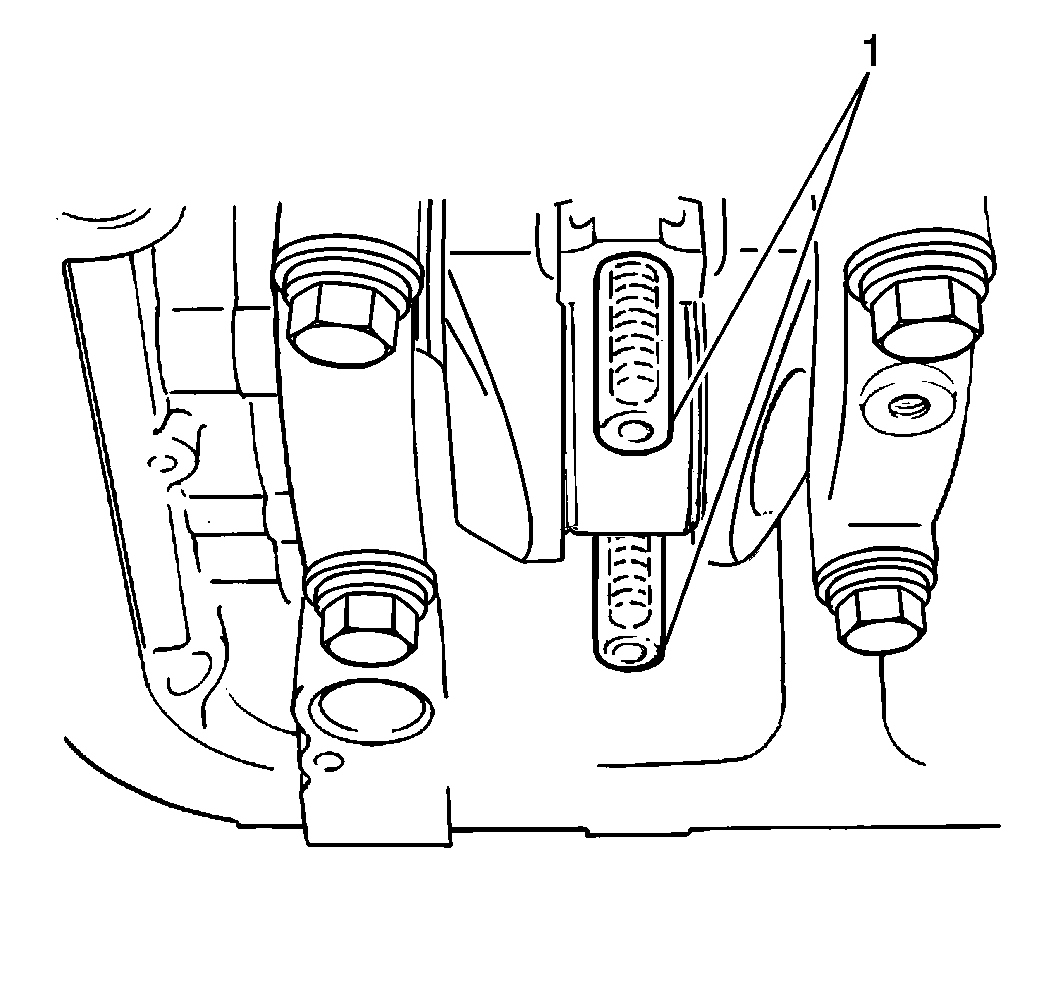
Notice: Install a piece of hose over the threads of the rod bolts. This is to prevent damage to the bearing journal, the cylinder walls or rod bolt threads when installing the connecting rod. Remove hose after connecting rod is in place.
Important: Decarbon the top of the cylinder bore before attempting to remove the piston from the cylinder.
Installation Procedure
Tools Required
J 8037 Piston Ring Compressor
- Apply the engine oil to the following parts:
- Install the piece of hose over the threads of the rod bolts (1).
- Point the arrow mark on the piston head to the crankshaft pulley side when installing the piston assembly into the cylinder bore.
- Install the upper connecting rod bearing to the connecting rod.
- Install the piston assembly into the cylinder bore.
- Guide the connecting rod into place on the crankshaft.
- Install a J 8037 . Ensure that the J 8037 sits firmly against the cylinder block until all of the piston rings have entered the cylinder bore.
- Install the lower connecting rod bearing to the connecting rod cap.
- Install the connecting rod cap to the connecting rod.
- Secure the connecting rod cap with two connecting rod cap nuts.
- Install the cylinder head to cylinder block. Refer to Cylinder Head Replacement .
- Install the cylinder head cover. Secure the cylinder head cover with four for new seal washers and nuts.
- Install the timing belt and the belt tensioner Refer to Timing Belt Tensioner Replacement .
- Install the distributor to the cylinder head. Refer to Distributor Replacement in Engine Electrical.
- Install the intake manifold and the Throttle Body Fuel Injection (TBI) Unit. Refer to Intake Manifold Replacement .
- Install the exhaust manifold from the cylinder head. Refer to Exhaust Manifold Replacement .
- Install the oil pump strainer (2) and the engine oil pan. Refer to Oil Pump Replacement .
- Refill the engine oil to specifications.
- Connect the negative battery cable.
| • | The pistons |
| • | The rings |
| • | The cylinder walls |
| • | The connecting rod bearings |
| • | The crankshaft |

Notice: Install a piece of hose over the threads of the rod bolts. This is to prevent damage to the bearing journal, the cylinder walls or rod bolt threads when installing the connecting rod. Remove hose after connecting rod is in place.
Using a hammer handle, gently tap the piston head to install the piston into the bore.
Notice: Use the correct fastener in the correct location. Replacement fasteners must be the correct part number for that application. Fasteners requiring replacement or fasteners requiring the use of thread locking compound or sealant are identified in the service procedure. Do not use paints, lubricants, or corrosion inhibitors on fasteners or fastener joint surfaces unless specified. These coatings affect fastener torque and joint clamping force and may damage the fastener. Use the correct tightening sequence and specifications when installing fasteners in order to avoid damage to parts and systems.
Tighten
Tighten the connecting rod cap nuts to 35 N·m (26 lb ft).
Tighten
Tighten the cylinder head cover washers and nuts to 5 N·m
(44 lb in).

