Removal Procedure
Tools Required
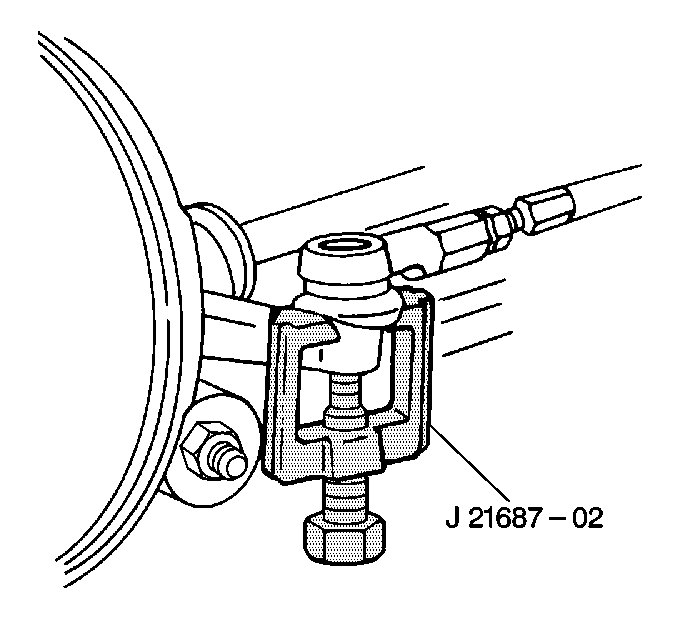
J 21867-02 Tie Rod End Remover
- Pull back the forward section of the driver's-side floor carpet.
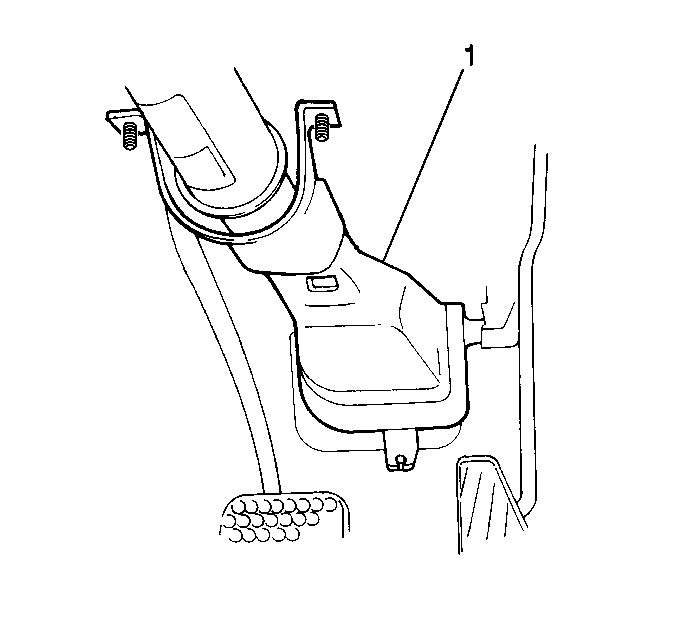
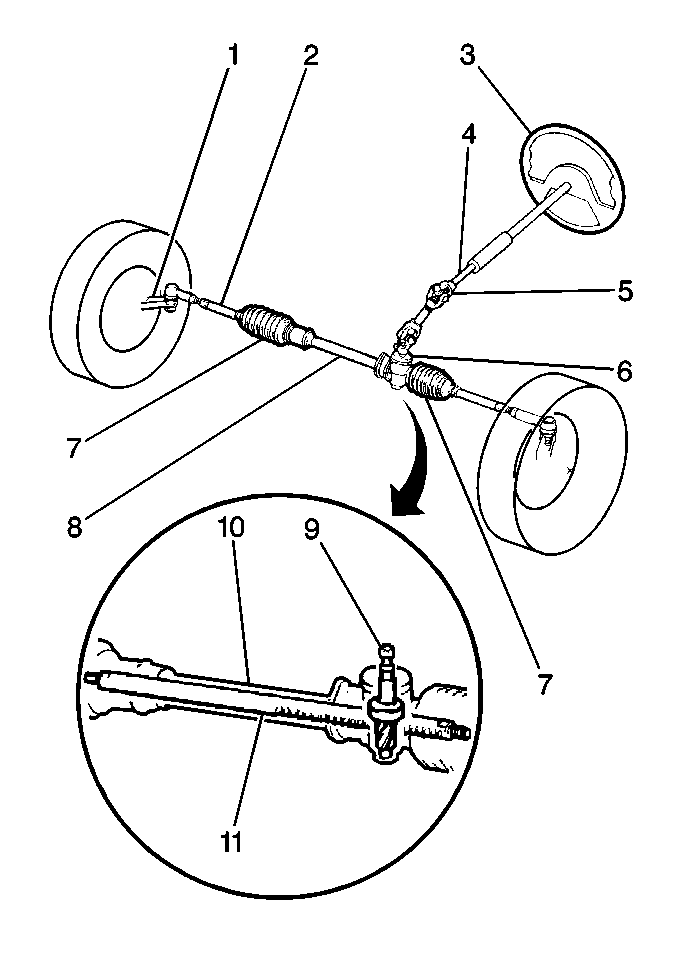
- Remove the steering shaft joint plastic cover (1) by hand.
- Loosen the upper steering shaft joint bolt.
- Remove the lower steering shaft joint nuts.
- Separate the shaft from the pinion.
- Raise and support the vehicle. Refer to Lifting and Jacking the Vehicle in General Information.
- Remove both of the front tires and wheels. Refer to Wheel Removal in Tires and Wheels.
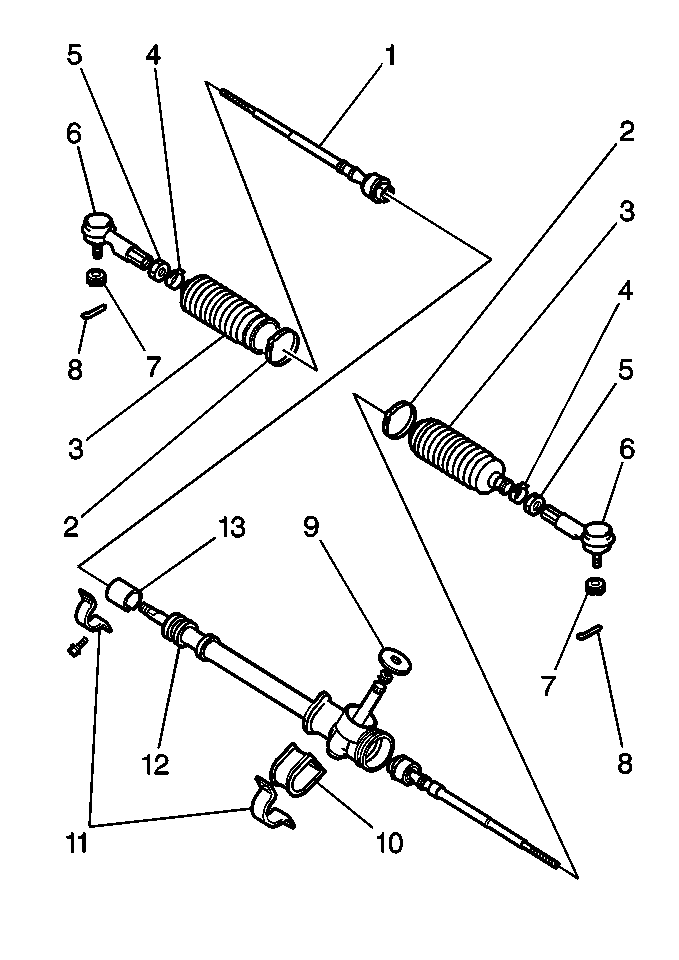
- Remove the following components from each tie rod end (3):
- Separate the tie rod ends from the right and the left steering knuckles using the J 21867-02 .
- Remove the 4 bolts from the steering gear mounting brackets in order to remove the steering gear from the bulkhead.
- Remove the steering gear (8) from the vehicle through the front wheel opening.
- Place match marks, using paint, on the inner tie rods and on the inner tie rod lock nuts in order to mark the location of the inner tie rod lock nuts.
- Remove the outer tie rod ends from the inner tie rods.
- Overhaul the manual steering gear, if necessary. Refer to Manual Steering Gear Overhaul .
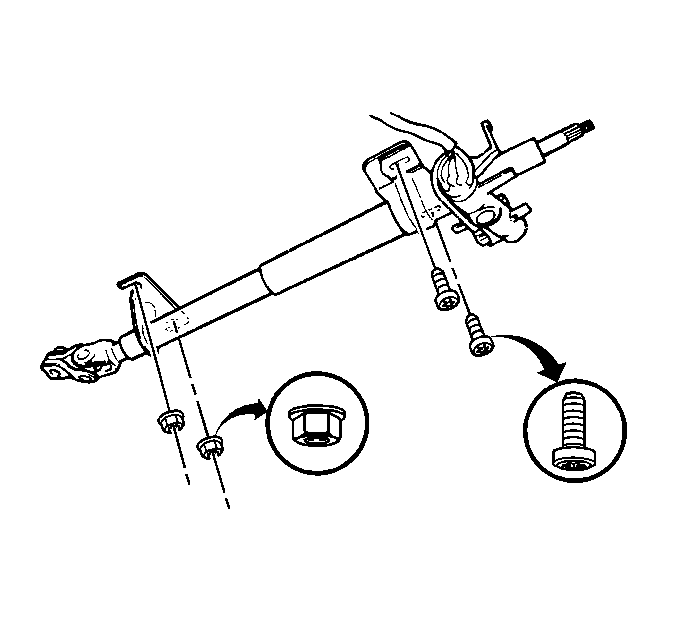
Important: Do not remove the upper steering shaft joint bolt.
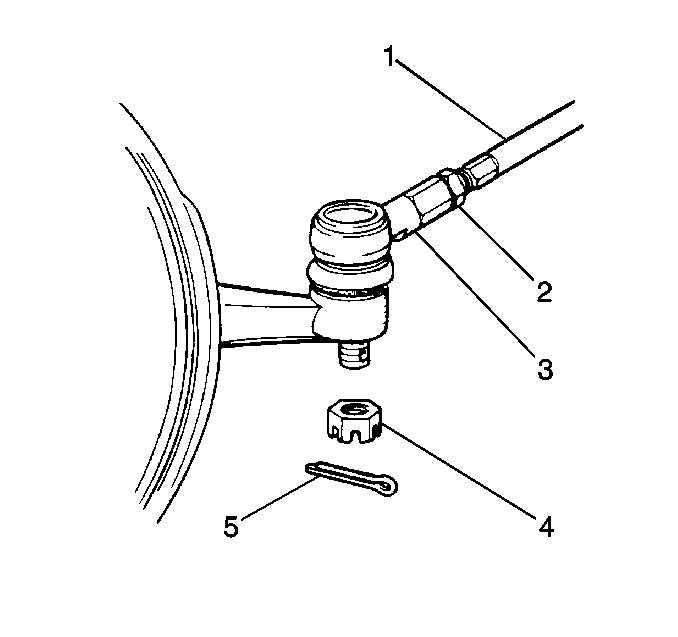
| • | The cotter pin (5) |
| • | The castle nut (4) |
Installation Procedure
- If replacing the steering gear, place match marks, using paint, on the new steering gear in the same locations as on the old steering gear.
- Install the steering gear (8) to the vehicle through the front wheel opening.
- Install the 4 bolts to the mounting brackets in order to secure the steering gear to the bulkhead.
- Install the inner tie rod lock nuts to the match marks on the inner tie rods.
- Install the right and the left tie rod ends to the inner tie rods.
- Install the right and the left tie rod ends (6) to the steering knuckles.
- Install the castle nuts (4) to the tie rod ends (3). Align the holes for the cotter pin (5) while you tighten the castle nuts (4) to the specification.
- Install the right and the left cotter pins (8).
- Install both of the front wheels. Refer to Wheel Installation in Tires and Wheels.
- Lower the vehicle.
- Install the lower steering shaft joint bolt.
- Connect the shaft to the pinion.
- Install the steering shaft joint plastic cover (1) by hand.
- Reposition the driver's-side floor carpet.
- Measure the wheel alignment. Refer to Wheel Alignment Measurement in Wheel Alignment.
- Adjust the toe. Refer to Front Toe Adjustment in Wheel Alignment.

Notice: Use the correct fastener in the correct location. Replacement fasteners must be the correct part number for that application. Fasteners requiring replacement or fasteners requiring the use of thread locking compound or sealant are identified in the service procedure. Do not use paints, lubricants, or corrosion inhibitors on fasteners or fastener joint surfaces unless specified. These coatings affect fastener torque and joint clamping force and may damage the fastener. Use the correct tightening sequence and specifications when installing fasteners in order to avoid damage to parts and systems.
Tighten
Tighten the bolts to 25 N·m (18 lb ft).

Tighten
Tighten the tie rod end castle nuts to 43 N·m (32 lb ft).

Bend the pin (8) ends in order to secure.

Tighten
Tighten the upper and the lower steering shaft joint bolts to 25 N·m
(18 lb ft).

