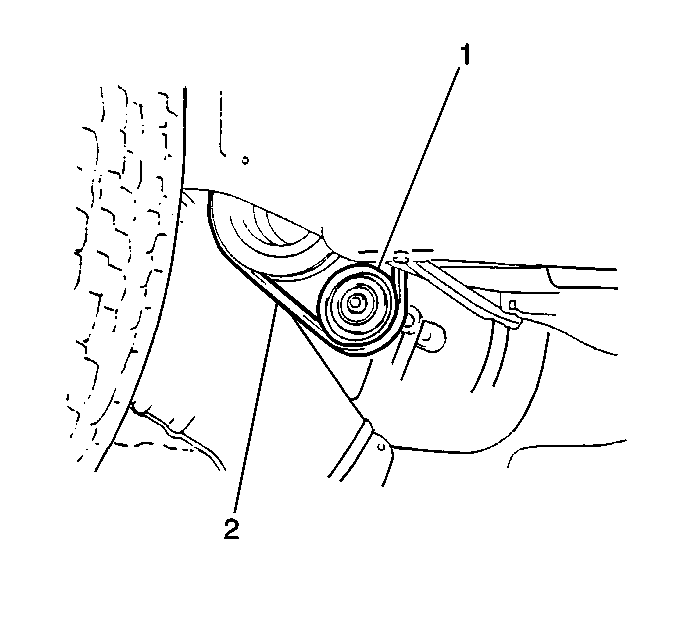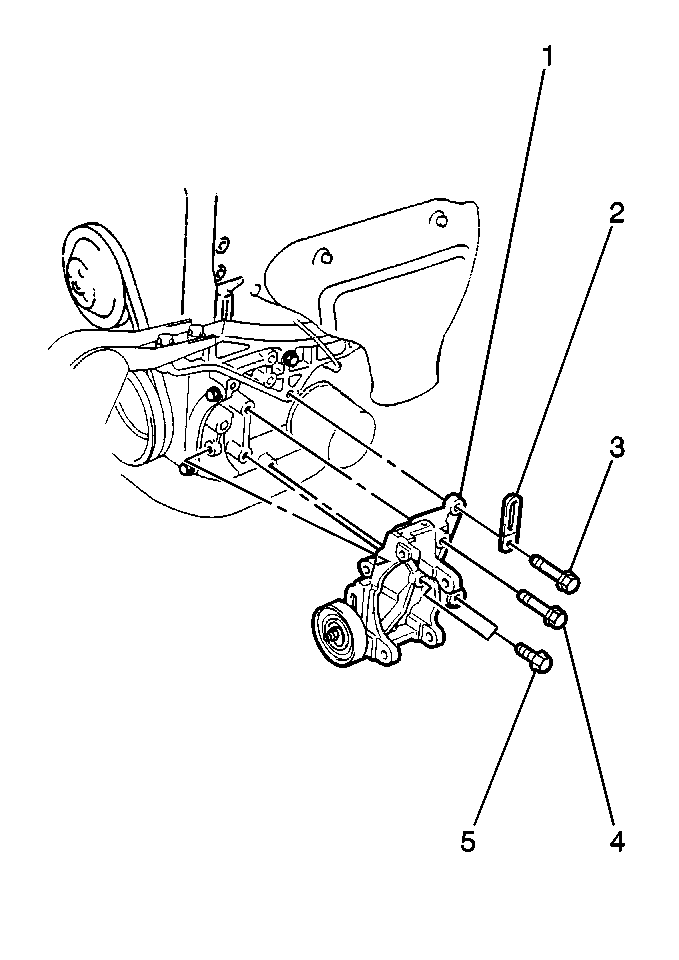
- Install the compressor
mounting bracket to the engine block.
Important: The proper torque sequence is essential in order to prevent damage to
the engine block or the compressor bracket.
Notice: Use the correct fastener in the correct location. Replacement fasteners
must be the correct part number for that application. Fasteners requiring
replacement or fasteners requiring the use of thread locking compound or sealant
are identified in the service procedure. Do not use paints, lubricants, or
corrosion inhibitors on fasteners or fastener joint surfaces unless specified.
These coatings affect fastener torque and joint clamping force and may damage
the fastener. Use the correct tightening sequence and specifications when
installing fasteners in order to avoid damage to parts and systems.
- Secure the compressor
bracket with 4 bolts (3,4,5). Tighten the bolts in the following
sequence:
- Tighten the bolts.
Tighten
Tighten the compressor bracket bolts to 34.3-39.2 N·m
(25.2-28.8 lb ft).
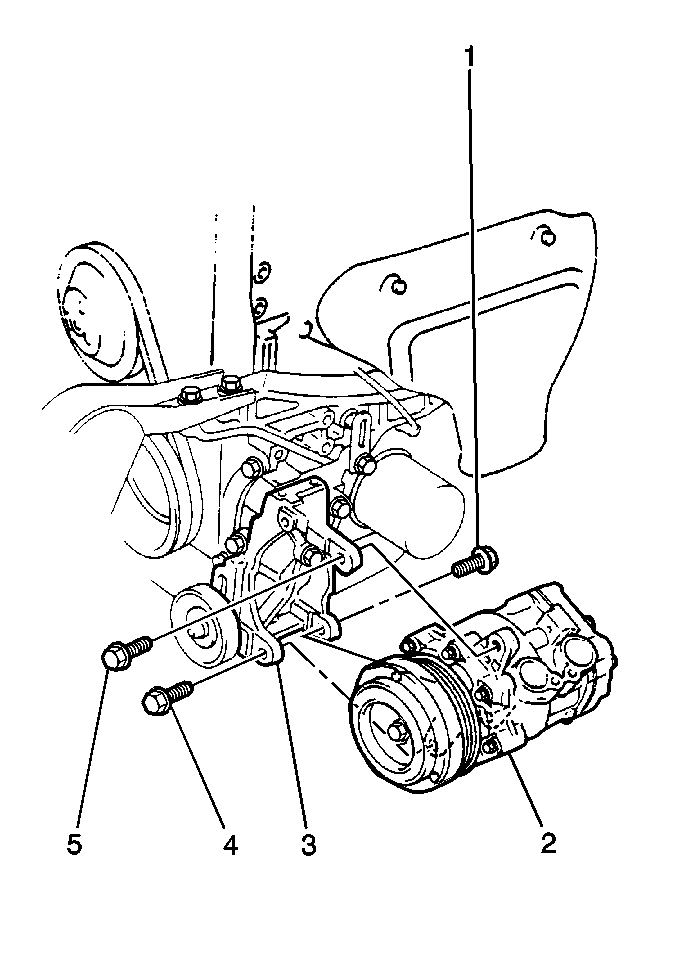
Important: The proper torque sequence is essential in order to prevent damage to
the compressor or the compressor bracket.
- Install the compressor to the compressor bracket.
- Secure the compressor with 3 bolts (1,4,5). Tighten
the bolts in the following sequence:
- Tighten the bolts.
Tighten
Tighten the compressor bolts to 22.5-27.4 N·m (16.5-20.1 lb ft).
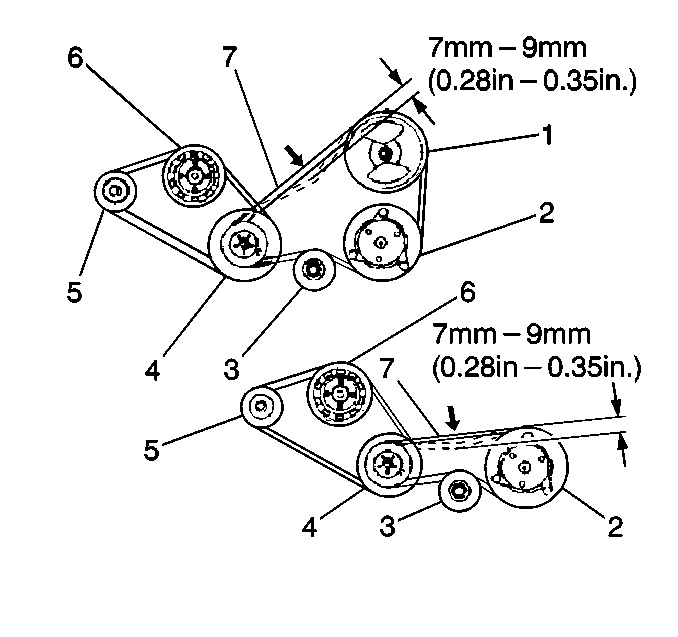
- Install the compressor
drive belt (2).
- Ensure that the belt is properly aligned on the compressor, power
steering (if equipped) and crankshaft pulleys.
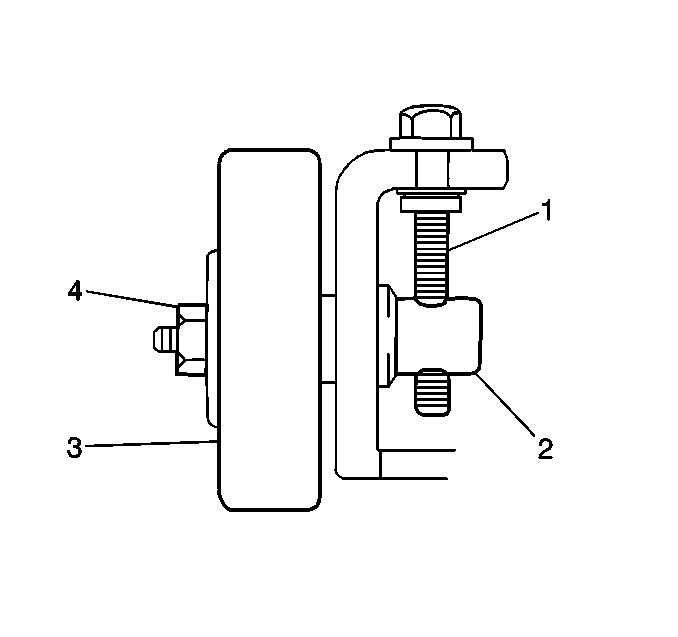
- Adjust the drive belt
tension.
| 9.1. | Turn the idler pulley adjusting bolt (1) to obtain 7-9 mm
(0.28-0.35 in) belt deflection at 10 kg (22 lbs)
of force (thumb pressure). |
| 9.2. | Tighten the idler pulley locknut (4). |
Tighten
Tighten the idler pulley locknut to 44.1-49 N·m (32.4-36 lb ft).
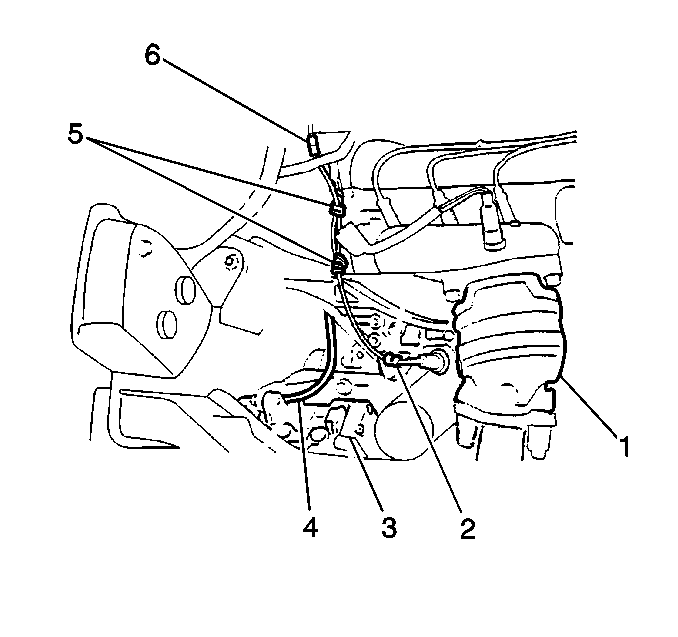
- Connect the compressor
clutch electrical connector (6).
- Secure the electrical connector wire with the clamps (5).
- Install the engine splash shield. Refer to
Engine Splash Shield Replacement
in Body Front End.
- Lower the vehicle.
- Install the power steering pump and bracket, if removed, Refer
to
Power Steering Pump Replacement
in Power Steering.


