- Disconnect the negative battery cable.
- Disconnect the rear window defogger battery feed wire.
- Inspect the rear window defogger grid lines for breaks.
- Use a wax pencil or a crayon in order to mark grid line breaks on the outside of the window.
- Perform the following steps in order to clean the grid line area that you intend to repair:
- Install one of the following items:
- Mix the grid repair material. Stir the material until a uniform silver color appears.
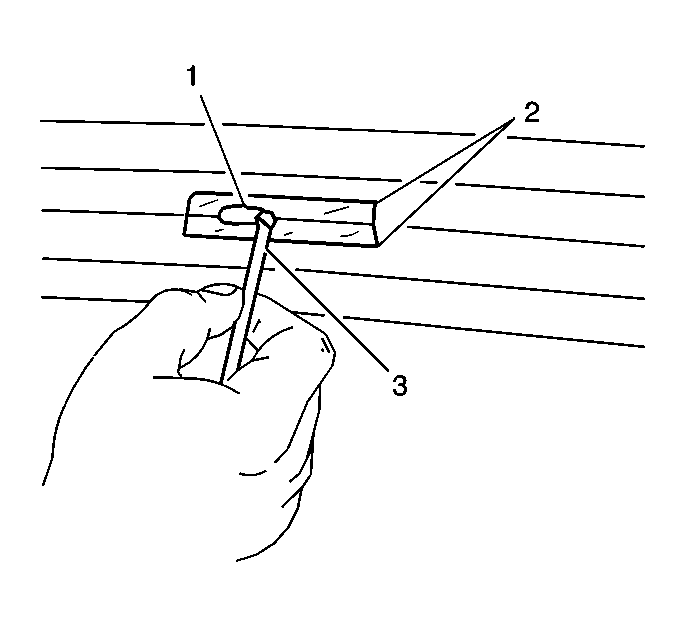
- The window must be at room temperature. Apply the grid repair material (1) to the repair area, using a small plastic paddle (3) or the equivalent.
- Carefully remove the decal or the tape.
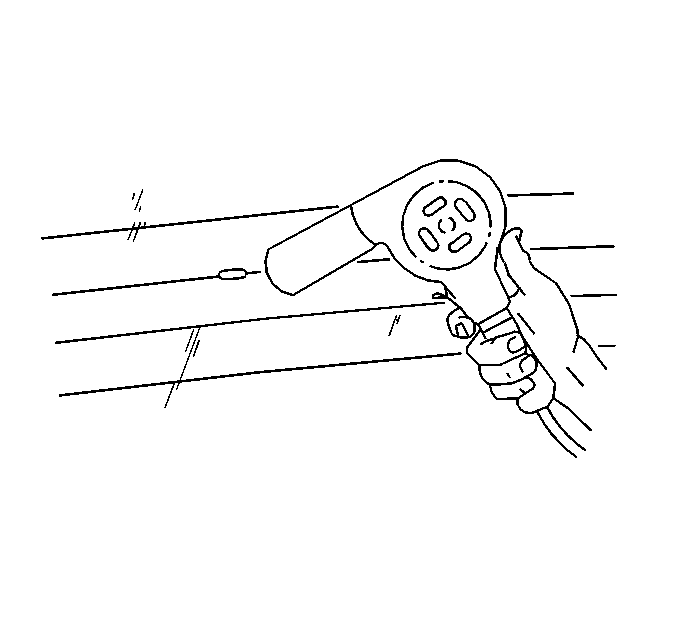
- Using a heat gun, apply heat to the repair area for 2-3 minutes under the following conditions:
- Inspect the grid line repair area. If the repair appears discolored, apply a coating of tincture of iodine to the repair area using a pipe cleaner or a fine brush.
- Connect the negative battery cable.
- Test the defogger operation in order to verify the grid line repair.
Caution: To avoid personal injury:
• Do not allow the repair material to come in contact with skin
or eyes and avoid breathing vapors. • Do not use near sparks or open flame.
Important: The rear defogger repair kit GM P/N 12346001 includes all of the materials needed for grid line repair of the rear window defogger. You may also use an equivalent repair material.
Caution: Unless directed otherwise, the ignition and start switch must be in the OFF or LOCK position, and all electrical loads must be OFF before servicing any electrical component. Disconnect the negative battery cable to prevent an electrical spark should a tool or equipment come in contact with an exposed electrical terminal. Failure to follow these precautions may result in personal injury and/or damage to the vehicle or its components.
| 5.1. | Buff the area using steel wool. |
| 5.2. | Wipe the area clean, using a cloth dampened with denatured alcohol. Do NOT use materials beyond their expiration date. |
| 5.3. | Buff and clean the area about 6 mm (0.25 in) beyond each side of the break in the grid line. |

Important:
• Use the repair decal or the tape in order to control the width
of the repair area. • If you use a decal, the die-cut metering slot MUST be the same
width as the grid line.
| • | A grid line repair decal (2) |
| • | 2 strips of tape - 1 positioned above and 1 positioned below the repair area |

Notice: The grid line repair material must be cured with heat. To avoid heat damage to the interior trim, protect the trim near the repair area where heat is to be applied.
| • | Hold the heat gun nozzle 25 mm (1 in) from the surface. |
| • | A minimum temperature of 50°C (200°F) is required. |
Allow the iodine to dry for about 30 seconds.
Carefully wipe off the excess iodine with a lint-free cloth.
Caution: At least 24 hours are required for complete curing of repair material. The repair area should not be physically distrubed until after that time. Insufficient curing of urethane adhesive may allow unrestrained occupants to be ejected from the vehicle resulting in personal injury.
