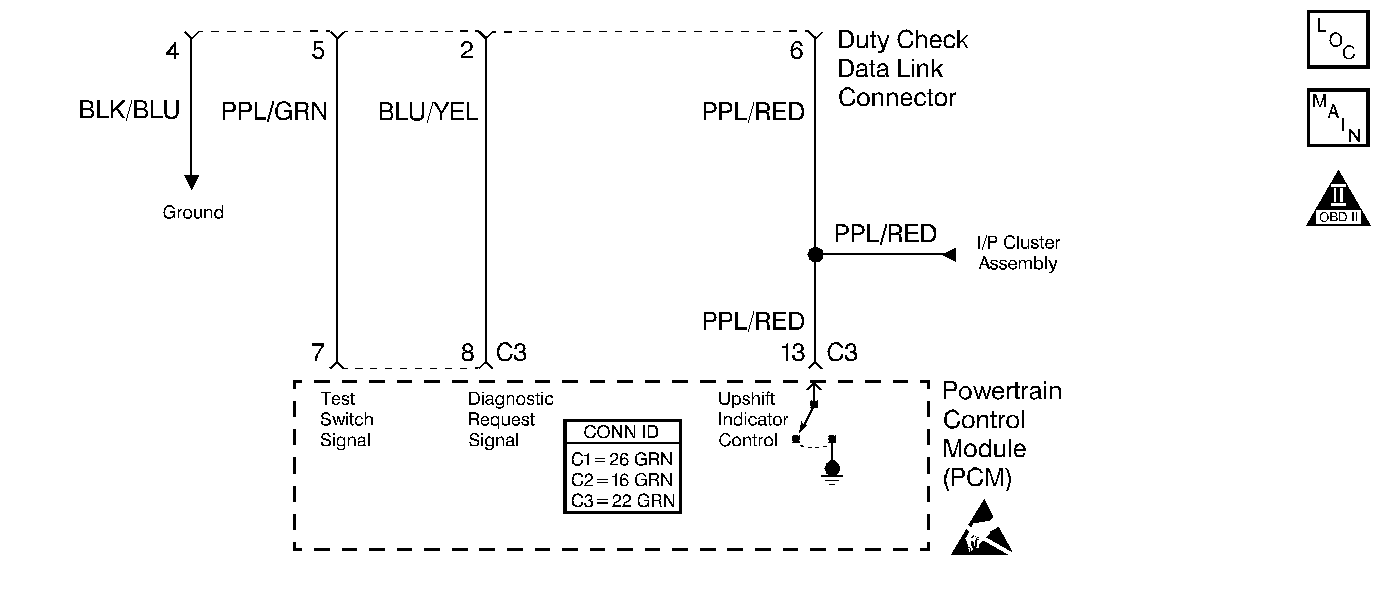
Circuit Description
The test switch terminal is located in the duty check data link connector behind the glovebox. The PCM fixes the ignition timing to the base setting when the test switch terminal is grounded.
Condition for Running the DTC
| • | Engine running at steady speed. |
| • | Engine operating in Close Loop. |
Conditions for Setting the DTC
| • | Vehicle speed is greater than 2 km/h (1 mph). |
| • | The test switch is ON (circuit is grounded). |
| • | The condition is present for 5 seconds |
Action Taken When the DTC Sets
| • | The PCM illuminates the malfunction indicator lamp (MIL). |
| • | The PCM records the operating conditions at the time the diagnostic fails. This information is stored in the Freeze Frame buffer. |
Conditions for Clearing the MIL/DTC
| • | The PCM turns OFF the MIL after three consecutively passing trips without a fault present. |
| • | A History DTC clears after 40 consecutive warm-up cycles without a fault. |
| • | Use the scan tool Clear DTC Information function in order to clear the DTC information. |
Diagnostic Aids
Check for a damaged wiring harness. Inspect the wiring harness for damage that may cause a short to ground. With the engine running, wiggle the wiring harness to the duty check data link connector while monitoring the Spark Advance Adjust Test Switch parameter on a scan tool for an ON display, indicating that the harness is shorting to ground.
Test Description
The numbers below refer to the step numbers in the Diagnostic Table.
-
The Powertrain (OBD) System Check prompts the technician to complete some basic checks and store the Freeze Frame data on the scan tool if applicable. This creates an electronic copy of the data taken when the fault occurred. The information is then stored in the scan tool for later reference.
-
This step determines if fault is present.
-
This step checks for a short to ground on the test switch terminal and its circuitry. When there is a short to ground in the test switch signal circuit the ignition timing will be fixed.
Step | Action | Value(s) | Yes | No |
|---|---|---|---|---|
Did you perform the Powertrain On-Board Diagnostic (OBD) System Check? | -- | |||
Does the Spark Advance Adjust Test Switch parameter on the scan tool indicate ON? | -- | Fault not Present-Go to Diagnostic Aids | ||
Is the voltage near the specified value? | 5 volts | Go to Diagnostic Aids | ||
4 |
Was a repair necessary? | -- | ||
5 | Replace the PCM. Refer to Powertrain Control Module Replacement . Is the action complete? | -- | -- | |
6 |
Are any DTCs displayed on the scan tool? | -- | Go to the Applicable DTC Table | System OK |
