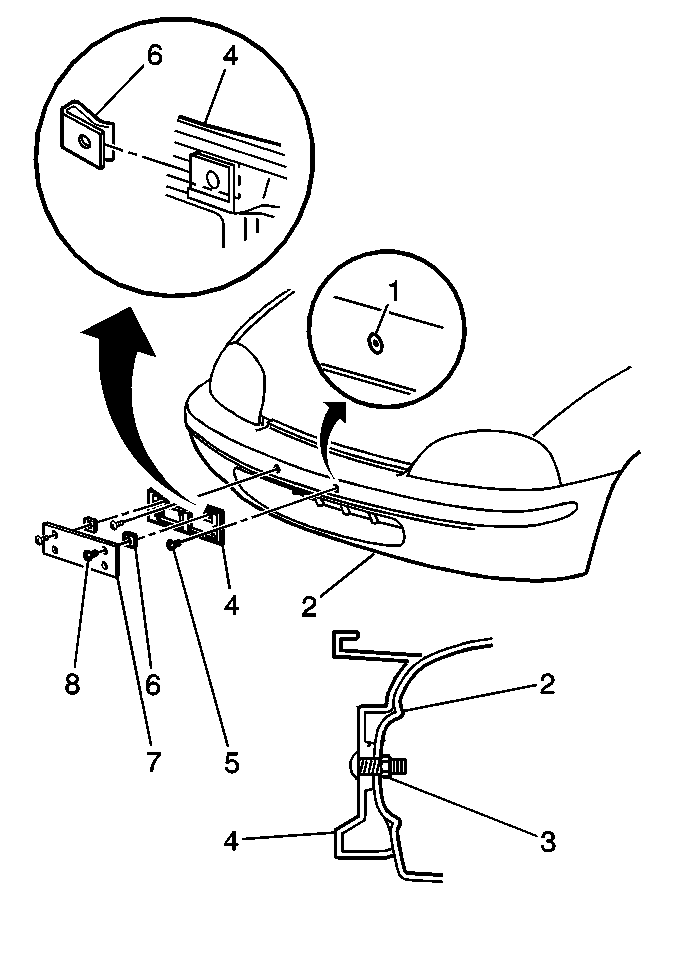
Removal Procedure

- Remove the 2 screws (8) that retain the license plate.
- Remove the license plate (7).
- Remove the 2 screws (5) that retain the front license plate bracket.
- Remove the front license plate bracket (4) from the front bumper fascia (2).
Installation Procedure

- If you are installing the front license plate bracket (4) for the first time, perform the following steps:
| 1.1. | Drill a pilot hole at each dimple (1) in the front bumper fascia (2).The diameter should be 4 mm (5/32 in), and the depth should be approximately 3 mm (1/8 in). |
| 1.2. | Enlarge the pilot holes to approximately 8 mm (5/16 in) and to approximately 3 mm (1/8 in) deep. |
- Install 2 spring nuts (6) to the front license plate bracket (4) in the following circumstances:
| 2.1. | You are installing the bracket for the first time. |
| 2.2. | The spring nuts (6) are missing |
- Install the bracket (4) to the front bumper fascia (2).
Secure the bracket with the 2 screws (5).
- Install the license plate (7) to the bracket (4).
Secure the license plate with the 2 screws (8).


