Removal Procedure
- Remove one-third of the brake fluid from the master cylinder.
- Raise and suitably support the vehicle. Refer to
Lifting and Jacking the Vehicle
.
- Remove the tires and the wheel. Refer to
Tire and Wheel Removal and Installation
.
Install two wheel nuts in order to retain the rotor.

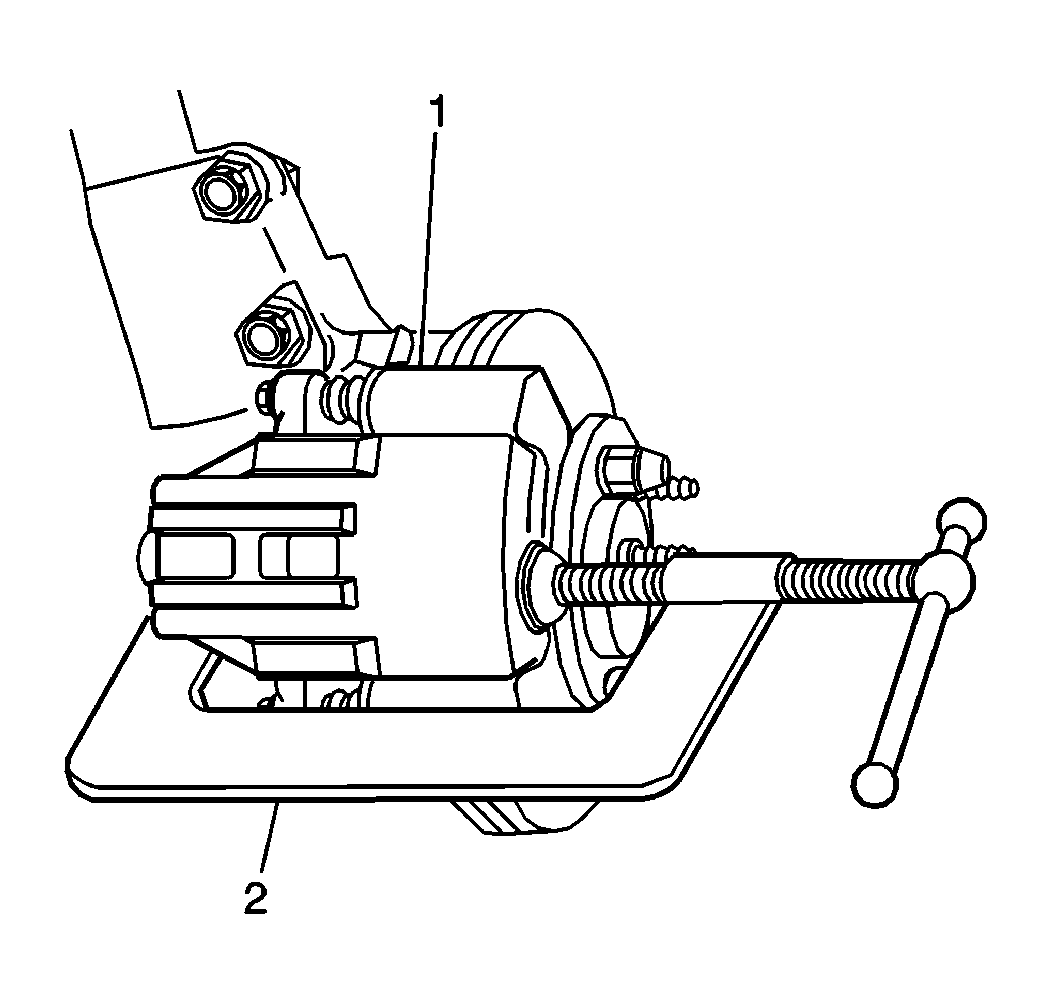
- Install a large C-clamp
(2) over the top of the brake caliper and against the back of the outboard
brake pad.
- Tighten the C-clamp until the caliper piston is pushed into the
caliper bore enough to slide the caliper off the rotor.
- Remove the hose bolt attaching the inlet fitting.

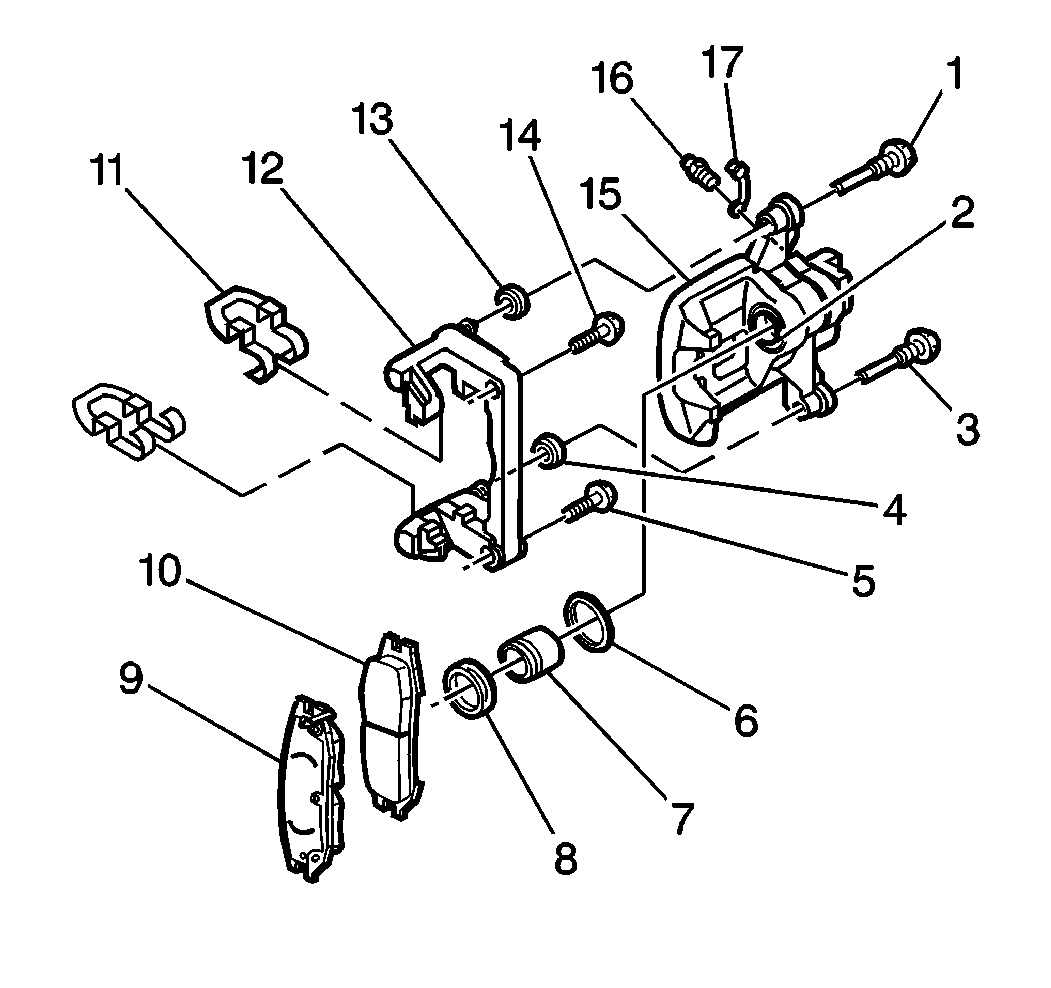
- Plug the openings in the caliper housing (15) and the pipe in
order to prevent brake fluid loss and contamination.
- Remove the caliper bolts (1 and 3).

Notice: Do not allow calipers to hang from the flexible hoses. Doing so can
damage the hoses.
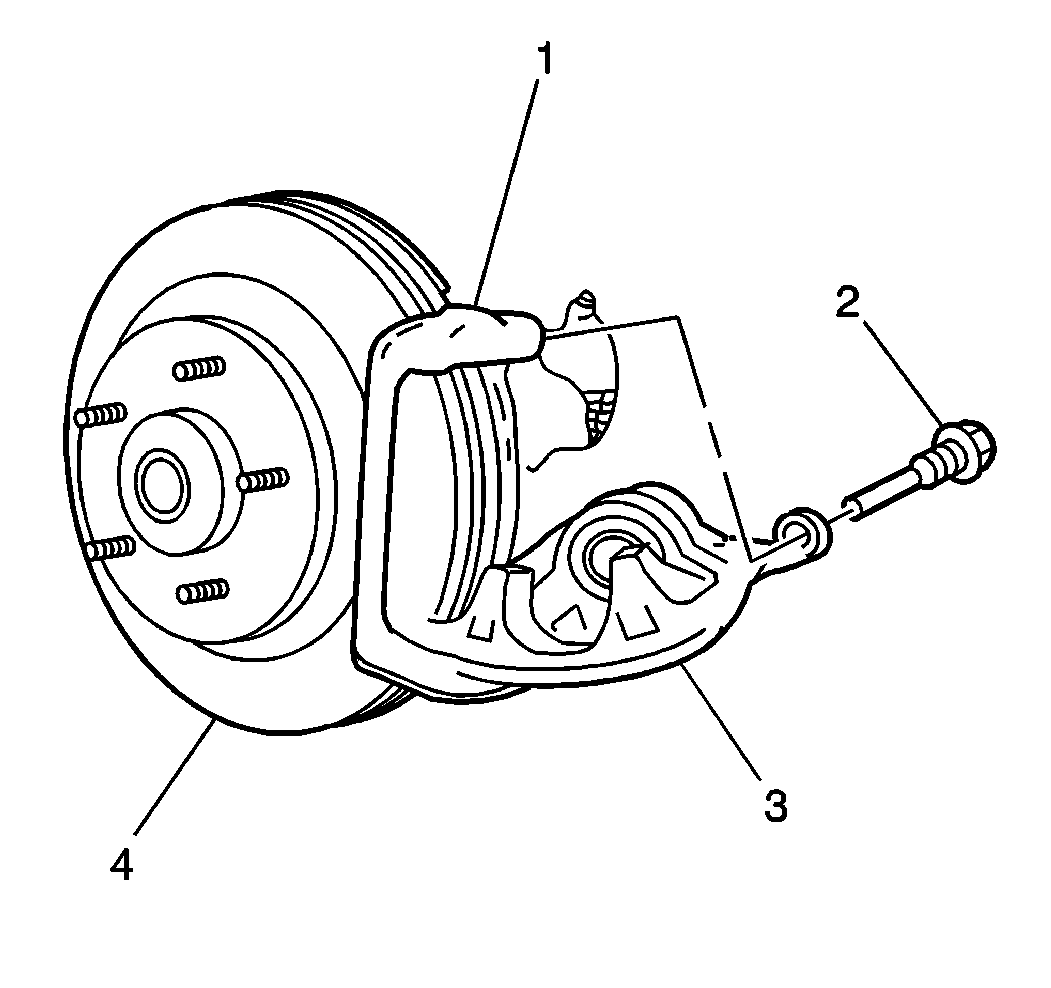
- Remove the caliper housing (3) from the rotor (4) and the caliper bracket
(1).
- Inspect the piston boots for the following conditions:
- Inspect the caliper bracket boots for the following conditions:
- Inspect the caliper bolts (2) for corrosion or damage. If corrosion
is found, use new parts, including bushings, when installing caliper. Do not
attempt to polish away corrosion.
Installation Procedure

- Install the caliper (3)
over the rotor (4) and the caliper bracket (1). Ensure that the bushings are
in place.

- Lubricate the caliper
bolts (1 and 3). Use silicone grease. Do not lubricate the threads.
- Lubricate the two rubber boots (13 and 4) in the caliper bracket
(12). Use silicone grease.
Notice: Use the correct fastener in the correct location. Replacement fasteners
must be the correct part number for that application. Fasteners requiring
replacement or fasteners requiring the use of thread locking compound or sealant
are identified in the service procedure. Do not use paints, lubricants, or
corrosion inhibitors on fasteners or fastener joint surfaces unless specified.
These coatings affect fastener torque and joint clamping force and may damage
the fastener. Use the correct tightening sequence and specifications when
installing fasteners in order to avoid damage to parts and systems.
- Install the caliper
bolts (1 and 3). Use a screwdriver in order to push the boot over the shoulder
of the caliper bolt. Ensure that the boot is securely in the
groove of the caliper bolt.
Tighten
Tighten the caliper bolts (1 and 3) to 43 N·m(32 lb ft).
Important: Replace the copper gaskets.
- Install the brake hose bolt.
Tighten
Tighten the brake hose bolt to 44 N·m(32 lb ft).
- Remove the wheel nuts securing the rotor to the hub and bearing.
- Install the tires and the wheels. Refer to
Tire and Wheel Removal and Installation
.
Align the previous marks on the wheel and the hub and bearing.
- Lower the vehicle.
- Fill the master cylinder to the proper level with clean brake
fluid. Refer to
Master Cylinder Reservoir Filling
.
- Bleed the entire brake system. Refer to
Hydraulic Brake System Bleeding
.
- Apply approximately 238 N (175 lb) of force to the
brake pedal three times in order to seat the pads against the rotor.
- Inspect the hydraulic brake system for brake fluid leaks. Refer
to
Brake Fluid Leak
.


