Removal Procedure
- Disconnect the negative battery cable.
- Remove the hood. Refer to Hood Replacement in Body Front End.
- Drain the engine coolant. Refer to Cooling System Draining and Filling in Engine Cooling.
- Evaporate and recover the refrigerant. Refer to Refrigerant Recovery and Recharging in HVAC System - Manual.
- Remove the air cleaner assembly. Refer to Air Cleaner Assembly Replacement in Engine Controls - 2.4L.
- Disconnect the brake booster vacuum line at the intake manifold.
- Remove the fuel injector rail cover. Refer to Fuel Injection Fuel Rail Assembly Replacement in Engine Controls - 2.4L.
- Remove the accelerator and the cruise control cables from the cable bracket. Refer to Accelerator Control Cable Bracket Replacement in Engine Controls - 2.4L.
- Disconnect the engine wiring harness from the underhood engine components . Refer to Starting and Charging Schematics in Engine Electrical.
- Remove the cruise control module. Refer to Cruise Control Module Replacement (2.4L) in Cruise Control.
- Disconnect the A/C line from the accumulator. Refer to Accumulator Replacement in HVAC System - Manual.
- Remove the drive belt. Refer to Drive Belt Replacement .
- Remove the surge tank. Refer to Radiator Surge Tank Replacement in Engine Cooling.
- Remove the upper and lower radiator hoses. Refer to Radiator Hose Replacement in Engine Cooling.
- Remove the fuel feed lines at the engine. Refer to Fuel Hose/Pipes Replacement - Engine Compartment in Engine Controls - 2.4L.
- Raise and support the vehicle. Refer to Lifting and Jacking the Vehicle in General Information.
- Remove the coolant pipe assembly. Refer to Coolant Pipe Replacement - Intake in Engine Cooling.
- Remove the right side wheel and tire assembly. Refer to Tire and Wheel Removal and Installation in Tires and Wheels.
- Remove the right side splash shield. Refer to Wheelhouse Splash Shield Replacement in Body Front End.
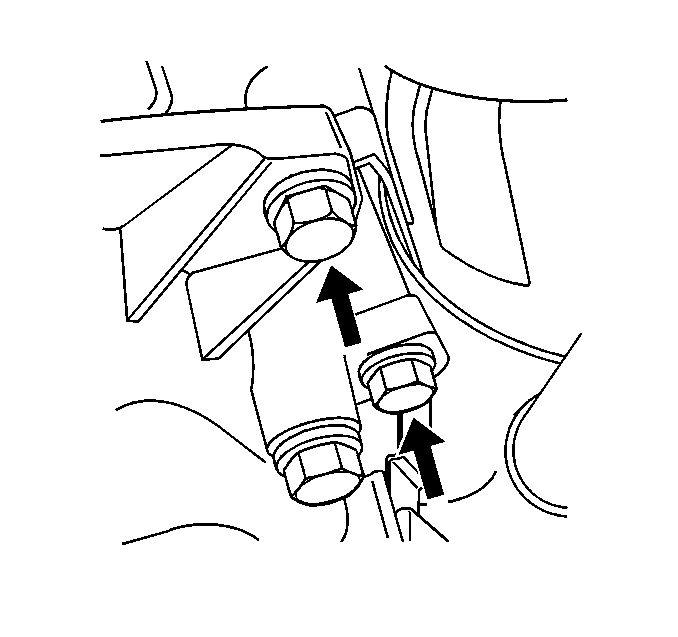
- Remove the engine mount strut. Refer to Engine Mount Strut Replacement .
- Remove the flywheel dust cover.
- Remove the exhaust pipe and hanger from the exhaust manifold. Refer to Exhaust Manifold Replacement (2.4L) in Engine Exhaust.
- Remove the starter. Refer to Starter Motor Replacement in Engine Electrical.
- Remove and support the A/C compressor. Refer to Compressor Replacement (2.4L) in HVAC System - Manual.
- Remove the A/C compressor bracket. Refer to Compressor Mounting Bracket Replacement (2.4L) in HVAC System - Manual.
- Drain the engine oil. Refer to Engine Oil and Oil Filter Replacement .
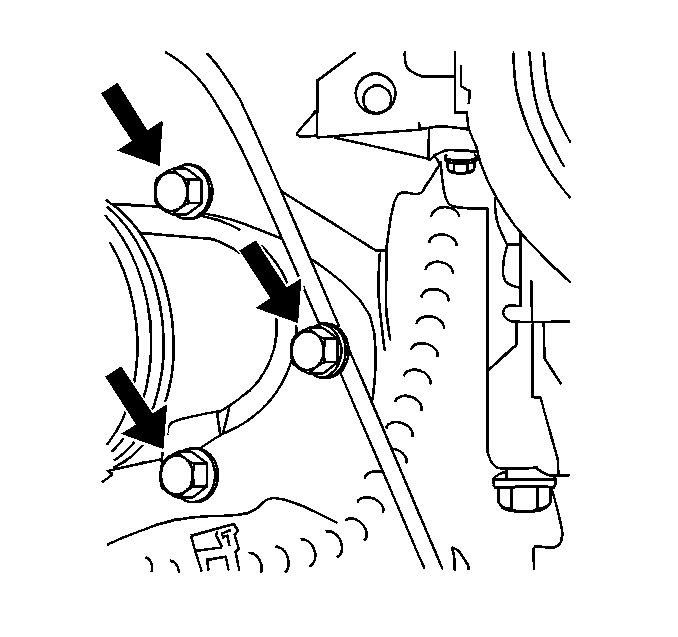
- Remove the torque converter bolts.
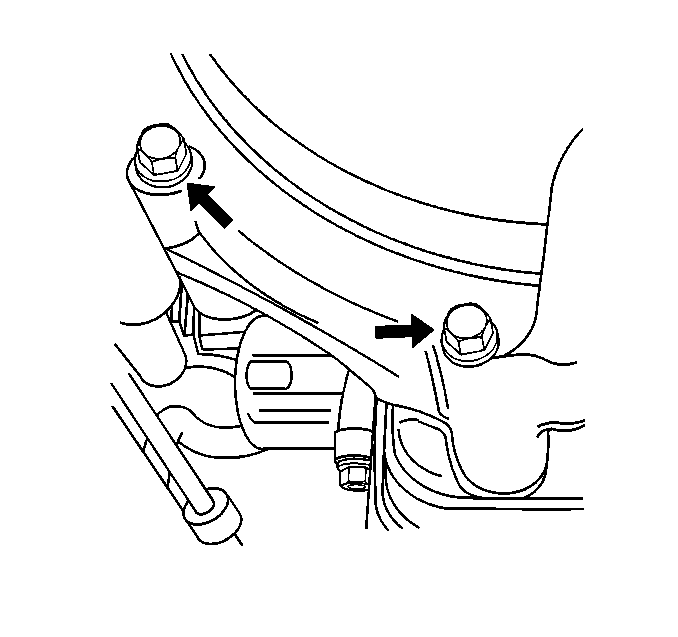
- Remove the transmission -to -engine support brace.
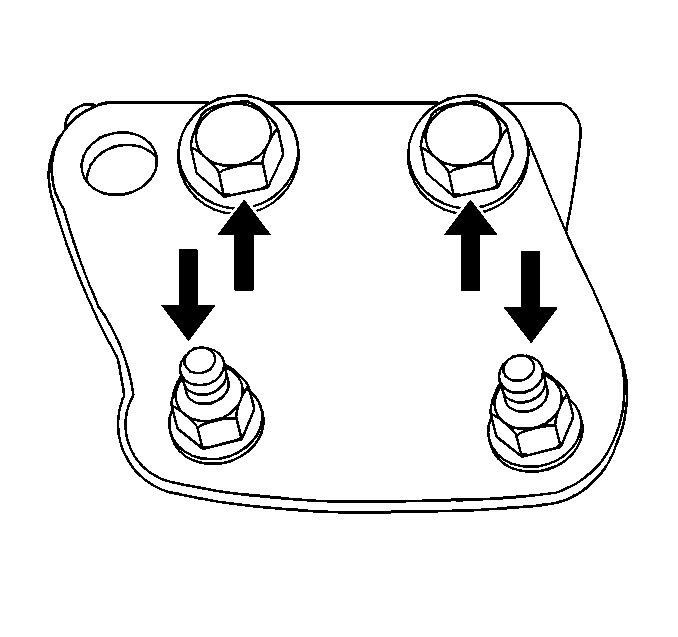
- Remove the lower transmission -to -engine bolts.
- Lower the vehicle.
- Support the transmission with a suitable jack.
- Install the engine lifting device to the engine lifting eyes.
- Remove the upper front engine mount.
- Remove the remaining transmission -to -engine bolts.
- Separate the engine from the transmission and lift the engine from the vehicle.
Caution: Unless directed otherwise, the ignition and start switch must be in the OFF or LOCK position, and all electrical loads must be OFF before servicing any electrical component. Disconnect the negative battery cable to prevent an electrical spark should a tool or equipment come in contact with an exposed electrical terminal. Failure to follow these precautions may result in personal injury and/or damage to the vehicle or its components.
Caution: In order to avoid possible injury or vehicle damage, always replace the accelerator control cable with a NEW cable whenever you remove the engine from the vehicle.
In order to avoid cruise control cable damage, position the cable out of the way while you remove or install the engine. Do not pry or lean against the cruise control cable and do not kink the cable. You must replace a damaged cable.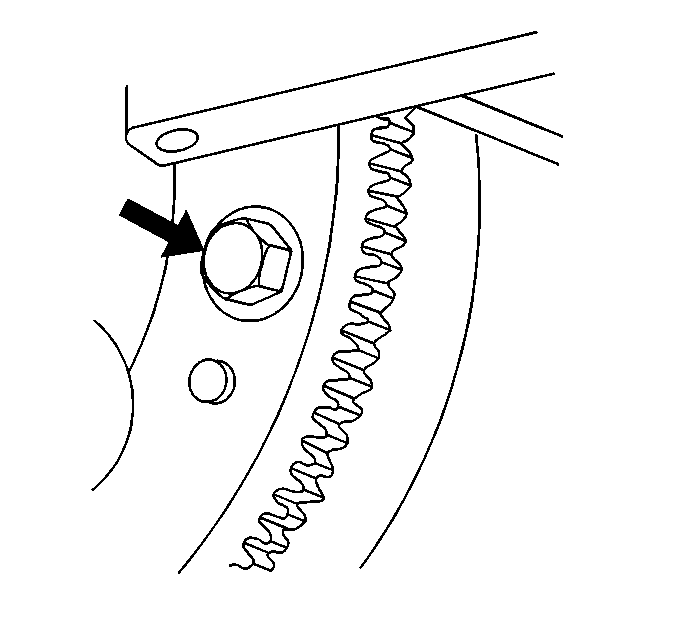
Installation Procedure
- Position the engine in the vehicle.
- Hand-tighten the upper transmission to engine bolts.
- Install the front upper engine mount.
- Remove the engine lifting device from the lifting eyes.
- Remove the jack supporting the transmission.
- Raise the vehicle.
- Install the lower transmission -to -engine bolts
- Install the lower transmission -to -engine brace.
- Install the torque converter bolts.
- Install the A/C compressor bracket. Refer to Compressor Mounting Bracket Replacement (2.4L) in HVAC System - Manual.
- Install the A/C compressor. Refer to Compressor Replacement (2.4L) in HVAC System - Manual.
- Install the starter. Refer to Starter Motor Replacement in Engine Electrical.
- Install the exhaust pipe and hanger to the exhaust manifold. Refer to Exhaust Manifold Replacement (2.4L) in Engine Exhaust.
- Install the flywheel dust cover.
- Install the engine mount strut. Refer to Engine Mount Strut Replacement .
- Install the right side splash shield. Refer to Wheelhouse Splash Shield Replacement in Body Front End.
- Install the right side wheel and tire assembly. Refer to Tire and Wheel Removal and Installation in Tires and Wheels.
- Install the coolant pipe assembly. Refer to Coolant Pipe Replacement - Intake in Engine Cooling.
- Lower the vehicle.
- Install the fuel feed lines at the engine. Refer to Fuel Hose/Pipes Replacement - Engine Compartment .
- Connect the upper and lower radiator hoses. Refer to Radiator Hose Replacement in Engine Cooling.
- Install the surge tank. Refer to Radiator Surge Tank Replacement in Engine Cooling.
- Install the fuel rail cover. Refer to Fuel Rail Assembly Replacement in Engine Controls - 2.4L.
- Install the drive belt. Refer to Drive Belt Replacement .
- Connect the A/C line to the accumulator. Refer to Accumulator Replacement in HVAC System - Manual.
- Install the cruise control module. Refer to Cruise Control Module Replacement (2.4L) in Cruise Control.
- Install the engine wiring harness. Refer to Starting and Charging Schematics in Engine Electrical.
- Install the accelerator and the cruise control cable. Refer to Accelerator Control Cable Bracket Replacement in Engine Controls - 2.4L.
- Connect the brake booster vacuum line at the manifold.
- Install the air cleaner assembly. Refer to Air Cleaner Assembly Replacement in Engine Controls - 2.4L.
- Fill the cooling system. Refer to Cooling System Draining and Filling in Engine Cooling.
- Evacuate and recharge the A/C system. Refer to Refrigerant Recovery and Recharging in HVAC System - Manual.
- Install the hood. Refer to Hood Replacement in Body Front End.
- Connect the battery cable.
- Start the engine and check for leaks.
- Check all of the fluid levels.
Caution: In order to avoid possible injury or vehicle damage, always replace the accelerator control cable with a NEW cable whenever you remove the engine from the vehicle.
In order to avoid cruise control cable damage, position the cable out of the way while you remove or install the engine. Do not pry or lean against the cruise control cable and do not kink the cable. You must replace a damaged cable.