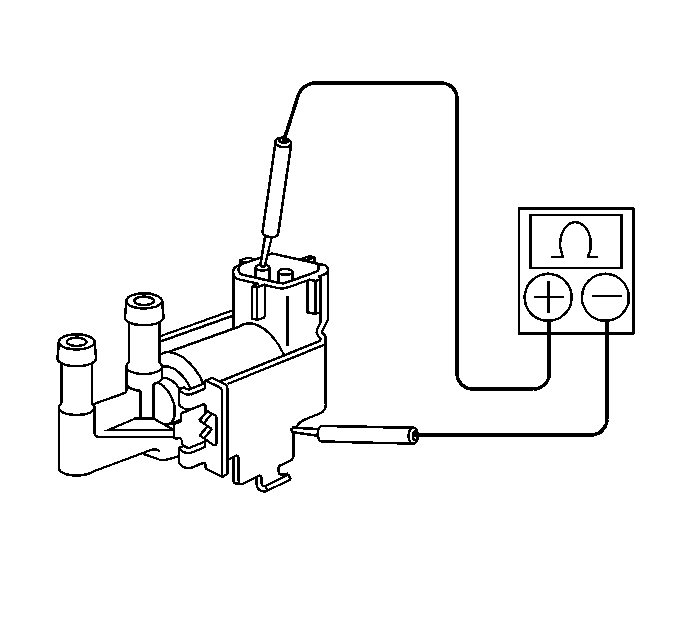
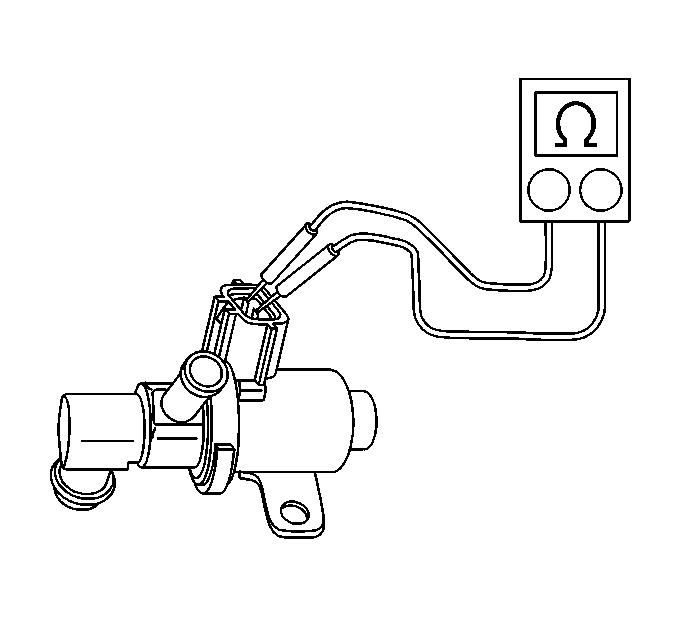
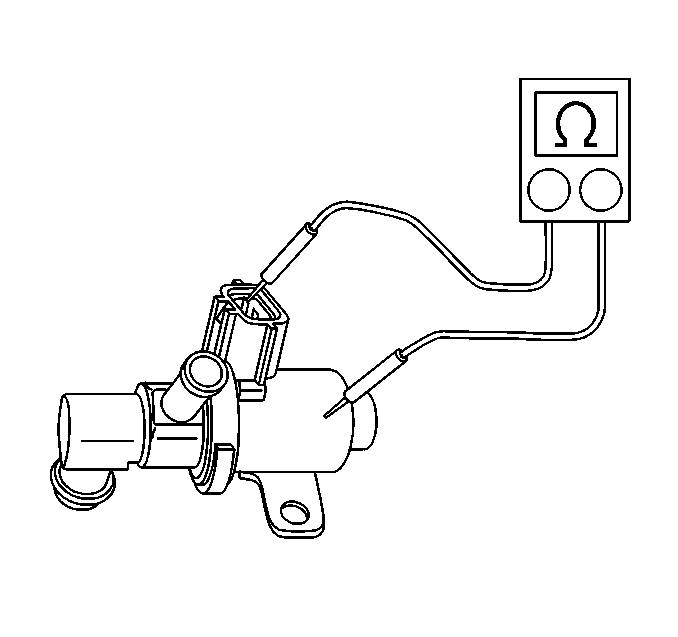
EVAP Canister Purge Valve Inspection
- Remove the EVAP canister purge valve. Refer to Evaporative Emission Canister Purge Solenoid Valve Replacement .
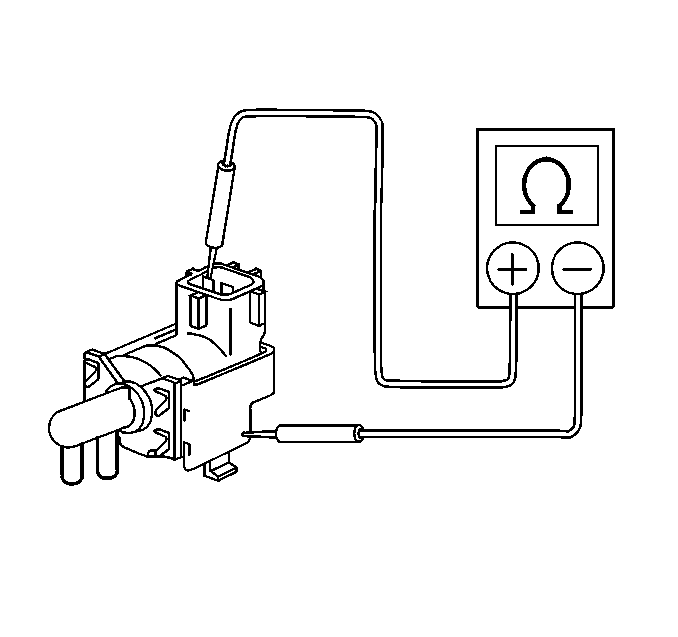
- Use a DMM in order to measure the resistance of the EVAP canister purge valve.
- Replace the EVAP canister purge valve if the resistance is not within the specified range. The solenoid will damage the PCM if the resistance value is less than 27 ohms.
- Check the PCM and replace if necessary. Refer to Powertrain Control Module Replacement .
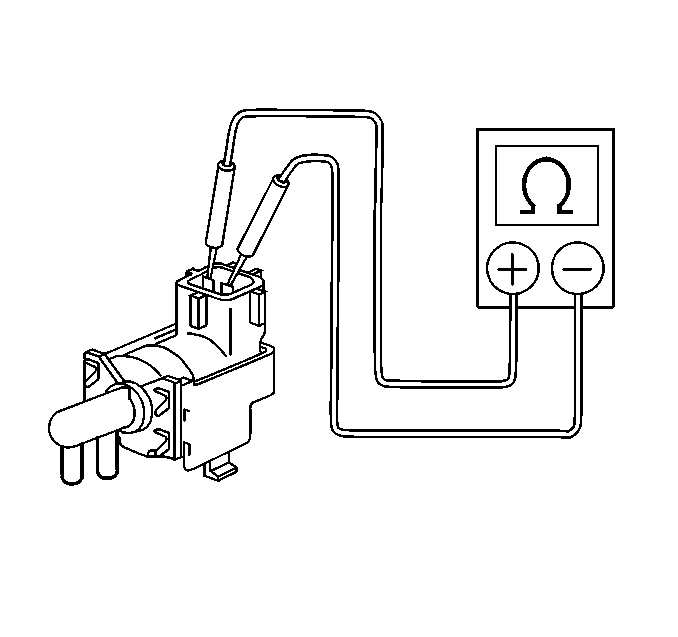
- Check for continuity of each terminal to the valve body.
- Replace the EVAP canister purge valve if continuity is present.
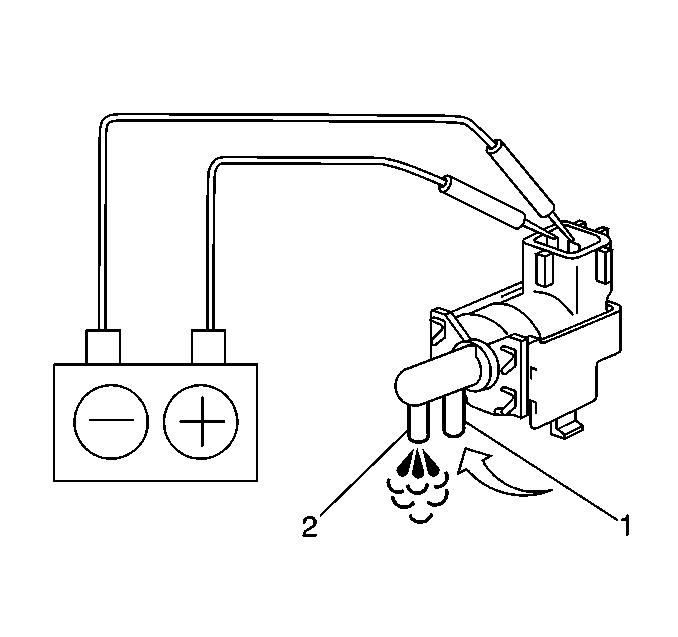
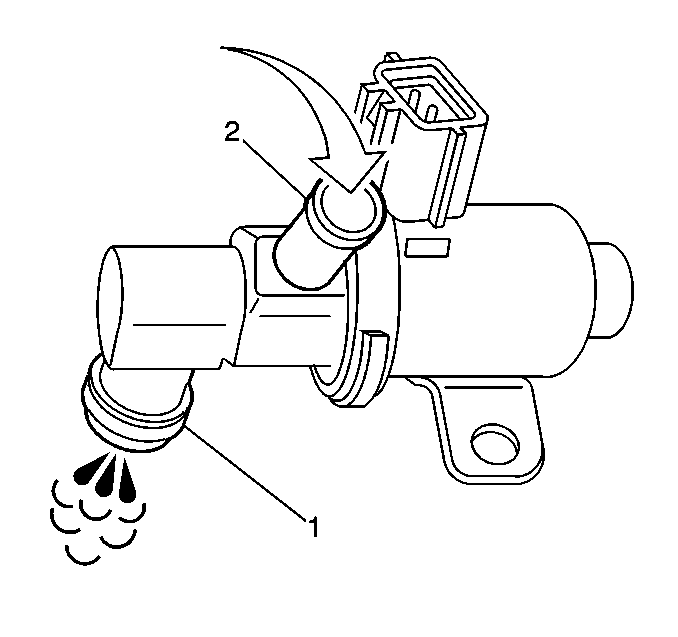
- Blow air into the inboard port (1). The air should NOT flow through the outboard port (2).
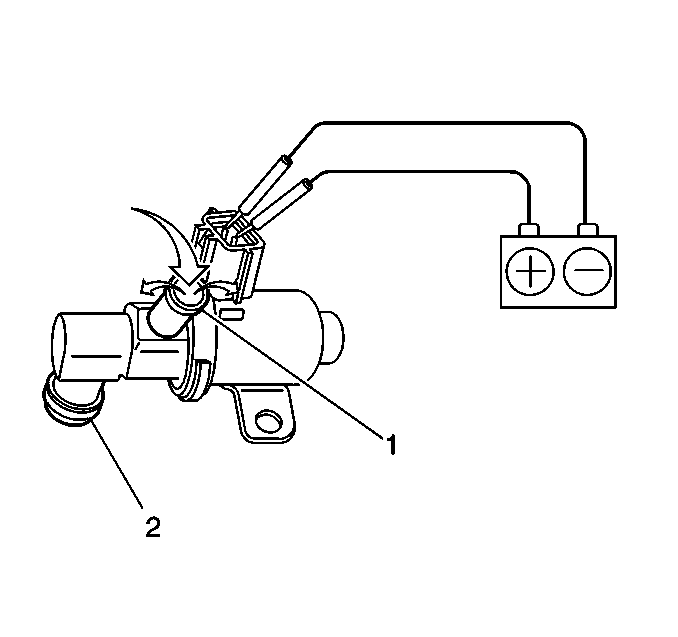
- Apply battery voltage across the terminals of the EVAP canister purge valve.
- Blow air into the inboard port (1). The air should flow easily to the outboard port (2).
- Replace the EVAP canister purge valve if the valve failed either test. Refer to Evaporative Emission Canister Purge Solenoid Valve Replacement .
Caution: Do not breathe the air through the EVAP component tubes or hoses. The fuel vapors inside the EVAP components may cause personal injury.

Measure
The EVAP canister purge valve resistance should be 27-33 ohms
at 20°C (68°F).

EVAP Pressure Switching Solenoid Inspection
- Remove the EVAP pressure switching solenoid.
- Use a DMM in order to measure the resistance of the EVAP pressure switching solenoid.
- Replace the EVAP pressure switching solenoid if the resistance is not within the specified range. The solenoid will damage the PCM, if the resistance value is less than 27 ohms.
- Check for continuity on each terminal to the valve body.
- Replace the EVAP pressure switching solenoid if continuity is present.
- Blow air into the inboard port (1). The air should NOT flow through the valve and out of the outboard port (2).
- Apply battery voltage across the terminals of the EVAP pressure switching solenoid.
- Blow air into the inboard port (1) and air should flow through the valve and out of the outboard port (2).
- Replace the EVAP pressure switching solenoid if the solenoid failed either test.
Caution: Do not breathe the air through the EVAP component tubes or hoses. The fuel vapors inside the EVAP components may cause personal injury.
Measure
The EVAP pressure switching solenoid resistance is 37-44 ohms
at 20°C (68°F).
EVAP Canister Vent Valve Inspection
- Disconnect the EVAP vent solenoid electrical connector.
- Use a DMM in order the measure the solenoid resistance value.
- Replace the solenoid if the resistance is not within the specified range. Refer to Evaporative Emission Canister Vent Solenoid Valve Replacement .
- Use a DMM in order the check for continuity between each solenoid terminal and solenoid housing.
- Replace the EVAP vent solenoid valve if the resistance is not within specification. A shorted valve will cause damage to the PCM.
- Blow air through the inboard port (2) of the EVAP vent valve. Air has to flow freely through the outboard port (1).
- Replace the valve if the air does not flow through the inboard port (2). Refer to Evaporative Emission Canister Vent Solenoid Valve Replacement .
- Apply battery voltage across the solenoid terminals.
- Blow air through the inboard port (1) of the solenoid. Air should NOT flow through the valve.
- Replace the solenoid if the solenoid fails any of the tests. Refer to Evaporative Emission Canister Vent Solenoid Valve Replacement .
Caution: Do not breathe the air through the EVAP component tubes or hoses. The fuel vapors inside the EVAP components may cause personal injury.
Measure
The resistance should be between 25-30 ohms at 20°C
(68°F).
Measure
The DMM has to read infinite (OL).
Fuel Tank Pressure (FTP) Sensor Inspection
Tools Required
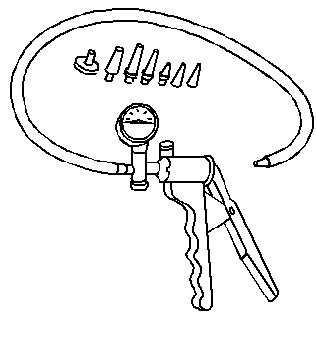
J 23738-A Hand Vacuum Pump
- Disconnect the electrical connector (4) from the fuel tank pressure (FTP) sensor .
- Turn ON the ignition, with the engine OFF.
- Measure the voltage between the 5 volt reference circuit (2) and the sensor ground circuit (1) with a DMM.
- If the measured voltage is not 5.0 volts for both tests, inspect for the following conditions:
- Measure the voltage from the input circuit (1) of the fuel tank pressure sensor to ground with the DMM.
- If the measured voltage is not 4.5-5.5 volts inspect for the following conditions:
- Turn OFF the ignition.
- Connect the electrical connector to the fuel tank pressure sensor .
- Disconnect the vacuum hose to the fuel tank pressure sensor.
- Connect a hand held vacuum/pressure pump to the fuel tank pressure sensor.
- Select the DC scale on the DMM.
- Connect one lead to the input circuit at C221 of the fuel tank pressure sensor , and connect the other lead to ground.
- Measure the output voltage under the following conditions:
- Replace the fuel tank pressure sensor if the measured voltage is not within the test values listed above. Refer to Fuel Tank Pressure Sensor Replacement .
- Remove the hand held vacuum pump.
- Connect the vacuum hose to the fuel tank pressure sensor .

Measure
The DMM should read 5.0 volts.
| • | An open or a high resistance in the 5 volt reference circuit of the fuel tank pressure sensor . |
| • | An open or high resistance in the ground circuit of the fuel tank pressure sensor . |
| • | Refer to Testing for Intermittent Conditions and Poor Connections and Wiring Repairs in Wiring Systems. |

Measure
The DMM should read 4.5-5.5 volts.
| • | An open or high resistance in the input circuit of the fuel tank pressure sensor . |
| • | A short in the input circuit of the fuel tank pressure sensor. |
| • | Refer to Testing for Intermittent Conditions and Poor Connections and to Wiring Repairs in Wiring Systems. |

| • | Apply vacuum of 2.0 kPa (15 mm Hg, 0.59 in. Hg) to the fuel tank pressure sensor. |
Measure
1.3-2.1 volts
| • | Release the vacuum from the fuel tank pressure sensor. |
Measure
3.0-3.6 volts
| • | Apply a pressure of 1.5 kPa (0.22 psi) to the fuel tank pressure sensor. |
Measure
4.2-4.8 volts
EVAP Canister Inspection
Tools Required
J 23738-A Hand Vacuum Pump
- Remove the EVAP canister. Refer to Evaporative Emission Canister Replacement .
- Plug the port (4).
- Hold the port plugged through the all tests.
- Hold the port (5) closed.
- Blow air with a pressure of 1.7 kPa (0.5 in Hg/0.25 psi) into port (1).
- Verify that air flows out of port (2).
- Hold the port (5) and the port (2) closed.
- Blow air with a pressure of 1.7 kPa (0.5 in Hg/0.25 psi) into port (1).
- Verify that air does not flow out of the port (3).
- Hold the port (3) closed.
- Apply a vacuum of 3.5 kPa (1.0 in Hg/0.5 psi) to port (5).
- Verify that the vacuum holds if the port (3) is closed.
- Open the port (3) and check for vacuum release.
- Hold the port (3) closed and apply 3.5 kPa (1.0 in. Hg/0.5 psi) of vacuum to port (1) .
- Check that air flows into the port (5).
- Replace the EVAP canister if the EVAP canister purge valve failed the above tests.
- Remove the plug from the EVAP port.
- Install the EVAP canister. Refer to Evaporative Emission Canister Replacement .
Caution: Do not breathe the air through the EVAP component tubes or hoses. The fuel vapors inside the EVAP components may cause personal injury.


EVAP System Inspection
- Visually inspect the EVAP lines, the hoses, and the connection for the following:
- Repair or replace any lines and hoses as necessary.
- Inspect the fuel filler cap gasket for damage.
- Visually inspect the EVAP canister for cracks.
- Replace the EVAP canister if the canister is damaged. Refer to Evaporative Emission Canister Replacement .
| • | Any sharp bends or kinks |
| • | Any deformed lines and hoses |
| • | Any cracks |
| • | Any fuel leakage |
| • | Any incorrect routing of lines and hoses |

