Removal Procedure
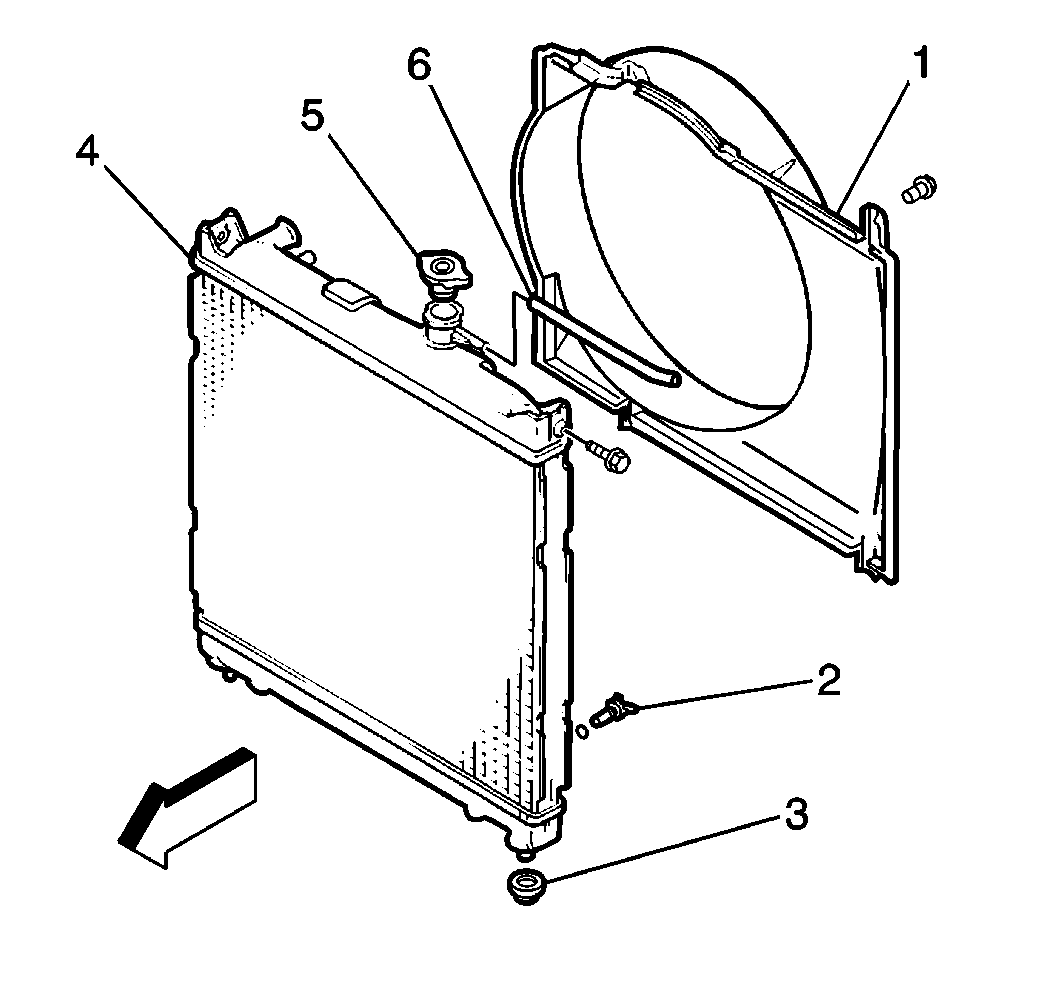
- Remove the radiator cap.
- Open the drain plug (3). Drain the coolant into a container.
- Close the drain plug (3).
- Remove the two bolts securing the A/C flexible hose to the radiator (if equipped). Reposition the hose to the rear.
- Remove the four bolts that secure the shroud (1) to the radiator (4).
- Remove the four fan clutch mounting bolts.
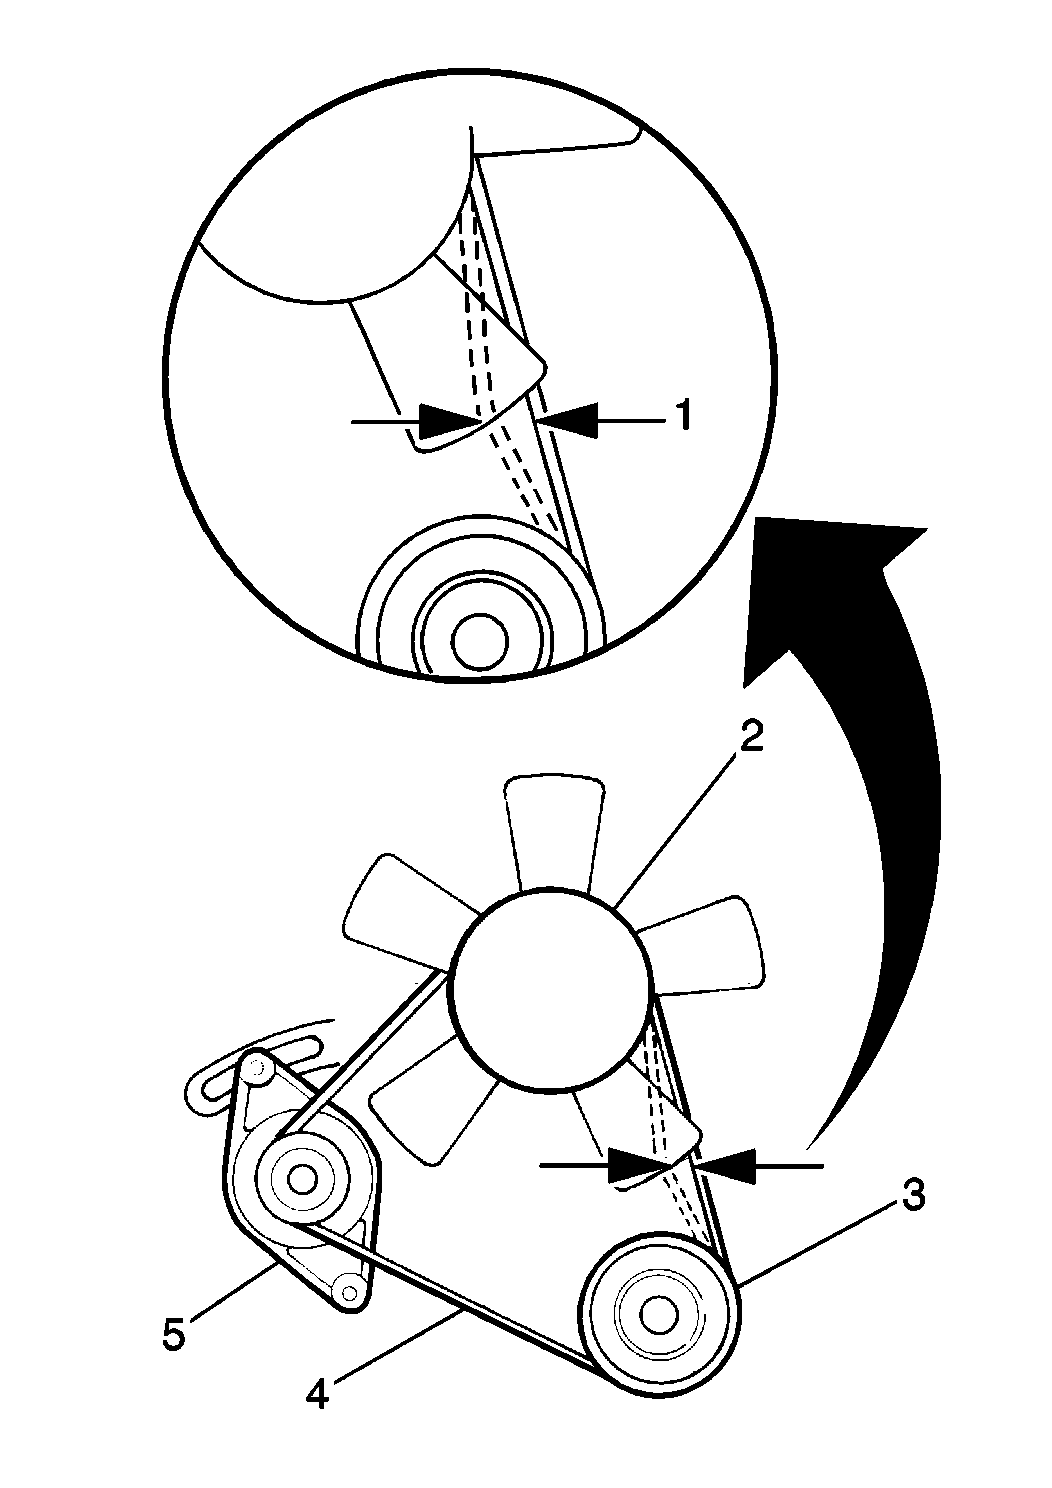
- Remove the shroud, the fan clutch (4), and the cooling fan (3) together.
- Remove the coolant pump pulley (1) from the coolant pump shaft. Disengage the generator/coolant pump drive belt (2) as the pulley is removed.
- Remove the five bolts and the crankshaft pulley (3) from the crankshaft.
- Remove the timing belt. Refer to Timing Belt Replacement in Engine Mechanical-1.6 Liter L4.
- Loosen the A/C compressor drive belt (if equipped).
- Remove one bolt and the engine oil level indicator tube, with the O-ring, from the oil pump.
- Remove the generator mounting bolt and bracket at the coolant pump.
- Remove the timing belt tensioner (5) and pulley (3). Refer to Timing Belt Tensioner Replacement in Engine Mechanical-1.6 Liter L4.
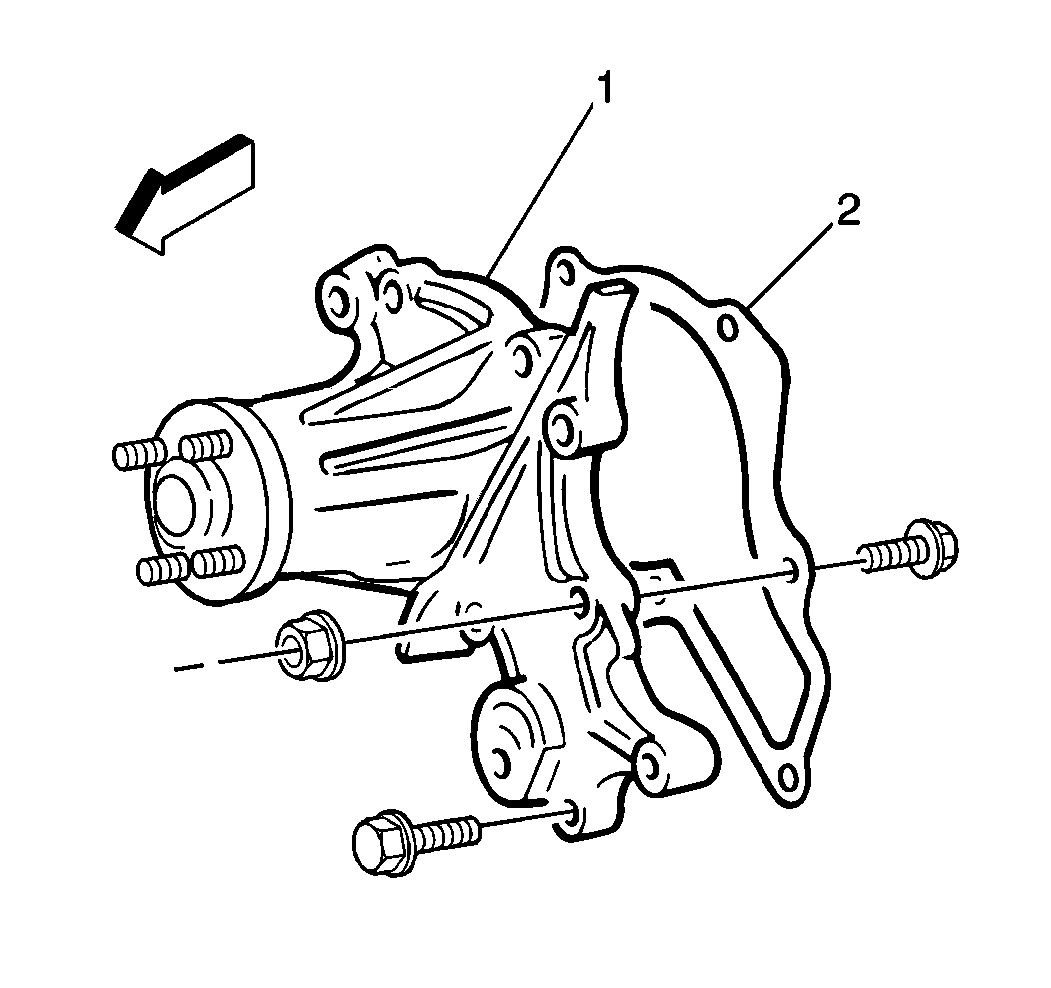
- Remove the five coolant pump mounting bolts and the coolant pump (1) with the gasket (2) and rubber seals from the engine.
- Clean the gasket material, corrosion and debris from the mating surfaces on the coolant pump (1) and the engine block.


Important: It is not necessary to remove the crankshaft pulley center bolt when removing the crankshaft pulley (3).

Installation Procedure
- Install the coolant pump (1) with a new gasket (2) to the engine. Secure the pump with five bolts.
- Install the rubber seals between the coolant pump and the oil pump.
- Install the rubber seals between the coolant pump and the cylinder head.
- Connect the engine oil level indicator tube to the engine. Secure the engine oil level indicator tube with a mounting bolt. Do not tighten fully.
- Install the timing belt tensioner and pulley. Refer to Timing Belt Tensioner Replacement in Engine Mechanical-1.6 Liter L4.
- Install the timing belt. Refer to Timing Belt Replacement in Engine Mechanical-1.6 Liter L4.
- Install the crankshaft pulley (3). Secure the crankshaft pulley with five bolts.
- Position the generator/coolant pump drive belt (2) on the pulley (1) before installing the coolant pump pulley (1).
- Install the coolant pump pulley (1) to the coolant pump shaft.
- Install the fan clutch, cooling fan and shroud together.
- Secure the fan clutch (4), cooling fan (3) and shroud with the four fan clutch nuts and the four shroud bolts.
- Adjust the air conditioner compressor drive belt (if equipped).
- Adjust the generator/coolant pump drive belt tension (1) so that the belt deflects 5 to 8 mm (0.02 to 0.32 in) under 10 kg (22 lbs) of applied pressure.
- Fill the radiator will an approved coolant. Refer to Cooling System Draining and Filling .
- Install the radiator cap to the radiator.
- Reposition the A/C flexible hose to the radiator. Secure with the two bolts.

Notice: Use the correct fastener in the correct location. Replacement fasteners must be the correct part number for that application. Fasteners requiring replacement or fasteners requiring the use of thread locking compound or sealant are identified in the service procedure. Do not use paints, lubricants, or corrosion inhibitors on fasteners or fastener joint surfaces unless specified. These coatings affect fastener torque and joint clamping force and may damage the fastener. Use the correct tightening sequence and specifications when installing fasteners in order to avoid damage to parts and systems.
Tighten
Tighten the coolant pump bolts to 12 N·m (106 lb in).
Tighten
Tighten the engine oil level indicator tube mounting bolt to 11 N·m
(97 lb in).

Tighten
Tighten the crankshaft pulley bolts to 16 N·m (12 lb ft).

Important: The fan clutch, cooling fan and radiator shroud must be installed together because of insufficient clearance to install these parts in separate steps.
Tighten
| • | Tighten the fan clutch nuts to 11 N·m (97 lb in). |
| • | Tighten the shroud bolts to 11 N·m (97 lb in). |


Tighten
Tighten the generator upper mounting bolt to 27 N·m (20 lb ft)
while holding the generator/coolant pump drive belt tension.
Tighten
Tighten the air conditioning flexible hose bolts to 15 N·m
(11 lb ft).
