Removal Procedure
- Remove the master cylinder from the vehicle. Refer to
Master Cylinder Replacement
in this section.
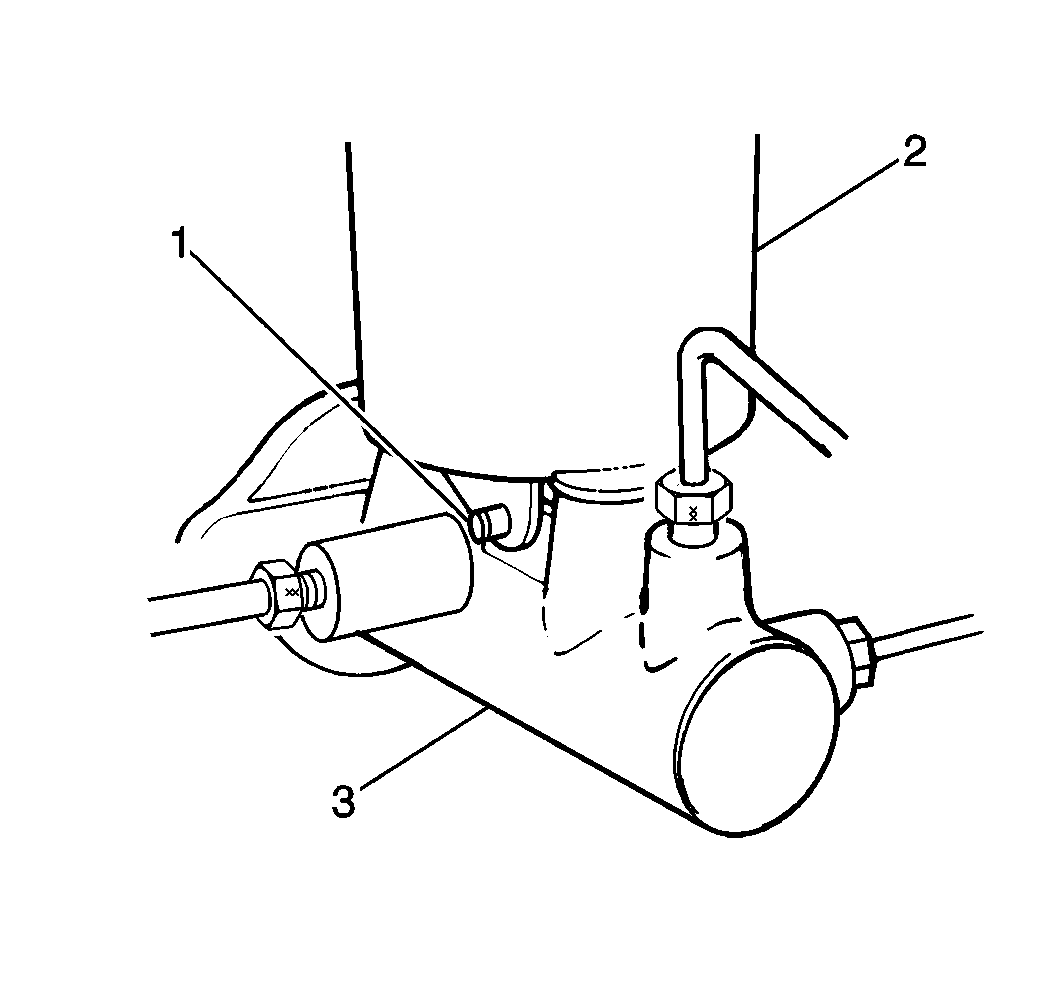
- Remove the reservoir pin
(1) using a hammer and a punch.
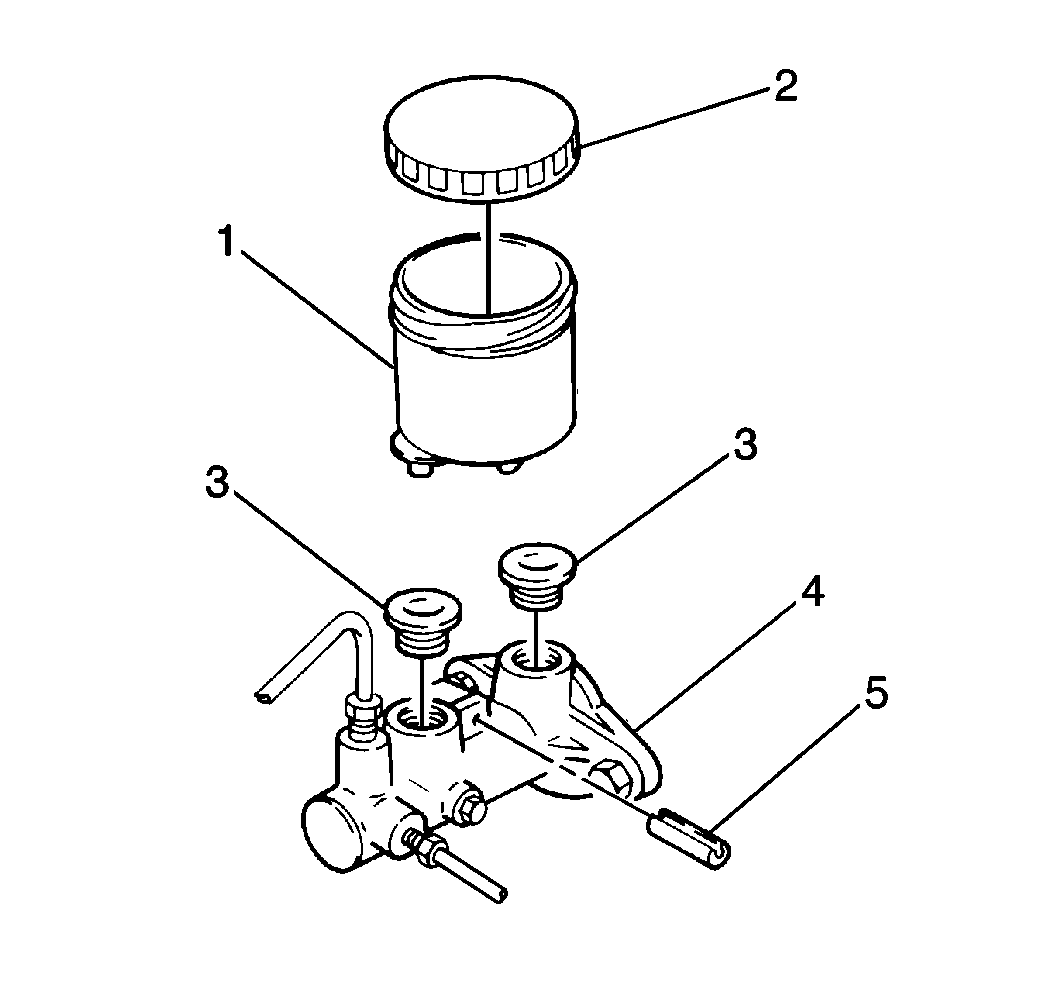
- Remove the reservoir (1)
and grommets (3) from the master cylinder (4).
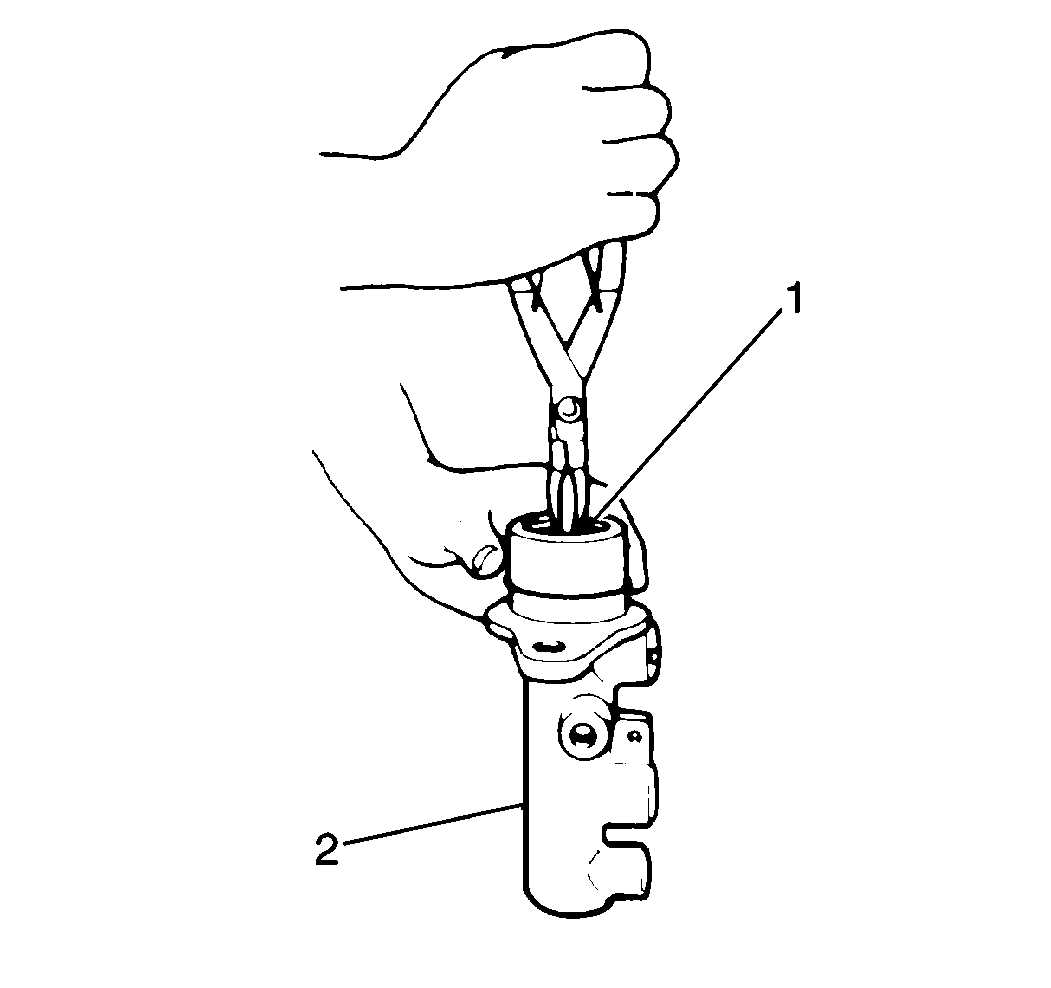
- Remove the snap ring from
the master cylinder (2).
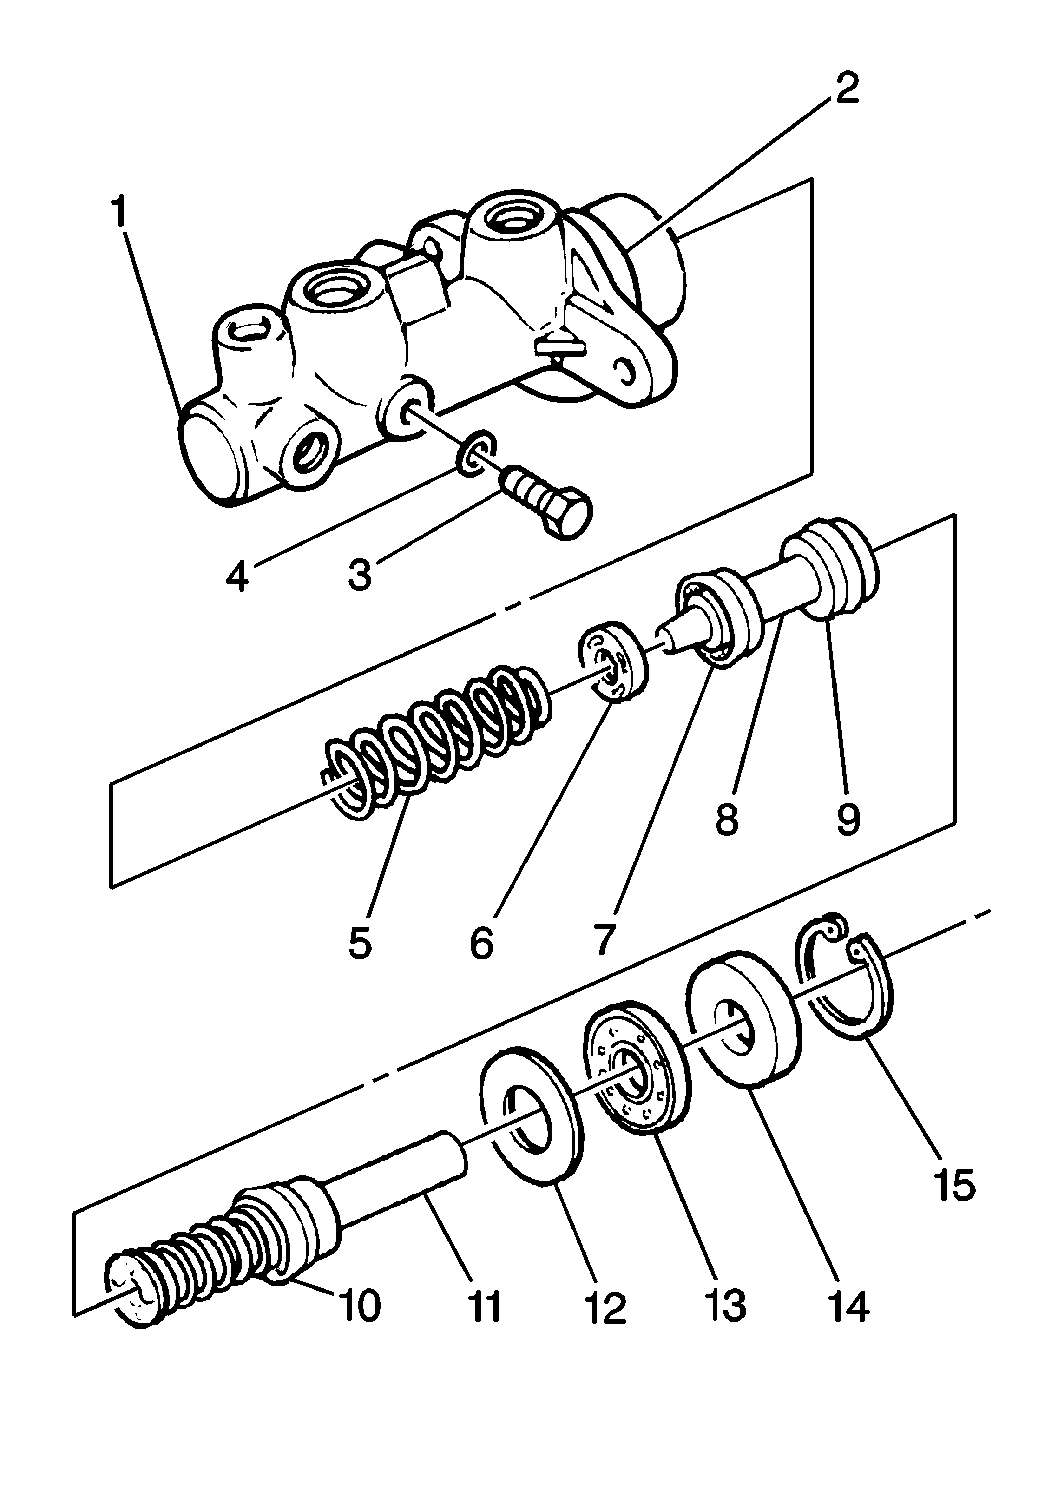
- Remove the primary piston
stopper (14), the cylinder
cup (13) and plate (12) and the primary piston (11) from the master cylinder
(1).
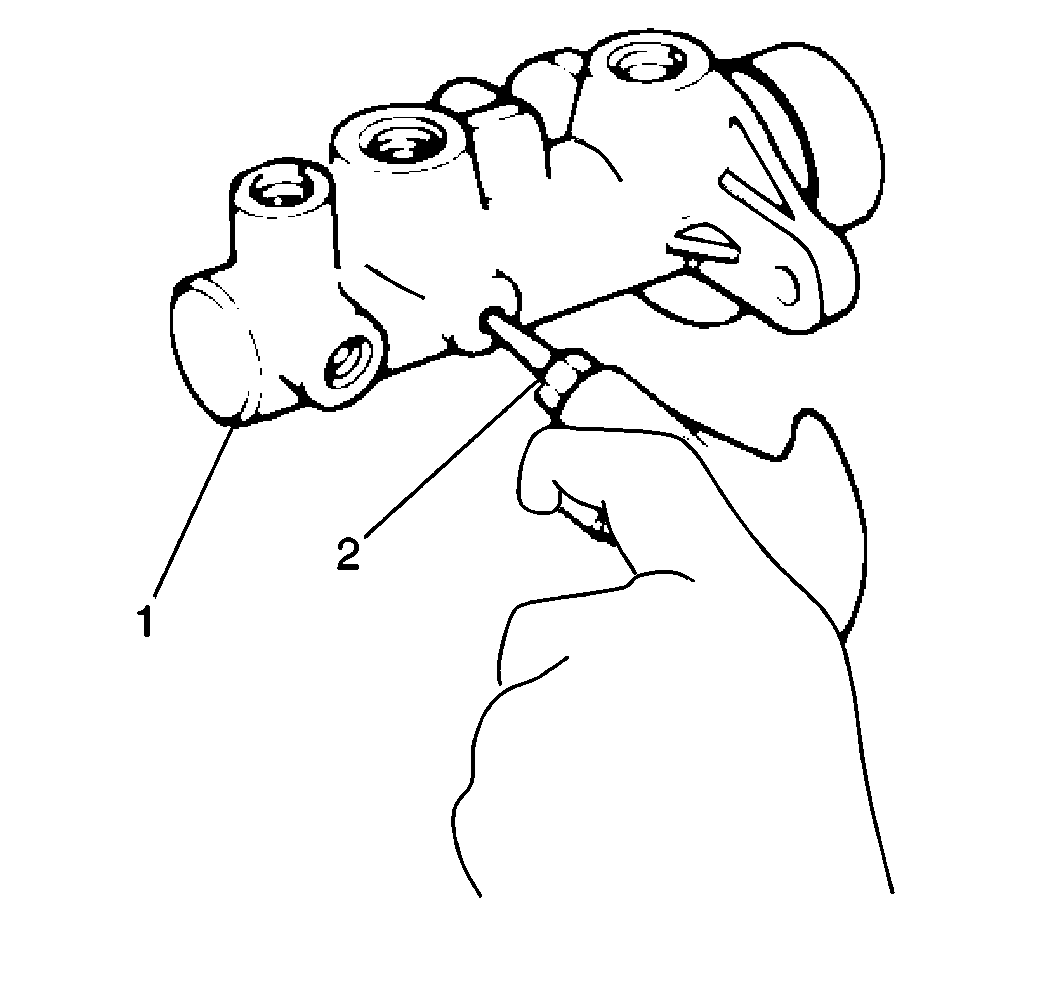
- Remove the piston stopper
bolt (2) and washer
from the master cylinder (1).
Caution: Be careful when blowing the secondary piston out of the
master cylinder with compressed air. The piston can exit the cylinder with
explosive force.
- Remove the secondary piston, the spring seat and the spring by blowing
dry compressed air into the piston stopper bolt hole.
- Clean the following parts:
| • | The reservoir, inside and out. |
| • | The master cylinder body and all of the internal parts with clean
brake fluid. |
| • | Dry all parts with dry, compressed air. |
Important: Replacement internal parts for the master cylinder are available only
as a complete piston set. Should any of the master cylinder internal parts
need to be replaced, replace them all.
- Inspect the following parts:
| • | The reservoir and cap for cuts, cracks and deformation. |
| • | The master cylinder body for scoring or corrosion. If these conditions
are noted, replace the master cylinder. |
| • | The master cylinder internal parts for wear. Replace the master
cylinder if the wear is excessive. |
Installation Procedure
- Coat all of the parts with clean brake fluid.

- Install the secondary
piston spring (5), the spring seat (6) and the piston (8) into the master
cylinder body (1).
- Install the primary piston (11), the cylinder cup (13) and plate
(12), and the piston stopper (14) to the master cylinder body (1).

- Compress the pistons and
install the snap ring (1).

Notice: Use the correct fastener in the correct location. Replacement fasteners
must be the correct part number for that application. Fasteners requiring
replacement or fasteners requiring the use of thread locking compound or sealant
are identified in the service procedure. Do not use paints, lubricants, or
corrosion inhibitors on fasteners or fastener joint surfaces unless specified.
These coatings affect fastener torque and joint clamping force and may damage
the fastener. Use the correct tightening sequence and specifications when
installing fasteners in order to avoid damage to parts and systems.
- Install the piston
stopper washer and bolt (12) with the pistons pushed all the way in.
Tighten
Tighten the piston stopper bolt to 10 N·m (89 lb in).

- Coat the new reservoir
grommets with clean brake fluid.
- Install the reservoir grommets (3) to the master cylinder (4).
Make sure the grommets seat properly.

- Install the reservoir
(2) to the master cylinder (3). Secure the reservoir by driving the reservoir
pin in using a drift.
- Install the master cylinder assembly to the vehicle. Refer to
Master Cylinder Replacement
in this
section.


