Rear Seat Belt Replacement 2 Door
Removal Procedure
Caution: The seat belt assembly and/or bracket assembly must be replaced as a unit only. Do not substitute parts for any reason, or personal injury could result.
Caution: To help avoid personal injury from unrepaired crash damage to a restraint system, perform the seat belt check for each seat belt system. Replace the seat belt system if there is any doubt about the condition of system components.
- Fold the rear seatback.
- Pull the rear seat release handle and raise the rear seat.
- Unclip the support rod from the bottom of the rear seat and support seat.
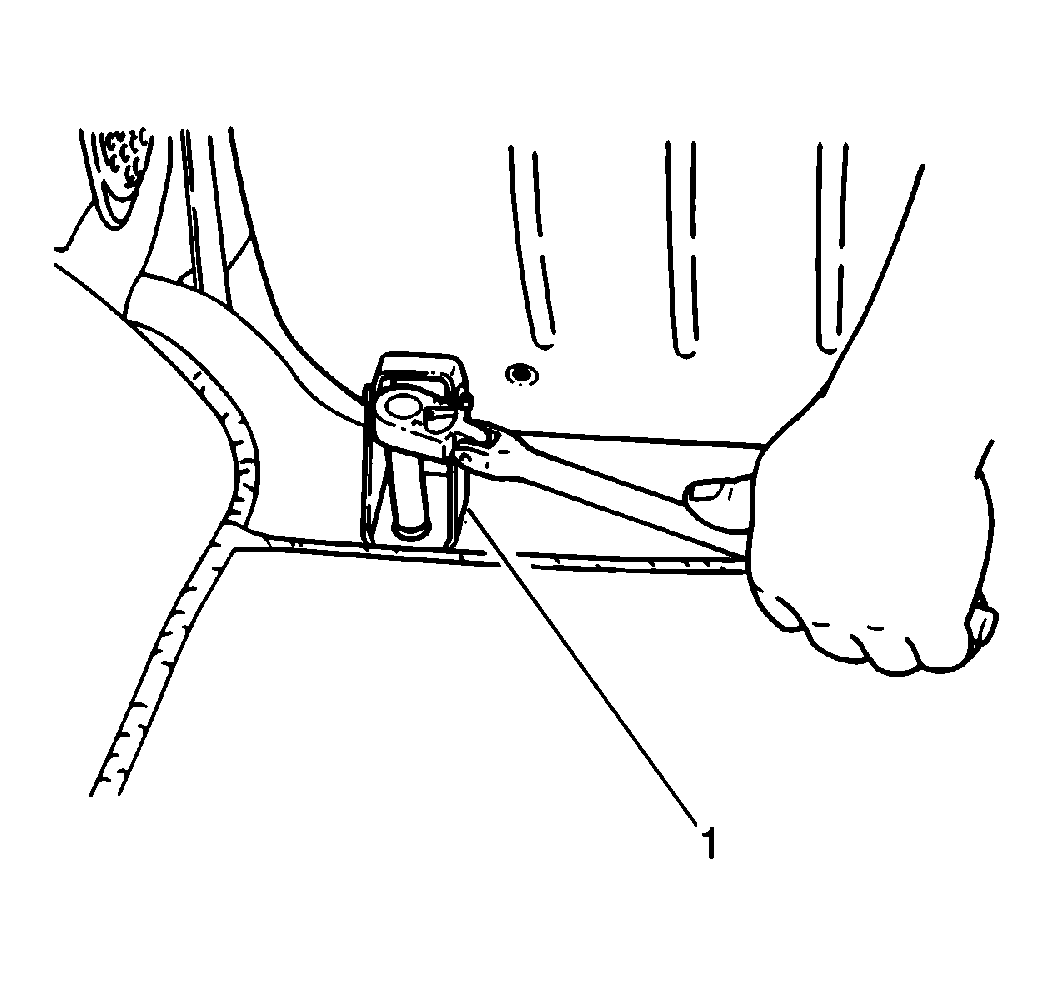
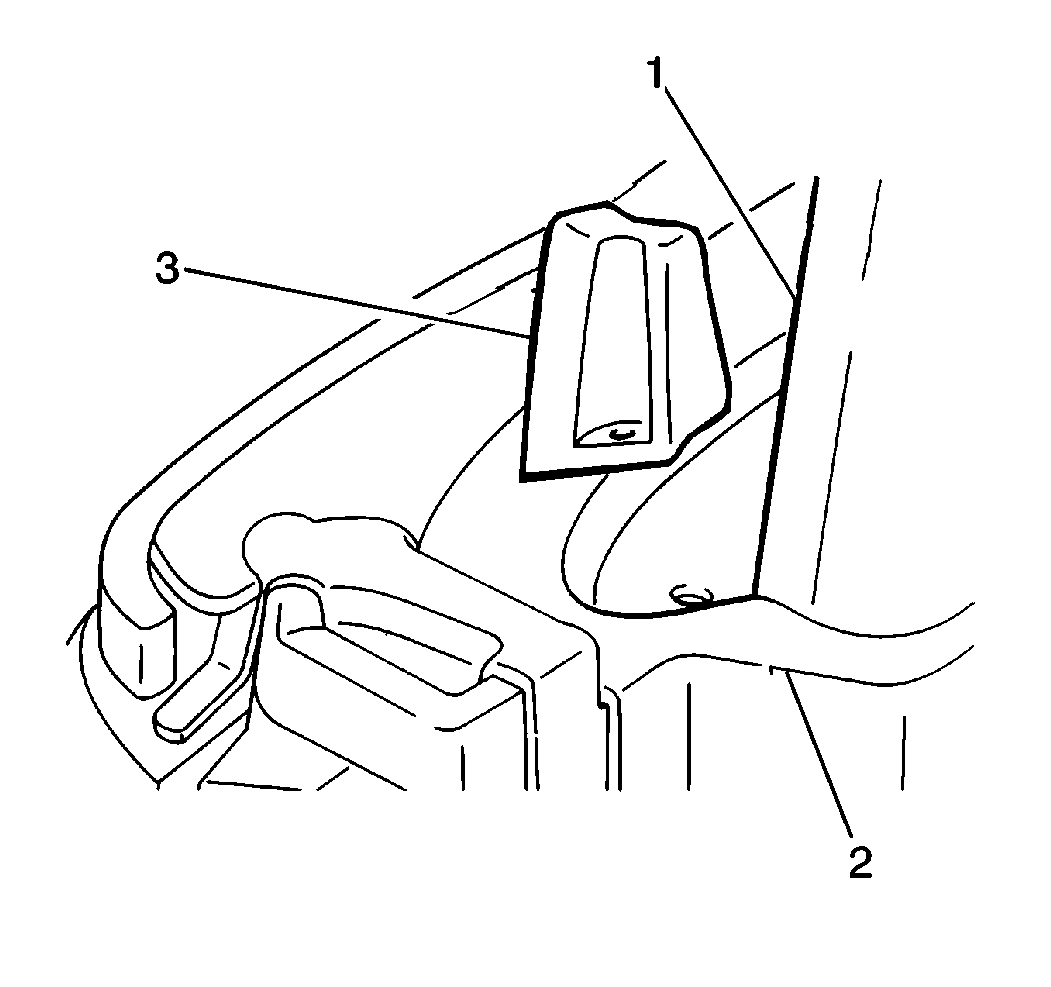
- Lift the rear seatbelt lower anchor bolt cover and remove the anchor bolt (1).
- Remove the two-door folding top. Refer to Roof in Body and Accessories.
- Remove the garnish moldings. Refer to Roof in Body and Accessories.
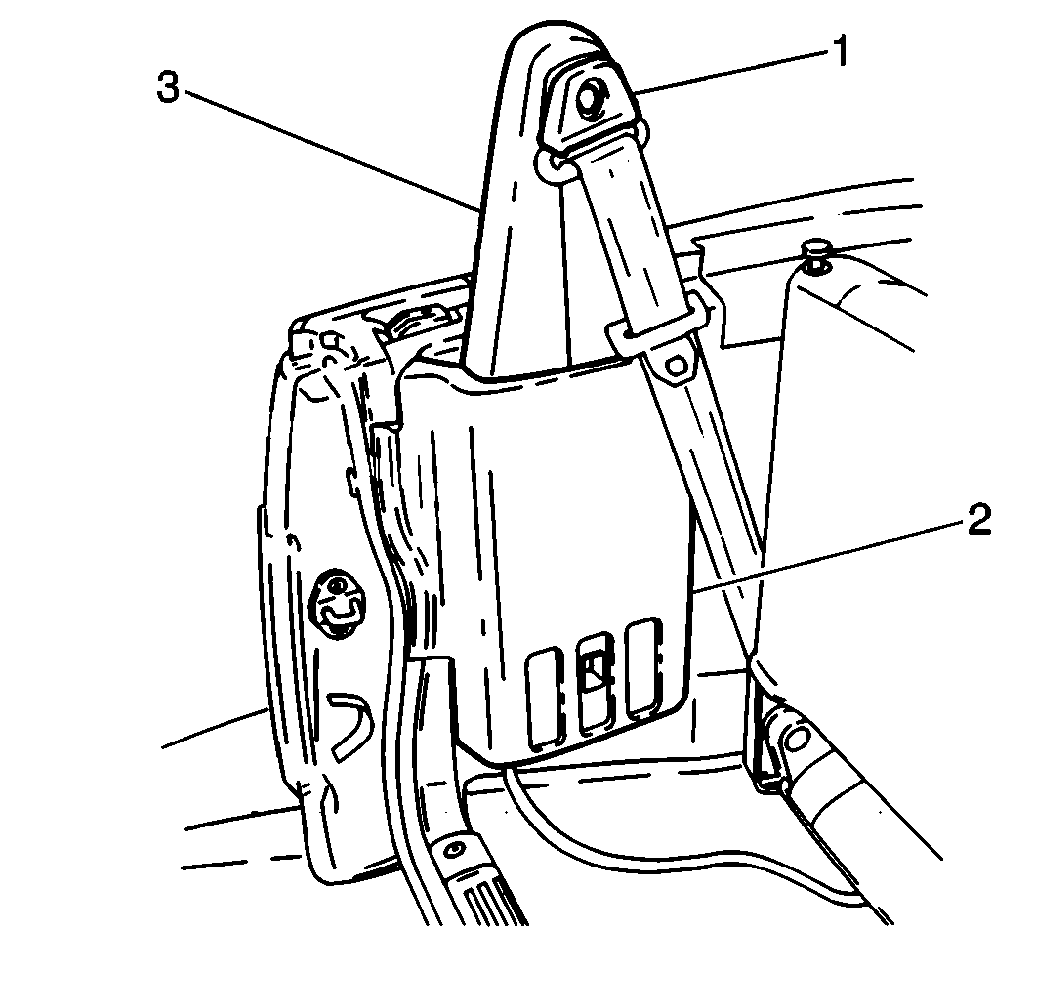
- Remove the two screws and the rubber stopper from the rear seat belt retractor trim cover (3).
- Remove the rear seat belt guide loop cover (1) and the anchor bolt.
- Loosen the rear door opening weatherstrip.
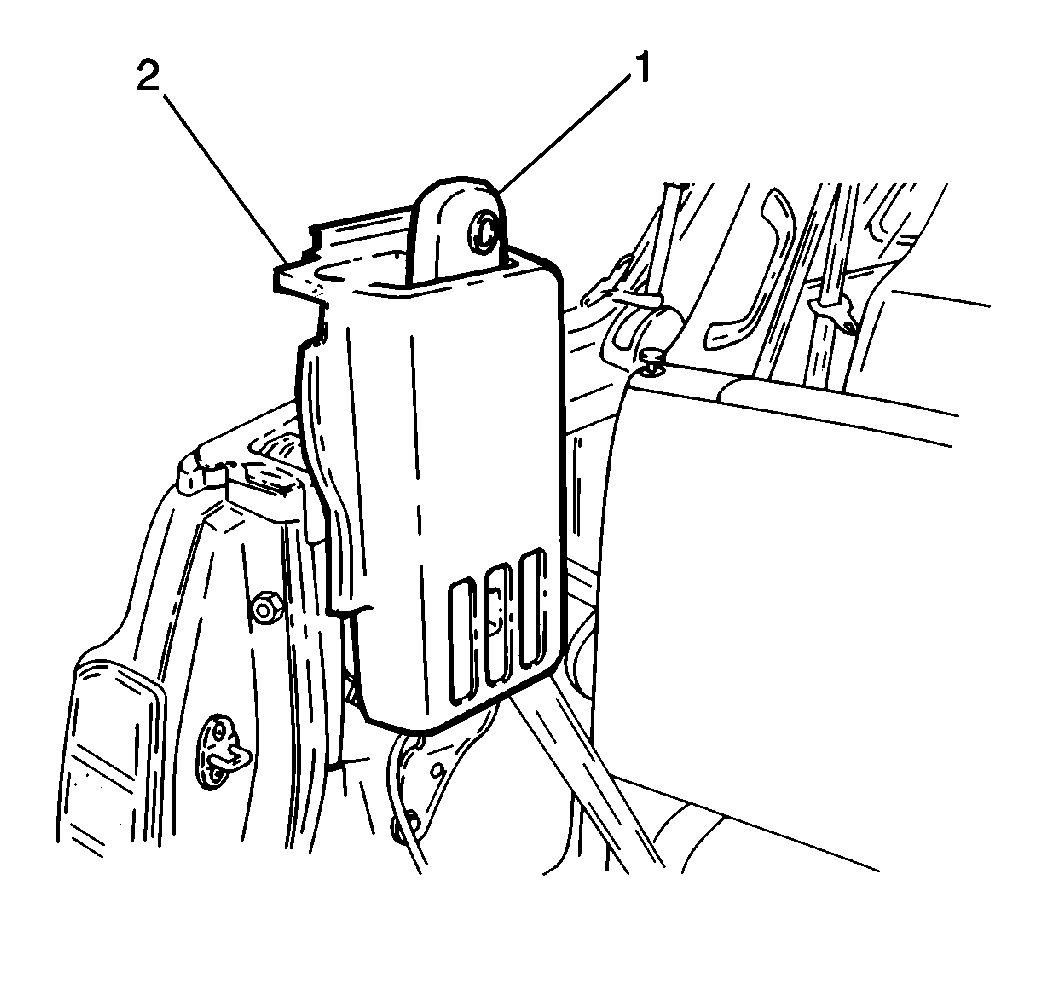
- Remove one screw and the rear seat belt retractor trim cover (2).
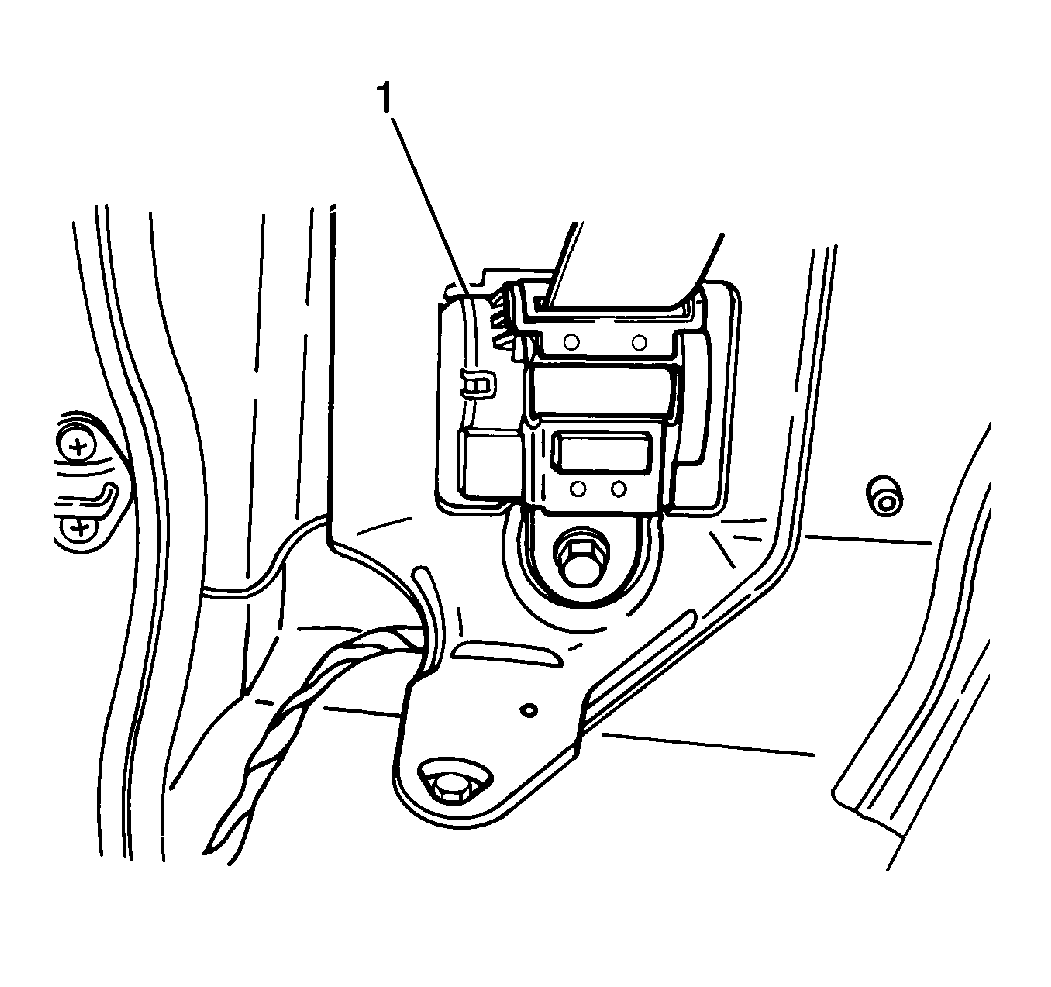
- Remove one bolt, one screw and the rear seat belt retractor mechanism (1) from the vehicle.
Installation Procedure
- Install the rear seat belt retractor mechanism (1) to the vehicle. Secure the mechanism with one screw and one bolt.
- Install the rear seat belt retractor trim cover (2) to the vehicle. Secure the cover with one screw.
- Press the rear door opening weatherstrip into place.
- Remove the rear seat belt guide loop anchor bolt.
- Install the rear seat belt guide loop cover.
- Install the rubber stopper (3) to the rear seat belt retractor trim cover (2). Secure the stopper with two screws.
- Install the rear seat belt lower anchor bolt (1).
- Install the garnish moldings. Refer to Roof in Body and Accessories.
- Install the folding top. Refer to Roof in Body and Accessories.
- Position the rear seat belt lower anchor bolt cover into place.
- Clip the support rod to the bottom of the rear seat and lower the seat.
- Raise the rear seatback into the upright position.

Notice: Use the correct fastener in the correct location. Replacement fasteners must be the correct part number for that application. Fasteners requiring replacement or fasteners requiring the use of thread locking compound or sealant are identified in the service procedure. Do not use paints, lubricants, or corrosion inhibitors on fasteners or fastener joint surfaces unless specified. These coatings affect fastener torque and joint clamping force and may damage the fastener. Use the correct tightening sequence and specifications when installing fasteners in order to avoid damage to parts and systems.
Tighten
Tighten the rear seat belt retractor mechanism bolt to 45 N·m
(33 lb ft).

Tighten
Tighten the rear seat belt guide loop anchor bolt to 45 N·m
(33 lb ft).

Tighten
Tighten the rear seat belt lower anchor bolt to 45 N·m
(33 lb ft).
Rear Seat Belt Replacement 4 Door
Removal Procedure
Caution: The seat belt assembly and/or bracket assembly must be replaced as a unit only. Do not substitute parts for any reason, or personal injury could result.
Caution: To help avoid personal injury from unrepaired crash damage to a restraint system, perform the seat belt check for each seat belt system. Replace the seat belt system if there is any doubt about the condition of system components.
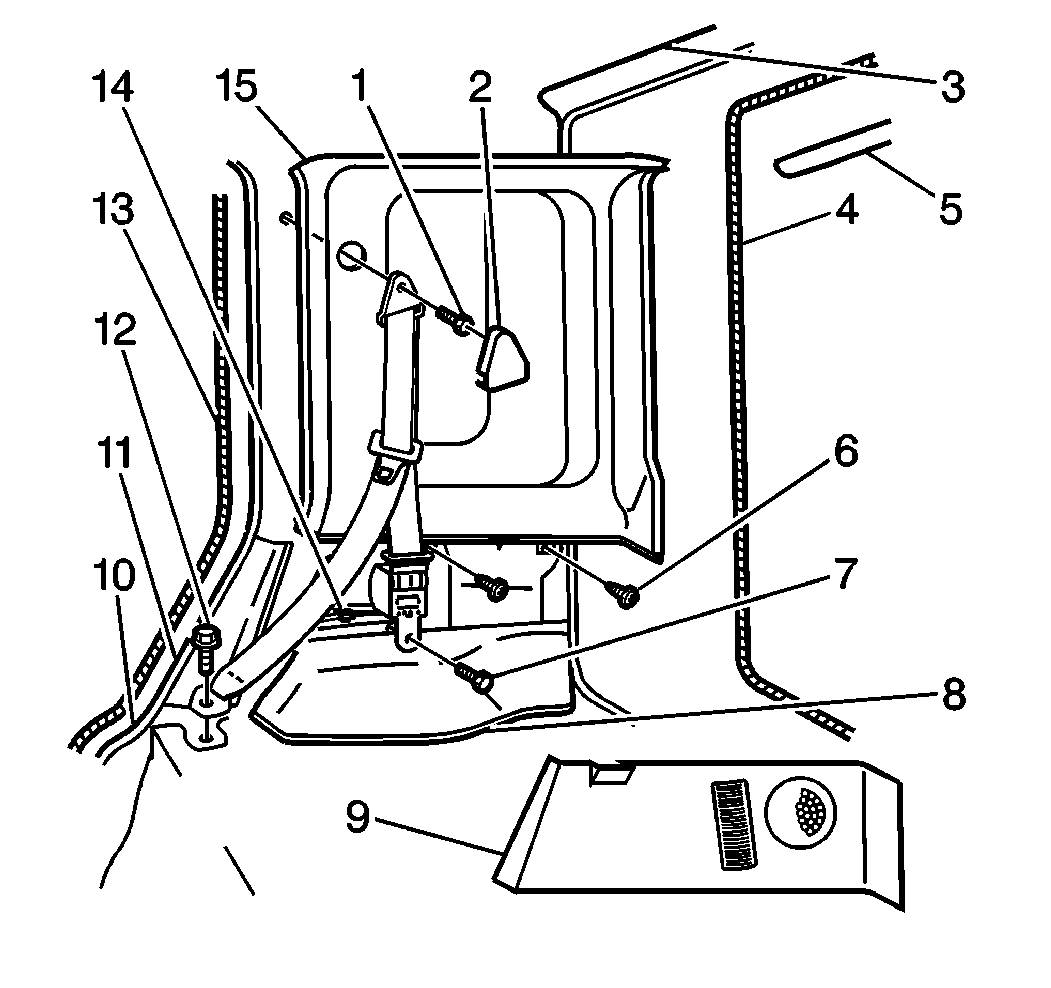
- Remove the rear seat belt guide loop cover (2) and anchor bolt (1).
- Remove the Rear Seat Belt Retractor Trim Cover . Refer to Body Rear End in Body and Accessories.
- Remove the rear seat belt lower anchor bolt (12).
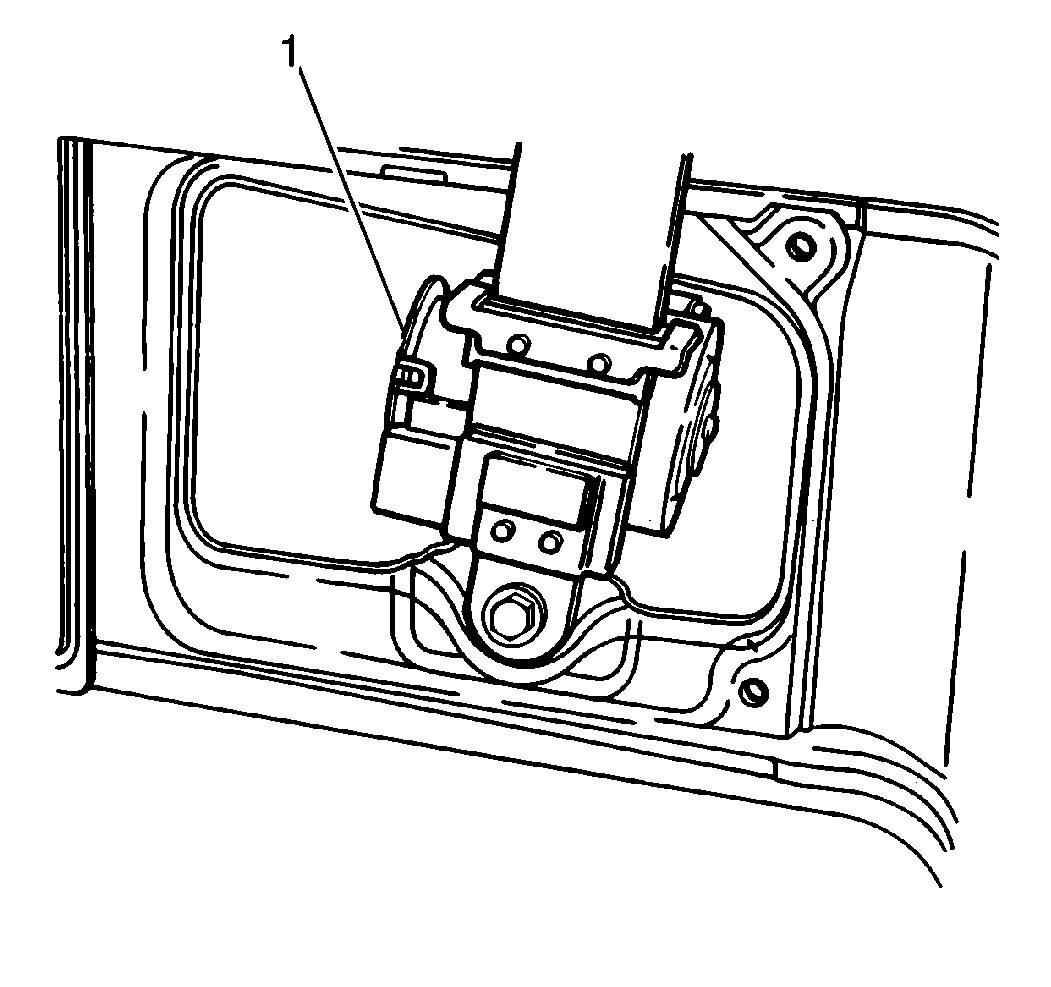
- Remove one bolt and the rear seat belt retractor mechanism (1).
Installation Procedure
- Install the rear seat belt retractor mechanism (1) to the vehicle. Secure the mechanism with one bolt.
- Install the rear seat belt lower anchor bolt (12).
- Install the Rear Seat Belt Retractor Trim Cover. Refer to Body Rear End in Body and Accessories.
- Install the rear seat belt guide loop anchor bolt (1).
- Install the rear seat belt guide loop cover (2).

Notice: Use the correct fastener in the correct location. Replacement fasteners must be the correct part number for that application. Fasteners requiring replacement or fasteners requiring the use of thread locking compound or sealant are identified in the service procedure. Do not use paints, lubricants, or corrosion inhibitors on fasteners or fastener joint surfaces unless specified. These coatings affect fastener torque and joint clamping force and may damage the fastener. Use the correct tightening sequence and specifications when installing fasteners in order to avoid damage to parts and systems.
Tighten
Tighten the rear seat belt retractor mechanism bolt to 45 N·m
(33 lb ft).

Tighten
Tighten the rear seat belt lower anchor bolt (12) to 45 N·m
(33 lb ft).
Tighten
Tighten the rear seat belt guide loop anchor bolt (1) to 45 N·m
(33 lb ft).
