For 1990-2009 cars only
Removal Procedure
- Gently pull the 4 knobs from the heater control unit.
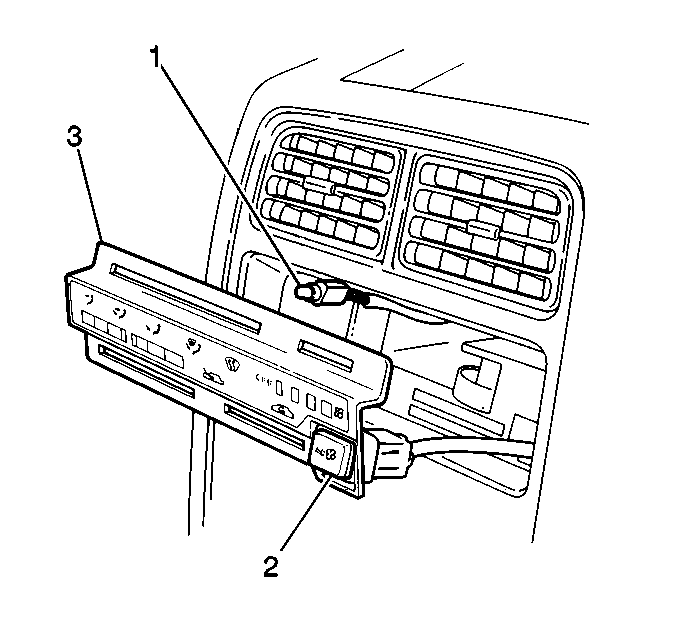
- Remove the heater control unit face plate (3) from the center trim bezel by pulling the face plate straight out.
- Remove the illumination lamp bulb socket (1) from the heater control unit face plate.
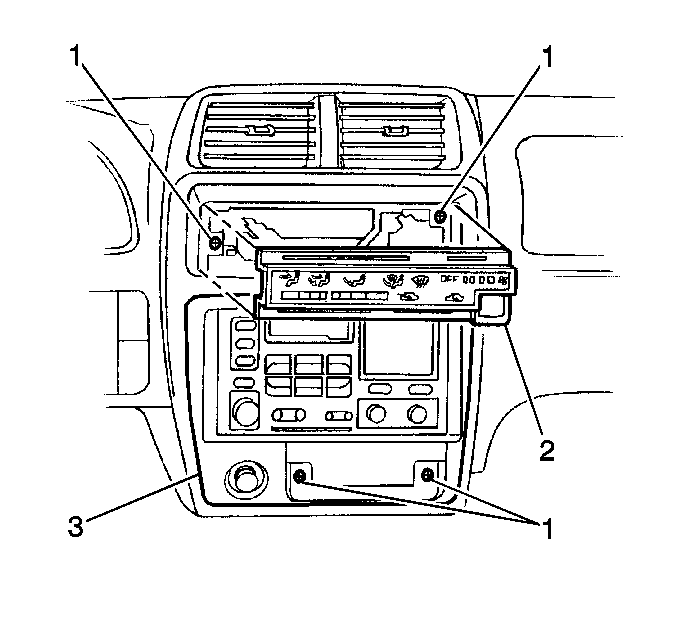
- Remove the ash tray.
- Remove the 4 screws (1) and the center trim bezel.
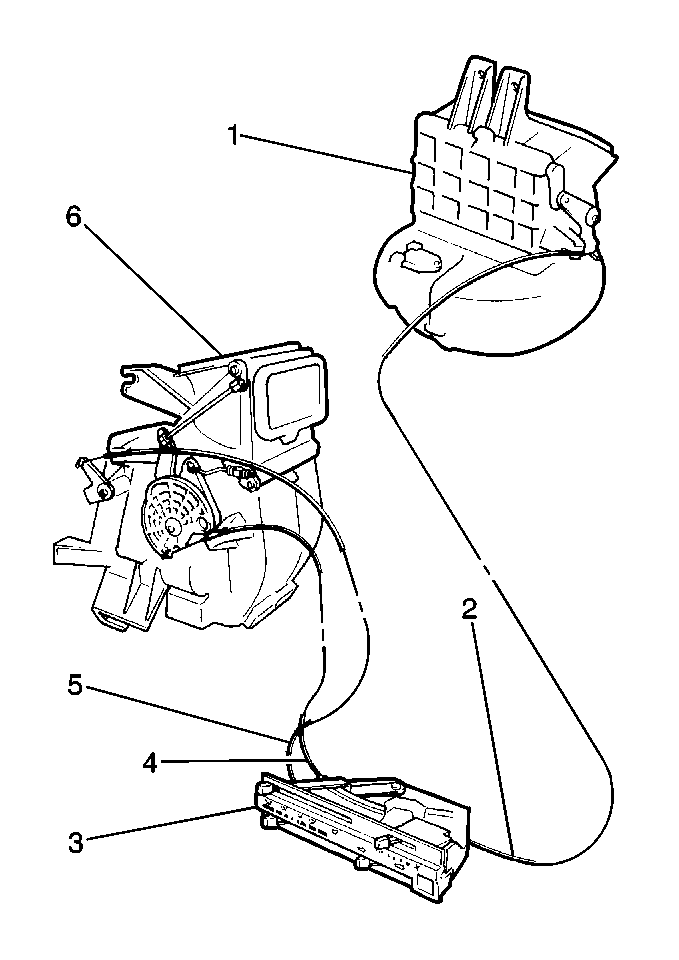
- Remove the temperature control cable (5) at the heater case.
- Remove the mode control cable (4) at the heater case.
- Remove the fresh/recirc control cable at the blower case.
- Disconnect the blower switch electrical connector.
- Remove the heater control unit from the instrument panel.
- Remove the blower switch from the heater control unit, as needed.


Important: Note the routing of the cables in order to facilitate installation.
Installation Procedure
- Install the blower switch to the heater control unit, as needed.
- Install the heater control unit to the instrument panel. Route the cables as previously noted.
- Connect the blower switch electrical connector.
- Install the fresh/recirc control cable (2) to the blower case.
- Install the mode control (4) cable to the heater case.
- Install the temperature control cable (5) to the heater case.
- Install the center trim bezel and secure with the 4 screws (1).
- Install the ash tray.
- Install the illumination lamp bulb socket (1) to the heater control unit face plate.
- Install the heater control unit face plate to the instrument panel by pushing the face plate until the plate snaps into place.
- Install the heater control unit knobs.
- Adjust the temperature, mode and fresh/recirc control cables as needed. Refer to the following:


| • | Mode Control Cable Adjustment |
| • | Vent Control Cable Adjustment |
