For 1990-2009 cars only
Removal Procedure
- Remove the heater control knobs from the heater control unit.
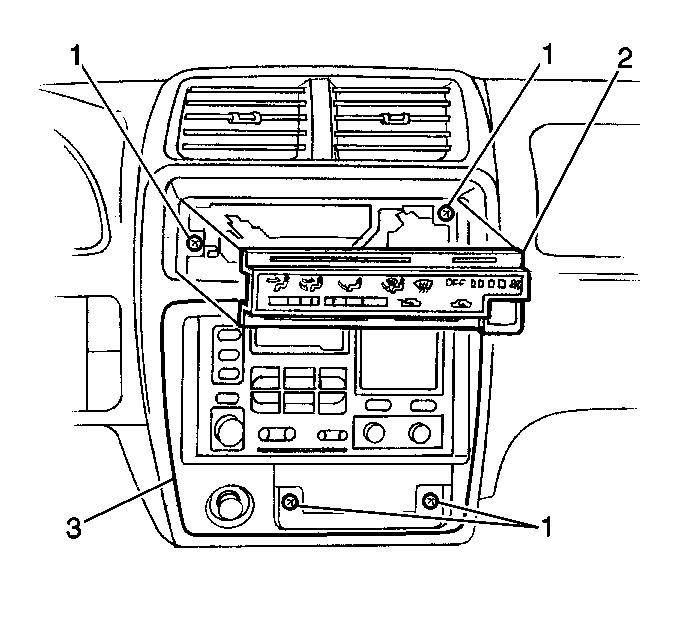
- Remove the heater control unit face plate (2) from the center trim bezel (3) by pulling straight out.
- Twist off the heater control unit face plate illumination bulb.
- Remove the ashtray from the track by pushing down on the retainer while pulling the ashtray straight out.
- Remove the 4 center trim bezel screws (1).
- Remove the center trim bezel (3).
- Remove the 4 screws which secure the radio.
- Remove the radio from the instrument panel by pulling the radio straight out.
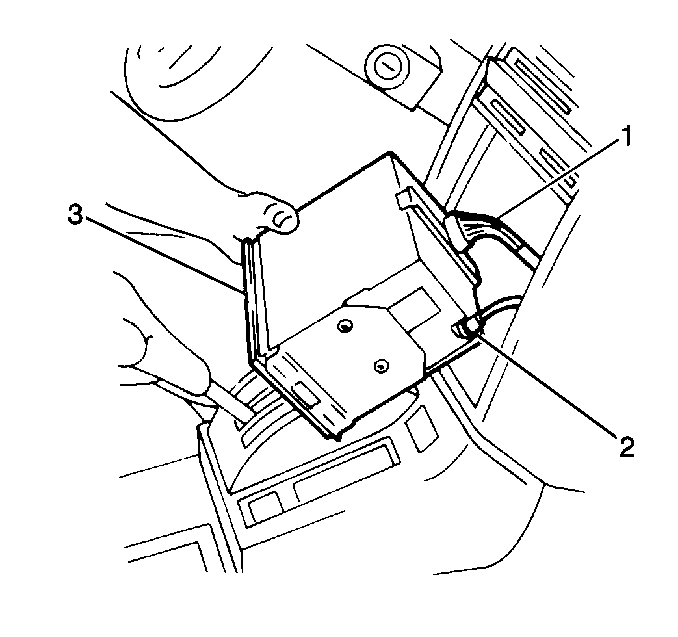
- Disconnect the electrical connector (1) from the radio (3).
- Disconnect the antenna (2) from the radio (3).
- Remove the radio from the vehicle.
- Remove the 4 side mounting bracket screws from the radio (3), as needed.
- Remove the side mounting brackets.


Installation Procedure
- Install the side mounting brackets to the radio (3), if removed. Secure the side mounting brackets with the 4 screws.
- Connect the antenna (2) to the radio (3).
- Connect the electrical connector (1) to the radio (3).
- Install the center trim bezel (3) to the instrument panel. Secure the center trim bezel with the 4 screws (1).
- Install the ashtray to the track. Push in the ashtray until the retainer engages.
- Install the heater control unit face plate (2) to the center trim bezel. Push in the heater control unit face plate (2) until the plate snaps into place.
- Install the heater control knobs to the heater controls.


