For 1990-2009 cars only
Removal Procedure
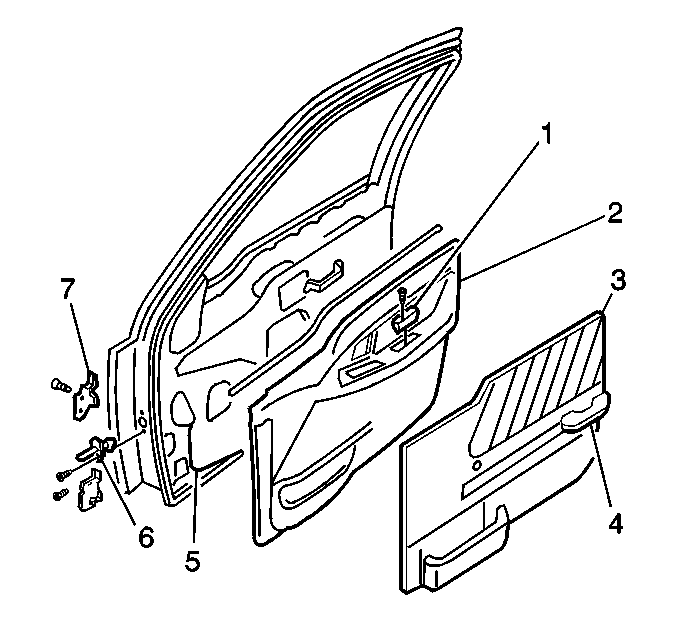
- Remove the screw from the front side door inside handle.
- Gently pry the front side door inside handle from the door trim panel.
- Remove the 2 screws from the armrest (4), if equipped.
- Remove the armrest from the door, if equipped.
- Remove one screw from the pull handle case (1), if equipped.
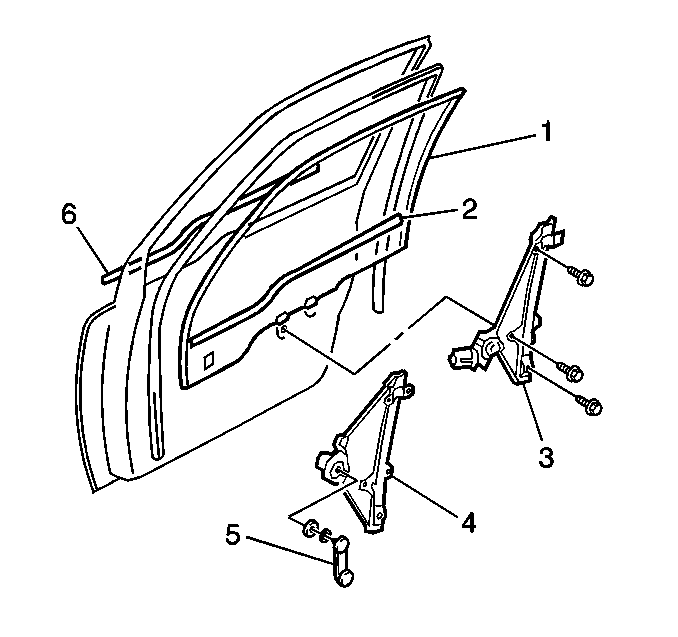
- Use a cloth in order to pull off the snap ring of the regulator handle (1).
- Remove the regulator handle (1).
- Gently pry the door trim panel away from the door by disengaging the retainer clips.
- Rotate the trim panel 90 degrees counterclockwise.
- Pull the trim panel away from the door in order to gain access to the power door electrical connector, if equipped.
- Disconnect the power door electrical connector, if equipped.
- Remove the door trim panel (2) from the vehicle.


Installation Procedure
- Position the door trim panel (2) to the door.
- Connect the electrical connectors, if equipped.
- Press the door trim panel plastic retainers into place.
- Install the regulator handle (5) to the door. Secure the regulator handle (5) to the door with the snap ring.
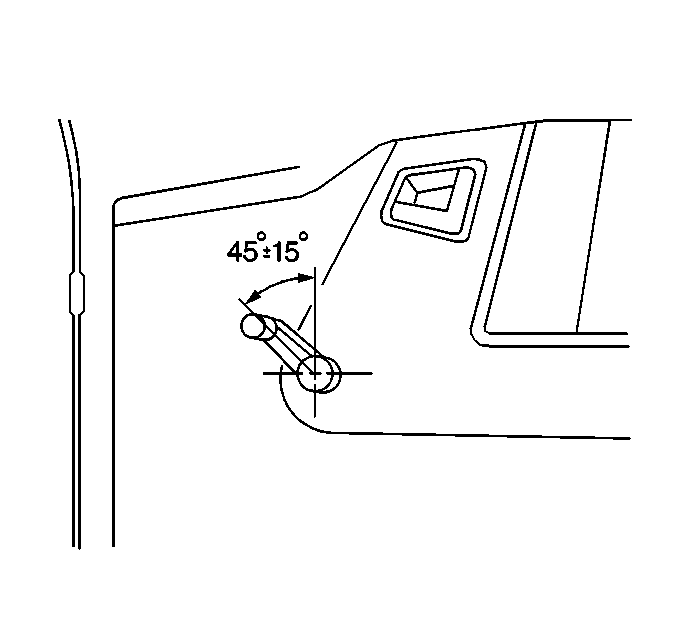
- Ensure the regulator handle is at a 45 degree angle when the window is fully closed.
- Install the screw to the pull handle case, if equipped.
- Install the armrest to the door, if equipped. Secure the armrest to the door with the 2 screws.
- Install the front side door inside handle to the door. Secure the inside handle with the screw.


