For 1990-2009 cars only
Removal Procedure
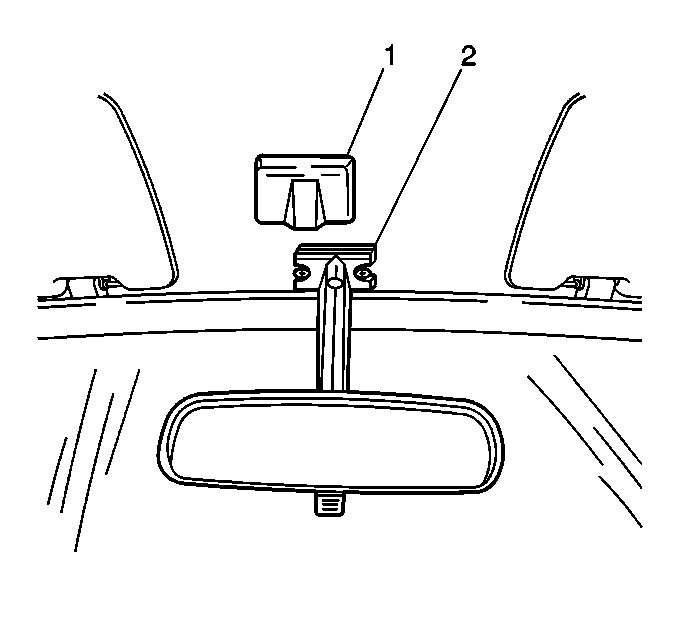
- Slide the rearview mirror trim bezel (1) off of the mirror (2).
- Remove the two screws that secure the inside rearview mirror (2).
- Remove the rearview mirror (2) from the vehicle.
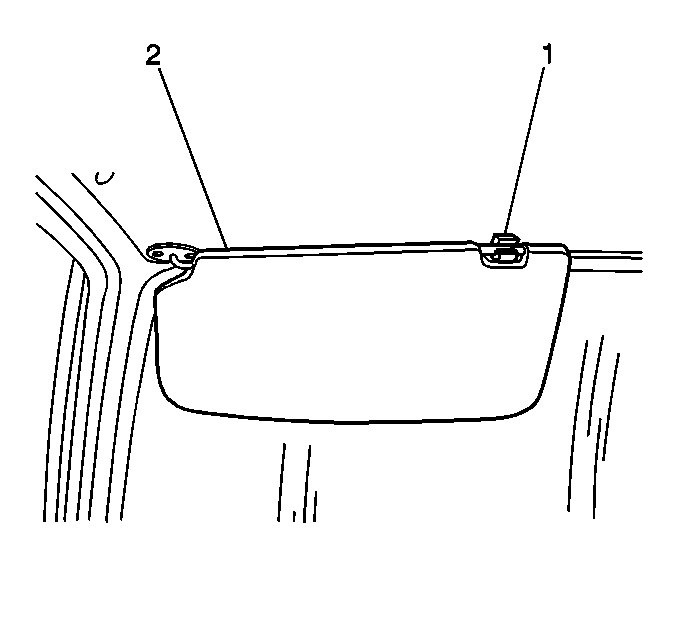
- Remove each screw that secures each sunshade support (1).
- Remove the sunshade support (1).
- Remove the 2 screws from each sunshade.
- Remove both sunshades (2) from the vehicle.
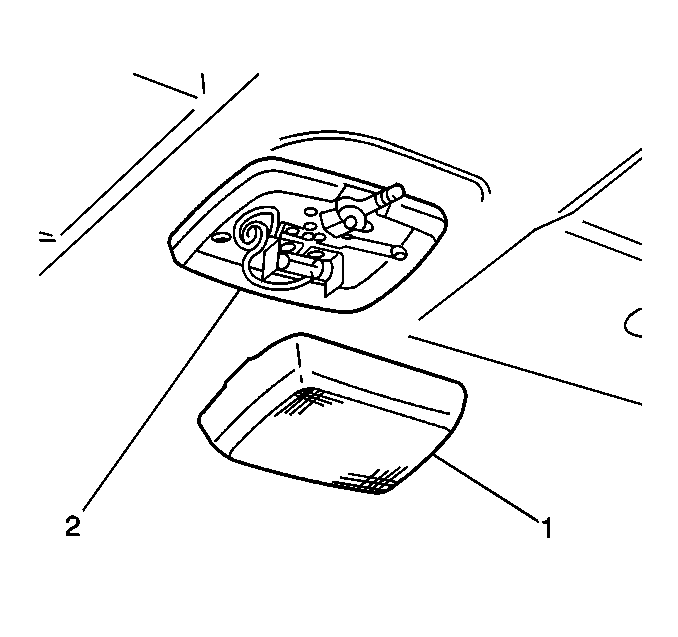
- Pull the dome lamp lens (1) off of the dome lamp (2).
- Remove the 2 screws that secure the dome lamp (2) to the roof.
- Lower the dome lamp from the roof.
- Remove the screw and the dome lamp bracket.
- Disconnect the dome lamp electrical connector.
- Remove the dome lamp (2) from the vehicle.
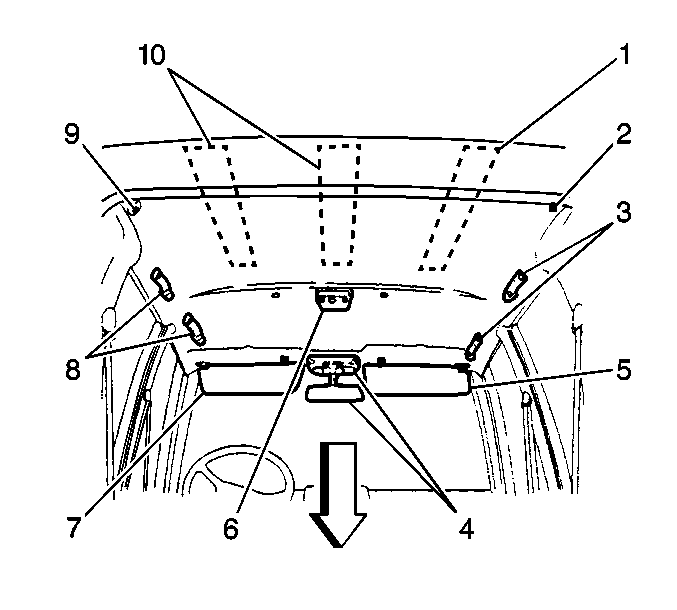
- Remove the 2 screws from each assist handle (3, 8).
- Remove the assist handles (3, 8) from the vehicle.
- Remove the screw from each coat hook and remove the coat hooks (2, 9) from the vehicle.
- Loosen the front door opening finishing lace along both windshield side garnish moldings.
- Gently pry both windshield side garnish moldings loose.
- Remove the windshield side garnish moldings from the vehicle.
- Gently pry the front headlining trim loose.
- Remove the front headlining trim from the vehicle.
- Remove the front and rear seat belt guide loop anchor bolts.
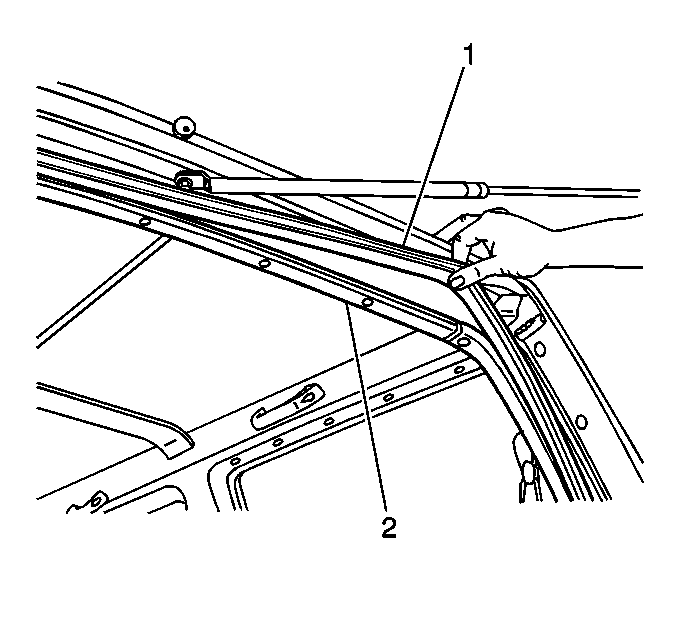
- Loosen the rear door opening weatherstrip (1) along the rear quarter window interior trim and the headlining trim (2).
- Remove the rear quarter window trim. Refer to Rear Quarter Upper Trim Panel Replacement .
- Remove the 4 plastic retainers and the rear headlining trim from the vehicle.
- Remove the 4 plastic retainers and the headlining (2) from the vehicle.
Installation Procedure
- Install the headlining (2) to the vehicle. Secure the headlining with the 4 plastic retainers.
- Install the rear headlining trim to the vehicle. Secure the rear headlining trim with the 4 plastic retainers.
- Install the rear quarter window trim. Refer to Rear Quarter Upper Trim Panel Replacement .
- Press the rear door opening weatherstrip (1) into place.
- Install the front and rear seat belt guide loop anchor bolts.
- Install the front headlining trim to the vehicle. Press the front trim into place.
- Install the windshield side garnish molding to the vehicle. Press the molding into place.
- Press the front door opening finishing lace into place along both of the windshield side garnish moldings.
- Install the coat hooks (2, 9) to the vehicle. Secure each hook with 1 screw.
- Install the assist handles (3, 8) to the vehicle. Secure each handle with 2 screws.
- Connect the dome lamp electrical connector.
- Install the dome lamp bracket. Secure the bracket with the screw.
- Install the dome lamp (6) to the roof. Secure the lamp with 2 screws.
- Install the dome lamp lens (1) to the dome lamp (2).
- Install the sunshades (2) to the vehicle. Secure each sunshade (2) with 2 screws.
- Install the sunshade supports (1) to the vehicle. Secure each support (1) with 1 screw.
- Install the inside rearview mirror (2) to the vehicle. Secure the mirror with 2 screws.
- Slide the inside rearview mirror trim bezel (1) onto the mirror.

Tighten
Tighten the front and rear seat belt guide loop anchor bolts to 45 N·m
(33 lb ft).


