Tools Required
| • | J 23129 Converter
Housing Seal Remover |
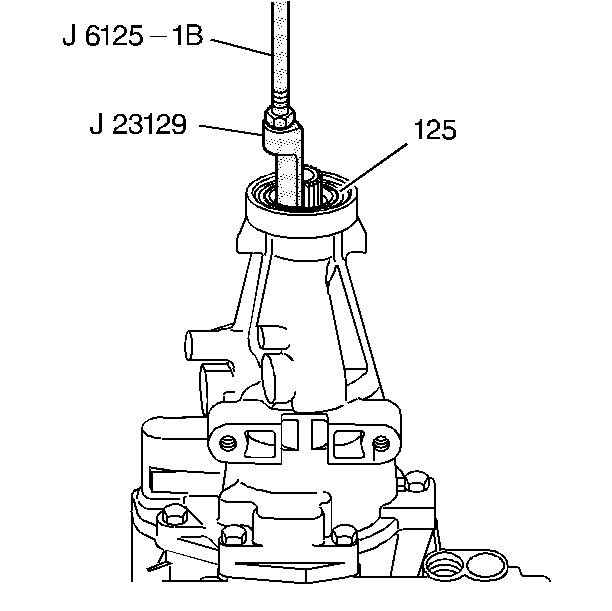
- Remove the extension housing seal (125) using
J 6125-1B and
J 23129 .
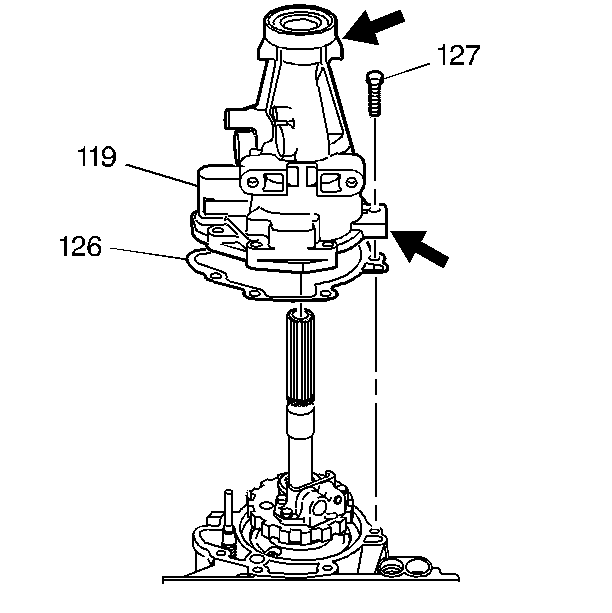
- Remove the extension housing bolts (127).
- Remove the extension housing (119) and the extension housing gasket
(126).
- Inspect the extension housing for cracks and porosity.
Tools Required
| • | J 23062-14 Extension
Housing Bushing Remover and Installer |
- Raise and suitably support the vehicle. Refer to
Lifting and Jacking the Vehicle
in General Information.
- Place a reference mark on the pinion flange yoke of the rear propeller
shaft and the differential pinion flange to ensure correct rear propeller
shaft installation. Refer
Propeller Shaft Replacement
in Propeller Shaft.
- Remove the following components from the vehicle:
- Drain the transmission fluid. Refer to
Transmission Fluid Pan Removal
in this section.
- Remove the transmission fluid pan and the transmission fluid pan
gasket.
- Drain the transmission fluid. Refer to
Transmission Fluid Pan Removal
in this section.
Notice: Use the correct fastener in the correct location. Replacement fasteners
must be the correct part number for that application. Fasteners requiring
replacement or fasteners requiring the use of thread locking compound or sealant
are identified in the service procedure. Do not use paints, lubricants, or
corrosion inhibitors on fasteners or fastener joint surfaces unless specified.
These coatings affect fastener torque and joint clamping force and may damage
the fastener. Use the correct tightening sequence and specifications when
installing fasteners in order to avoid damage to parts and systems.
- Install the transmission
fluid pan and a new gasket onto the transmission in order to provide support
for the transmission assembly.
Use 12 transmission fluid pan bolts in order to secure the transmission
fluid pan.
Tighten
Tighten the transmission fluid pan bolts to 13 N·m (115 lb in).
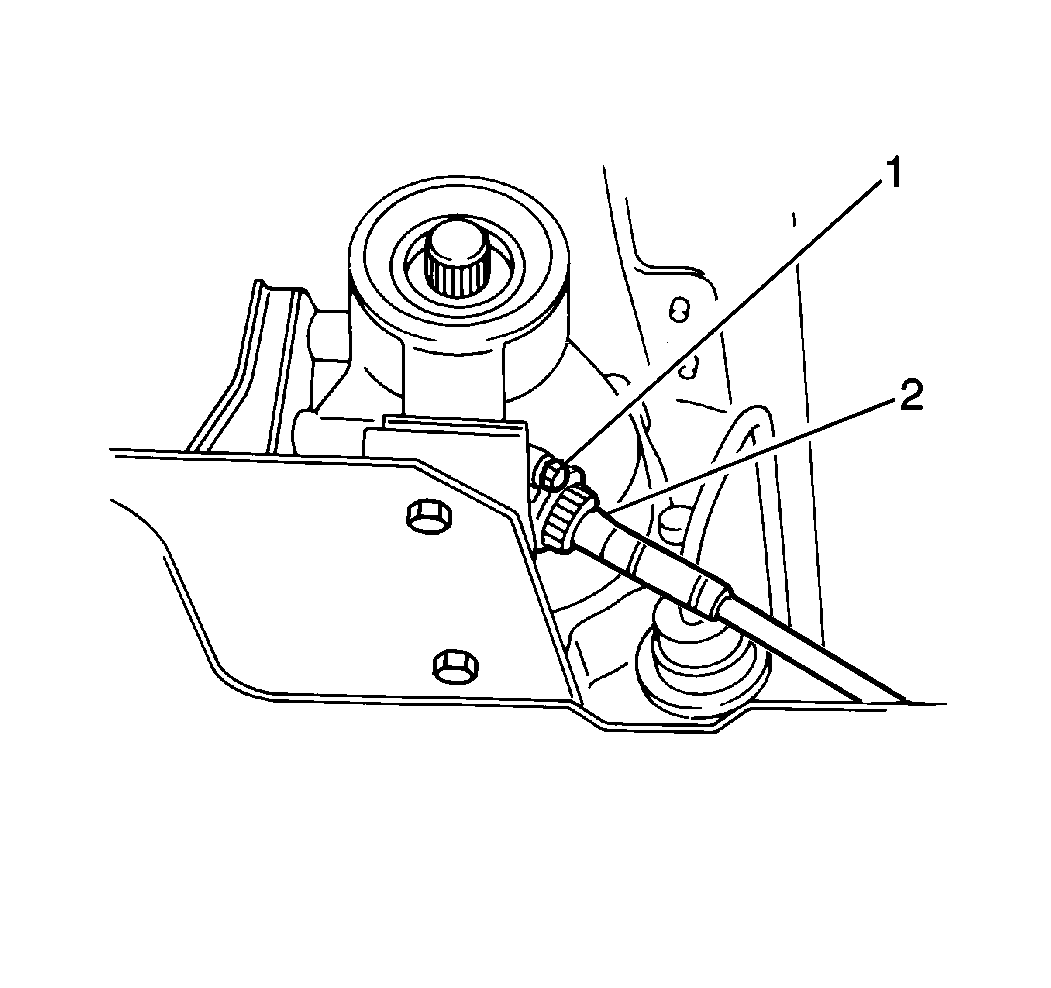
- Disconnect the speedometer
cable (2) from the speedometer driven gear case.
- Remove the following components from the transmission:
| • | The speedometer guide bracket bolt (1) |
| • | The speedometer guide bracket |
- Remove the speedometer driven gear case from the transmission
extension housing.
Remove the two exhaust pipe bracket bolts and nuts.
- Remove the exhaust pipe bracket from the extension housing and
the catalytic converter.
- Support the transmission with a suitable hydraulic jack.
- Remove the 2 rear transmission mount bolts.
- Remove the 4 rear transmission crossmember bolts.
- Remove the rear transmission crossmember from the vehicle.
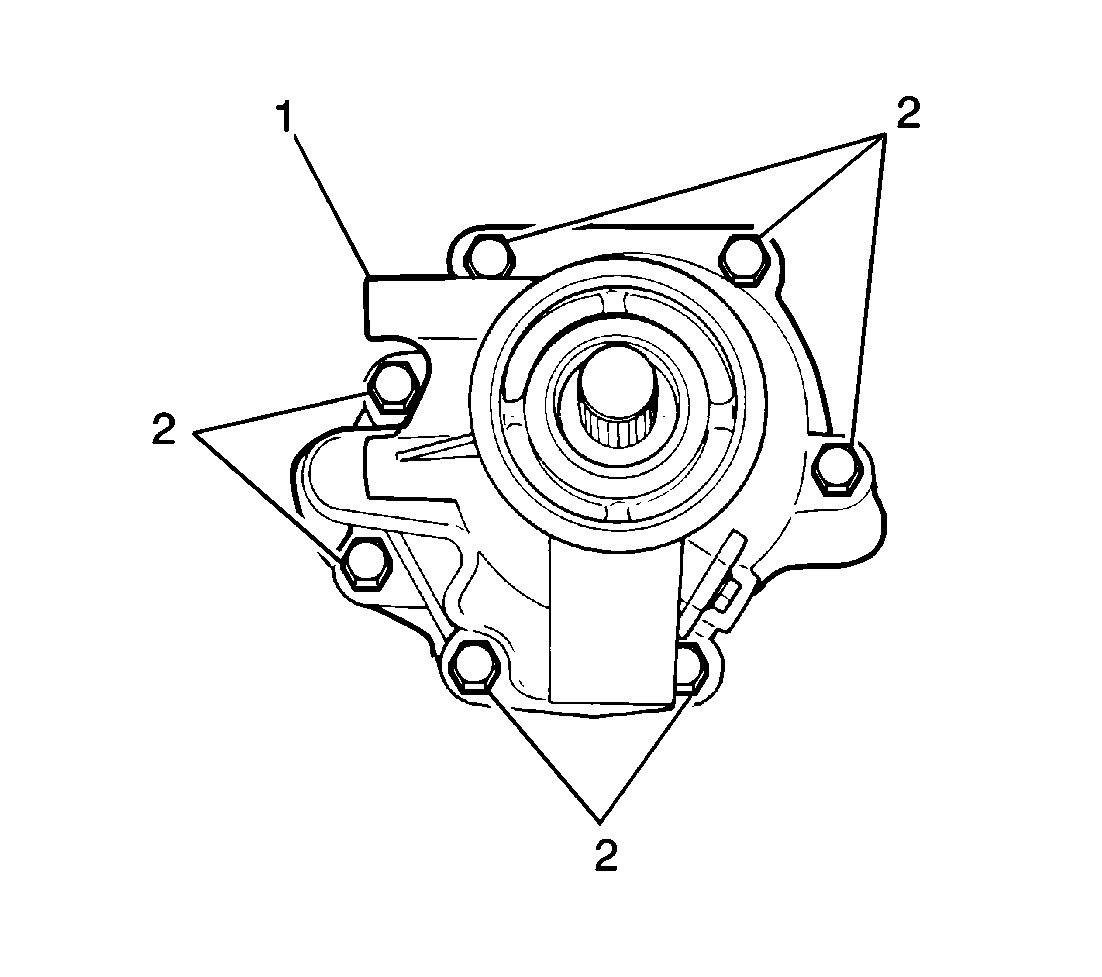
- Remove the following components
from the transmission
case:
| • | The 7 extension housing bolts (2) |
| • | The extension housing (1) |
| • | The extension housing gasket |
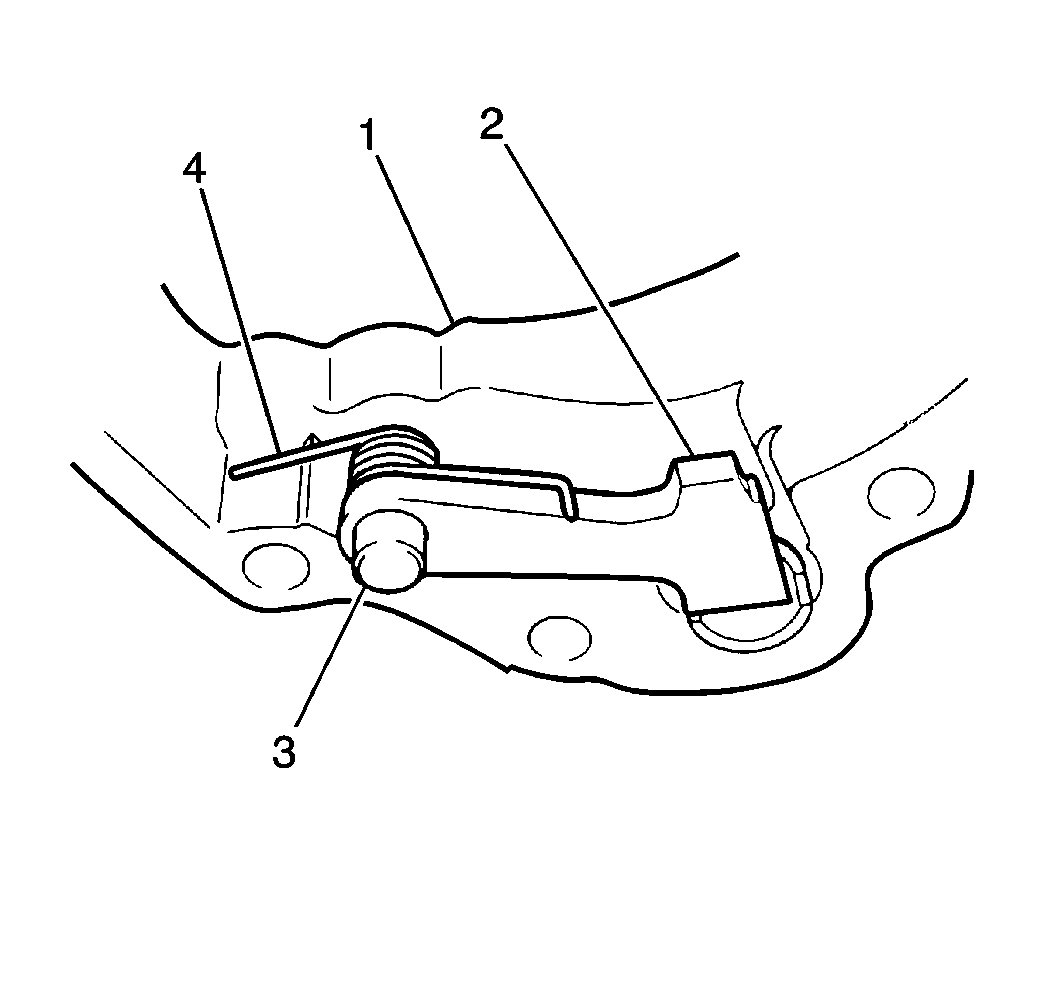
- Remove the following items
from the extension
housing (1):
| • | The parking lock pawl (2) |
| • | The parking lock pawl shaft (3) |
| • | The parking lock pawl return spring (4) |
- Use the J 23129
and
the J 6125-B
in order
to remove the extension housing seal from the extension housing.
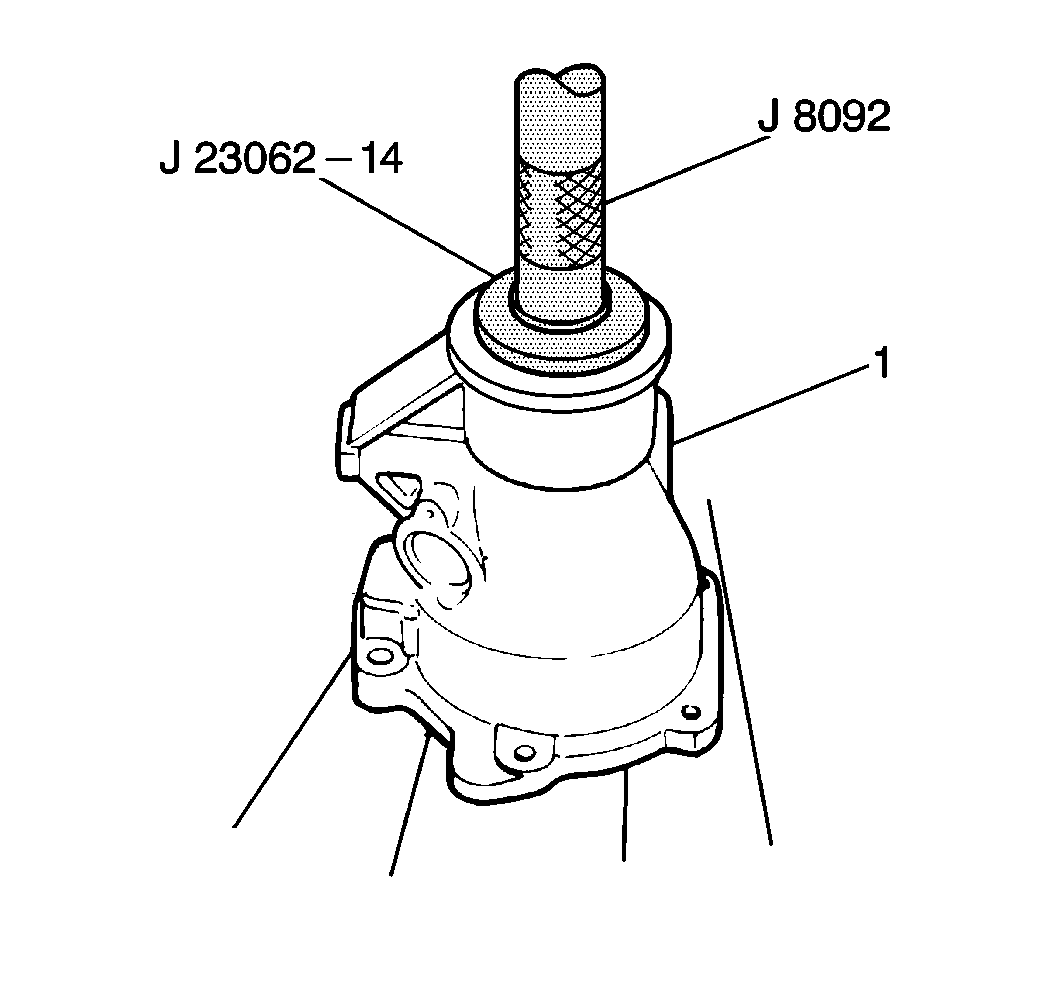
- Use the J 23062-14
and aJ 8092
in order to remove the extension bearing from the extension
housing (1).
- Clean the extension housing and the transmission case mating surfaces.
- Inspect the extension housing for cracks or other damage. Replace
the extension housing, if necessary.


