Engine Flywheel Replacement Without CTF
Removal Procedure
Caution: Refer to Battery Disconnect Caution in the Preface section.
- Disconnect the negative battery cable.
- Raise the vehicle. Refer to
Lifting and Jacking the Vehicle
in General Information.
- Remove the transmission assembly. Refer to
Transmission Replacement
in Automatic Transmission - Allison.
- If the vehicle is equipped with a manual transmission, remove the clutch
assembly.

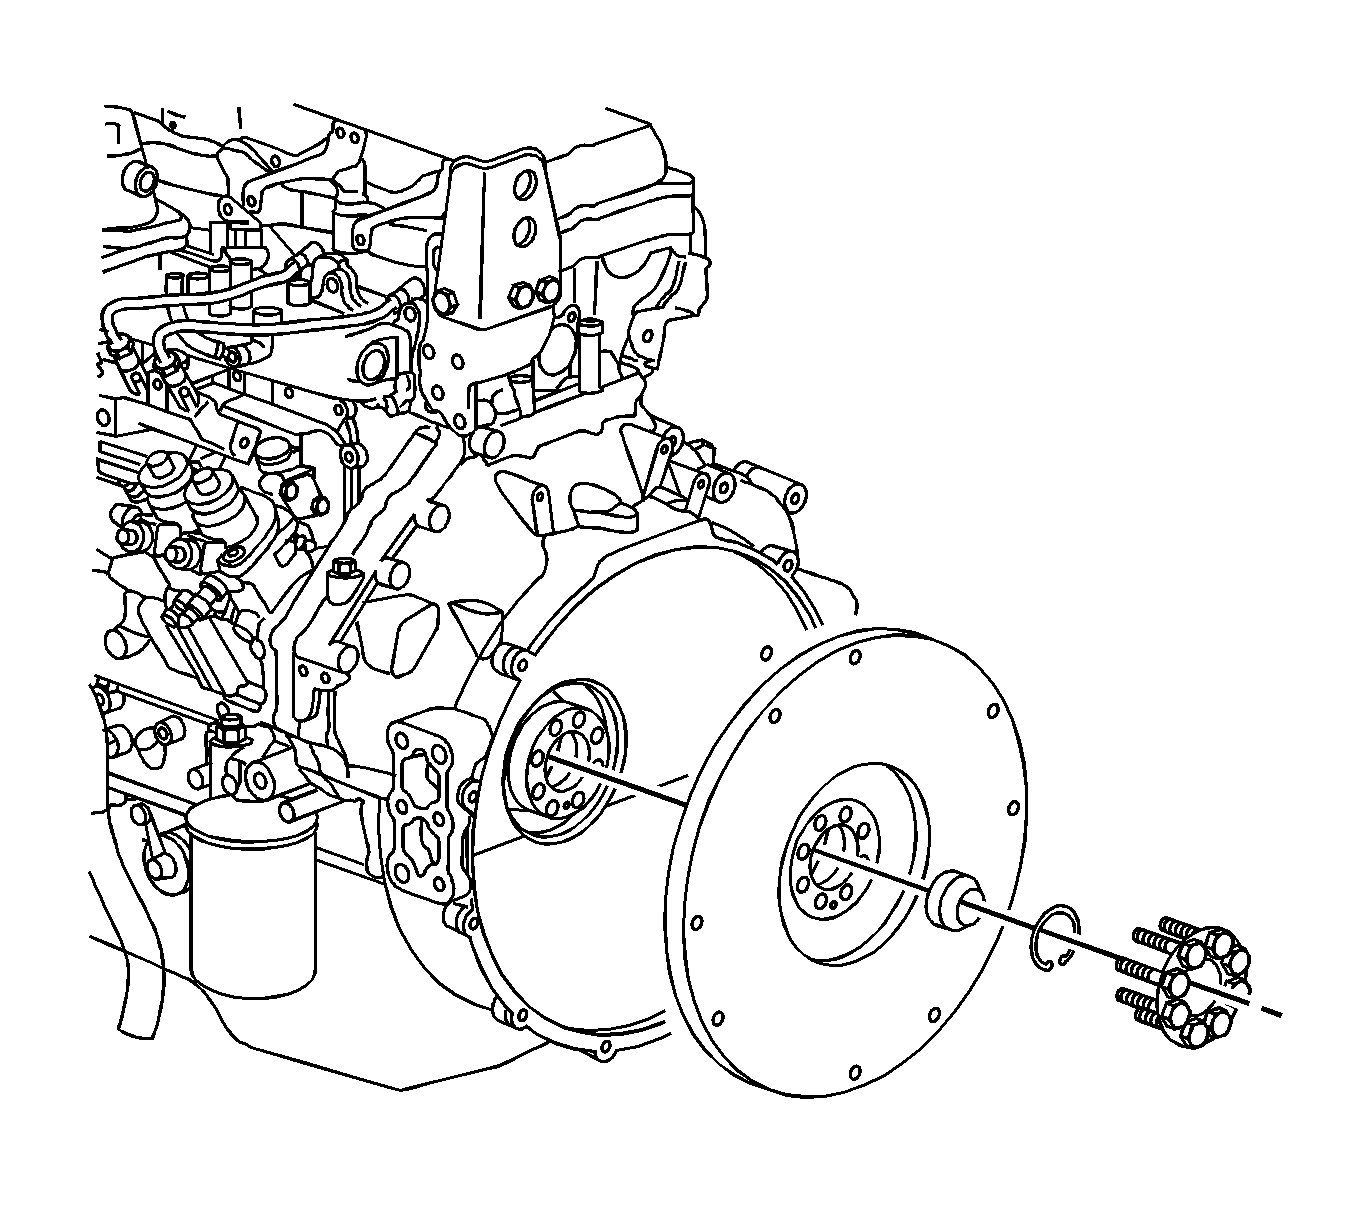
- Remove the flywheel bolts and washers.

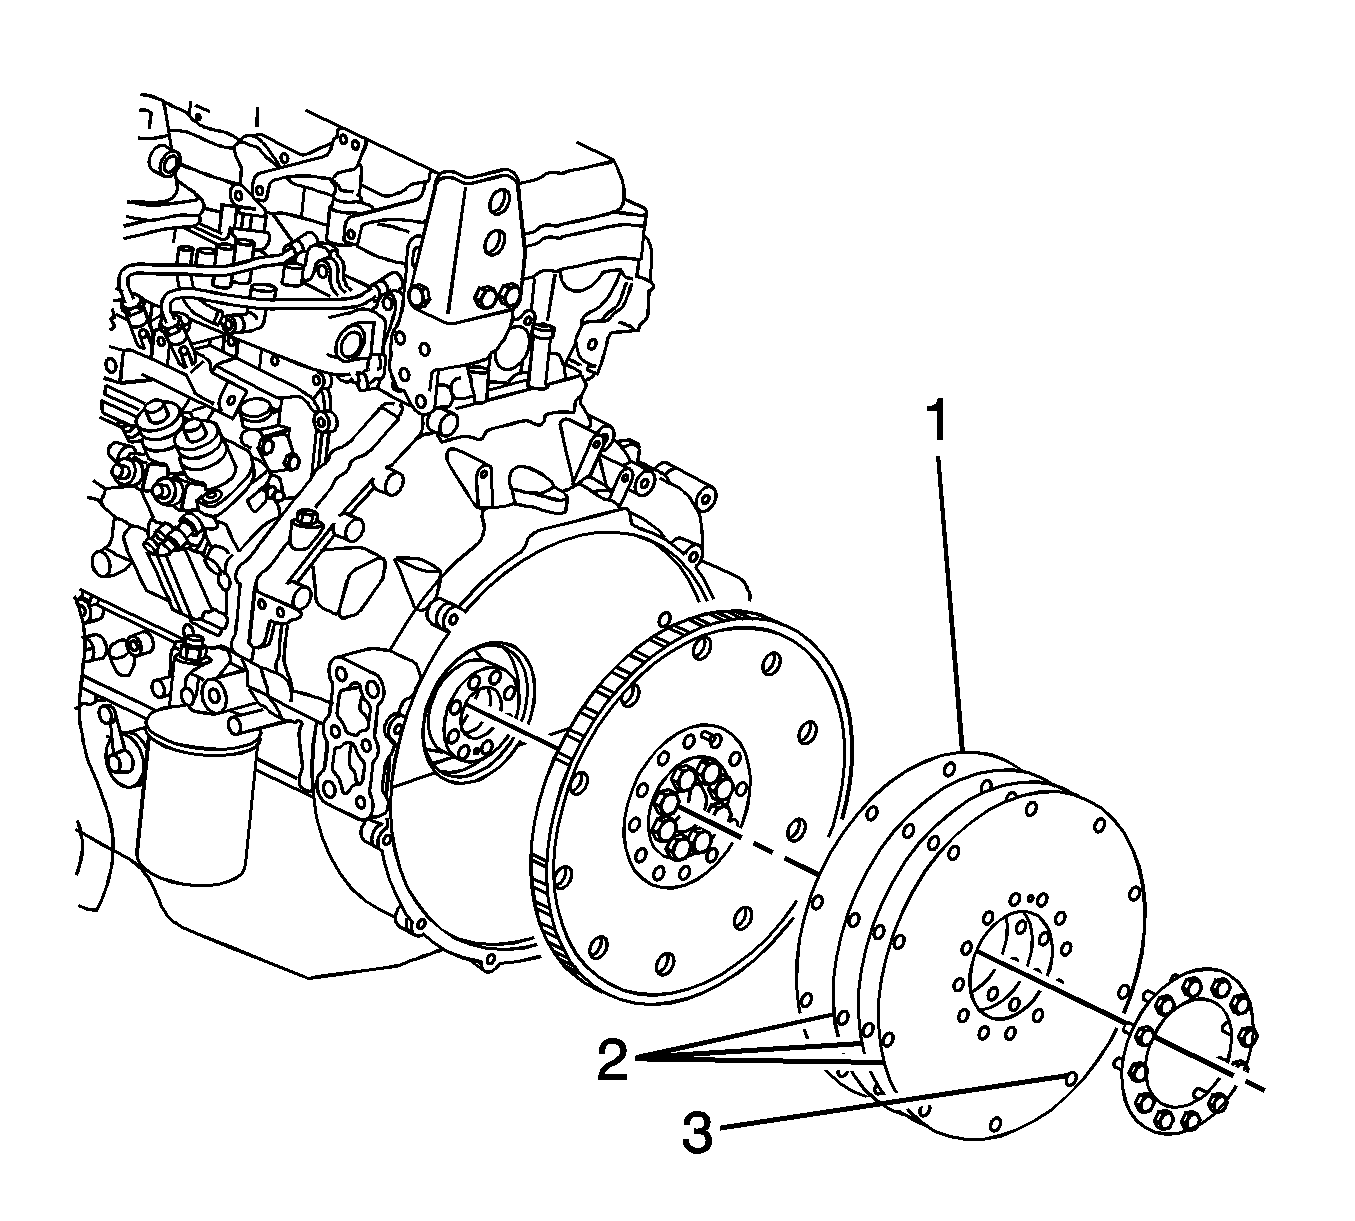
- If the vehicle is equipped with a MD automatic
transmission, remove the flex plate (1, 2).

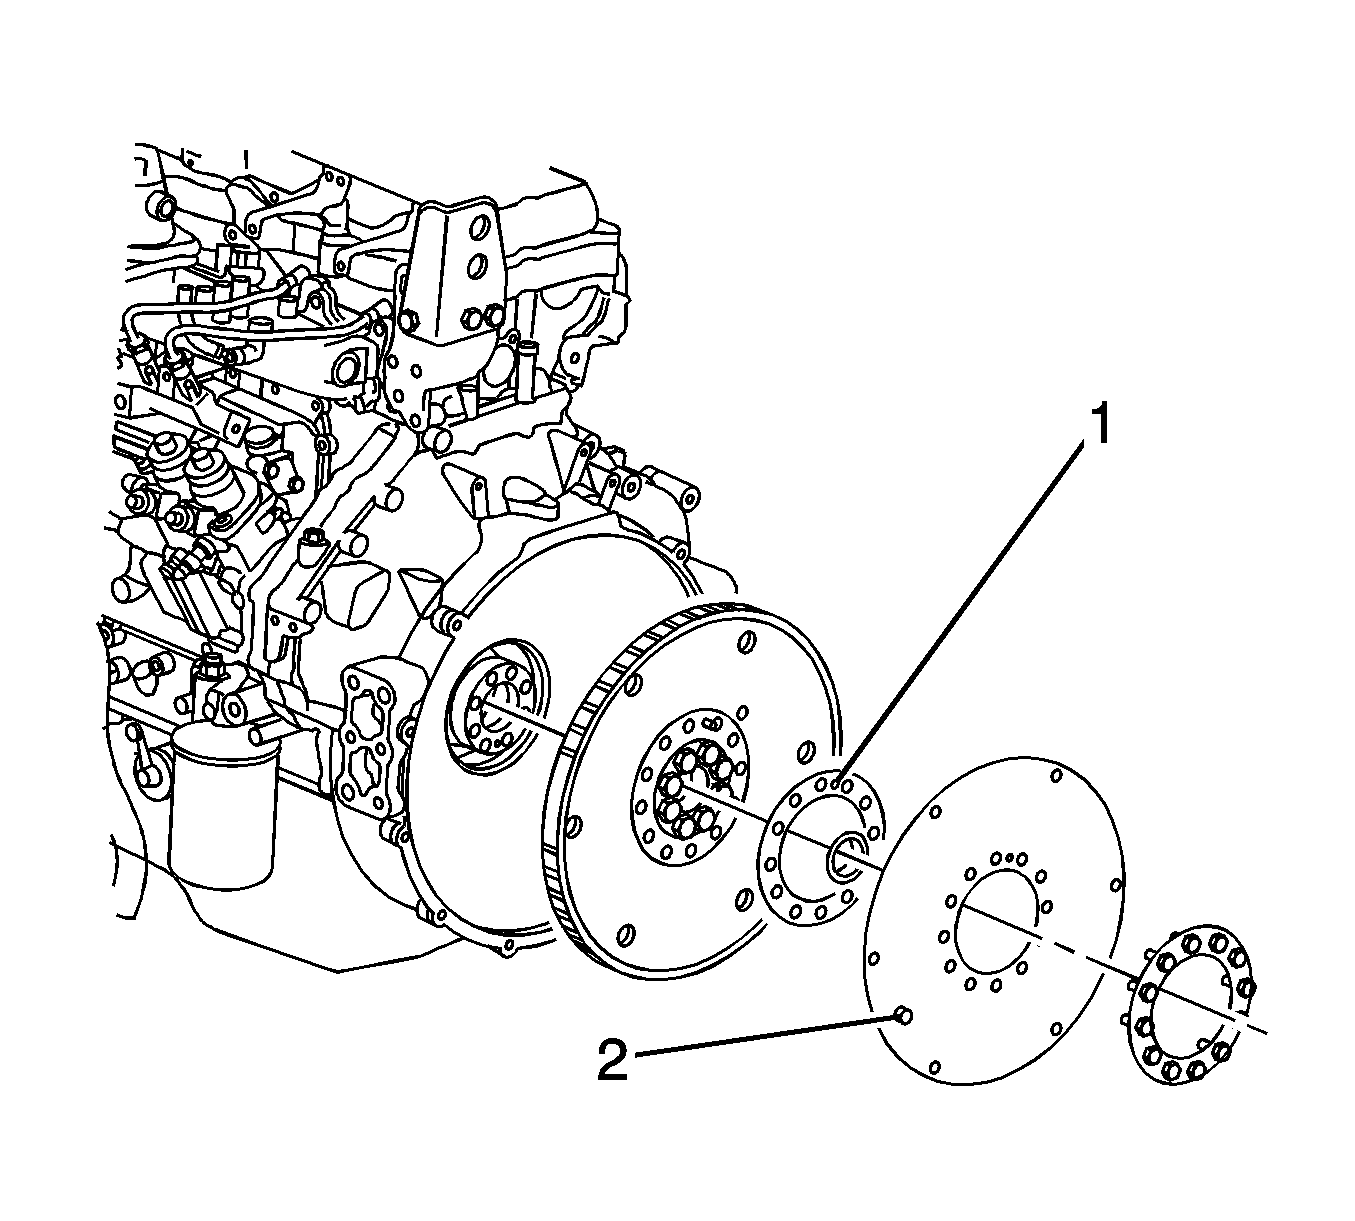
- If the vehicle is equipped with a LCT transmission, remove the flex plate (1, 2).
- Remove the flywheel assembly.
- Inspect the flywheel for burning, scoring, warping or excessive wear.
- Inspect the flywheel ring gear for worn or broken teeth.
Installation Procedure

- If the vehicle is equipped with a LCT automatic transmission, perform the following.
| 1.1. | Install the flywheel to the crankshaft. |
| 1.2. | Install the flex plate (1, 2) with knock pin, confirming the installation
direction. |
| 1.3. | To install the flex plate (1, 2), insert a shaft to net hole. Remove
the shaft after installation of the flex plate. |

- If the vehicle is equipped with a MD automatic
transmission, perform the following.
| 2.1. | Install the flywheel to the crankshaft. |
| 2.2. | Install the flex plate (1, 2) with knock pin, confirming the installation
direction. |
| 2.3. | To install the flex plate (1, 2), insert a shaft to net hole. Remove
the shaft after installation of the flex plate. |
Notice: Refer to Fastener Notice in the Preface section.

- Install the flywheel bolts and washers.
Tighten
Tighten the flywheel bolts in the following stages
according to the order in the figure:
| • | First stage: 78 N·m (58 lb ft). |
| • | Second stage: 60 degrees. |
| • | Third stage: 60 degrees. |
- If the vehicle is equipped with a manual transmission, install the clutch
to the flywheel.
- Install the transmission assembly. Refer to
Transmission Replacement
in Automatic Transmission -
Allison.
- Lower the vehicle.
- Connect the negative battery cable.
Engine Flywheel Replacement With CTF
Removal Procedure
- Disconnect the negative battery cable. Refer to
Battery Negative Cable Disconnection and Connection
in Engine Electrical.
- Raise the vehicle. Refer to
Lifting and Jacking the Vehicle
in General Information.
- Remove the transmission assembly. Refer to
Transmission Replacement
in Automatic Transmission - Allison.
- If the vehicle is equipped with a manual transmission, remove the clutch
assembly.

- Remove
the flywheel bolts and washers.

- If the vehicle is equipped with a MD automatic transmission, remove the flex
plate (1, 2).

- If the vehicle is equipped with a LCT transmission, remove the flex plate (1, 2).
- Remove the flywheel assembly.
- Inspect the flywheel for burning, scoring, warping or excessive wear.
- Inspect the flywheel ring gear for worn or broken teeth.
Installation Procedure

- If the vehicle is equipped with a LCT automatic transmission, perform the following.
| 1.1. | Install the flywheel to the crankshaft. |
| 1.2. | Install the flex plate (1, 2) with knock pin, confirming the installation
direction. |
| 1.3. | To install the flex plate (1, 2), insert a shaft to net hole. Remove
the shaft after installation of the flex plate. |

- If the vehicle is equipped with a MD automatic transmission, perform the following.
| 2.1. | Install the flywheel to the crankshaft. |
| 2.2. | Install the flex plate (1, 2) with knock pin, confirming the installation
direction. |
| 2.3. | To install the flex plate (1, 2), insert a shaft to net hole. Remove
the shaft after installation of the flex plate. |
Notice: Refer to Fastener Notice in the Preface section.

- Install the flywheel bolts and washers.
Tighten
Tighten the flywheel bolts in the following stages
according to the order in the figure:
| • | First stage: 78 N·m (58 lb ft) |
| • | Second stage: 60 degrees |
| • | Third stage: 60 degrees |
- If the vehicle is equipped with a manual transmission, install the clutch
to the flywheel.
- Install the transmission assembly. Refer to
Transmission Replacement
in Automatic Transmission - Allison.
- Lower the vehicle.
- Connect the negative battery cable. Refer to
Battery Negative Cable Disconnection and Connection
in Engine Electrical.


