Caution: Diesel fuel containing water is still flammable. You could be burned. If you ever try to drain water from your fuel, keep sparks, flames and smoking materials away from the mixture.
Notice: If there is water in the diesel fuel and the weather is warm or humid, fungus and bacteria can grow in the fuel. They can damage the fuel system. A diesel fuel biocide can be used to sterilize the fuel system. However, the fuel system may still need to be cleaned. Your dealer/retailer can advise you of the appropriate solution.
If the fuel tank needs to be purged to remove water, see your dealer/retailer or a qualified technician. Improper purging can damage the fuel system.Sometimes, water can be pumped into your fuel tank along with your diesel fuel. This can happen if a service station doesn't regularly inspect and clean its fuel tanks, or if it gets contaminated fuel from its suppliers.

If this happens, a water-in-fuel indicator will come on. If it does, the water must be drained. Your dealer can show you how to do this.
If it comes on, use this chart.
Problem | Recommended Action | ||
|---|---|---|---|
Light comes on intermittently. | Drain water from fuel filter. | ||
Light stays on: | |||
| Drain fuel filter immediately. If no water can be drained and light stays on, see you dealer for assistance. | ||
| Drain fuel filter immediately. If no water can be drained, water may be frozen in water drain system. Water may be frozen in the fuel lines. Move the vehicle to a warm location to thaw out, and then drain filter system. | ||
| Fuel tank purging required. See you dealer for assistance. | ||
Notice: Driving when this warning indicator is on, can damage the fuel injection system and the engine. If the indicator comes on right after a refuel, it means water was pumped into the fuel tank. Turn off the engine immediately. Then, have the water drained at once.
The frequency of water draining or element replacement is determined by the contamination level in the fuel. Inspect or service the collection bowl for water daily and replace the element every 10,000 miles or at least every other oil change or whichever comes first.
To drain water, do the following:
-

Loosen the self-venting drain to empty the bowl of water.
- Tighten the drain. Run the engine and check for leaks.
To replace the element, do the following:
- Disconnect the element electrical connector from the bowl.
- Loosen the self-venting drain to empty the bowl of water.
- Remove the filter element from the mounting head with the bowl connected.
- Remove the bowl from the filter element. Clean the bowl and the O-ring gland and save them for re-use..
- Lubricate the O-ring with clean diesel fuel or motor oil and place it in the bowl gland.
- Spin the bowl onto the new filter element snugly by hand. Do not use tools to tighten them together.
- Lubricate the filter top seal with clean diesel fuel or motor oil.
- Fill the filter element/bowl assembly with clean diesel fuel and attach it onto the mounting head. Hand tighten an additional one-third to one-half turn after full seal contact is made.
- Complete the priming procedure. See "Fuel Priming" following.
- Start your engine and check that there are no leaks.
If the water-in-fuel light comes on again after driving a short distance or if the engine runs rough or stalls, a large amount of water has probably been pumped into the fuel tank. The fuel tank should be purged.
Fuel Priming
In order for the diesel engine fuel system to work properly, the fuel lines must be full of fuel and contain no air. If air gets into the fuel lines, it will be necessary to prime the fuel lines to eliminate air before operating the vehicle.
Air can get into the fuel lines by any of the following happening:
| • | The vehicle ran out of fuel. |
| • | The fuel filter was removed for servicing or replacement. |
| • | The fuel lines were removed or disconnected for servicing. |
| • | The fuel filter water drain valve was opened while the engine was running. |
Air in the fuel lines will not harm the engine or the vehicle, however, the engine may not be able to start until the fuel system is primed and the air is removed.
For vehicles with cruise control, you can prime the vehicle and remove the air from the fuel system. The following procedure will show you how:
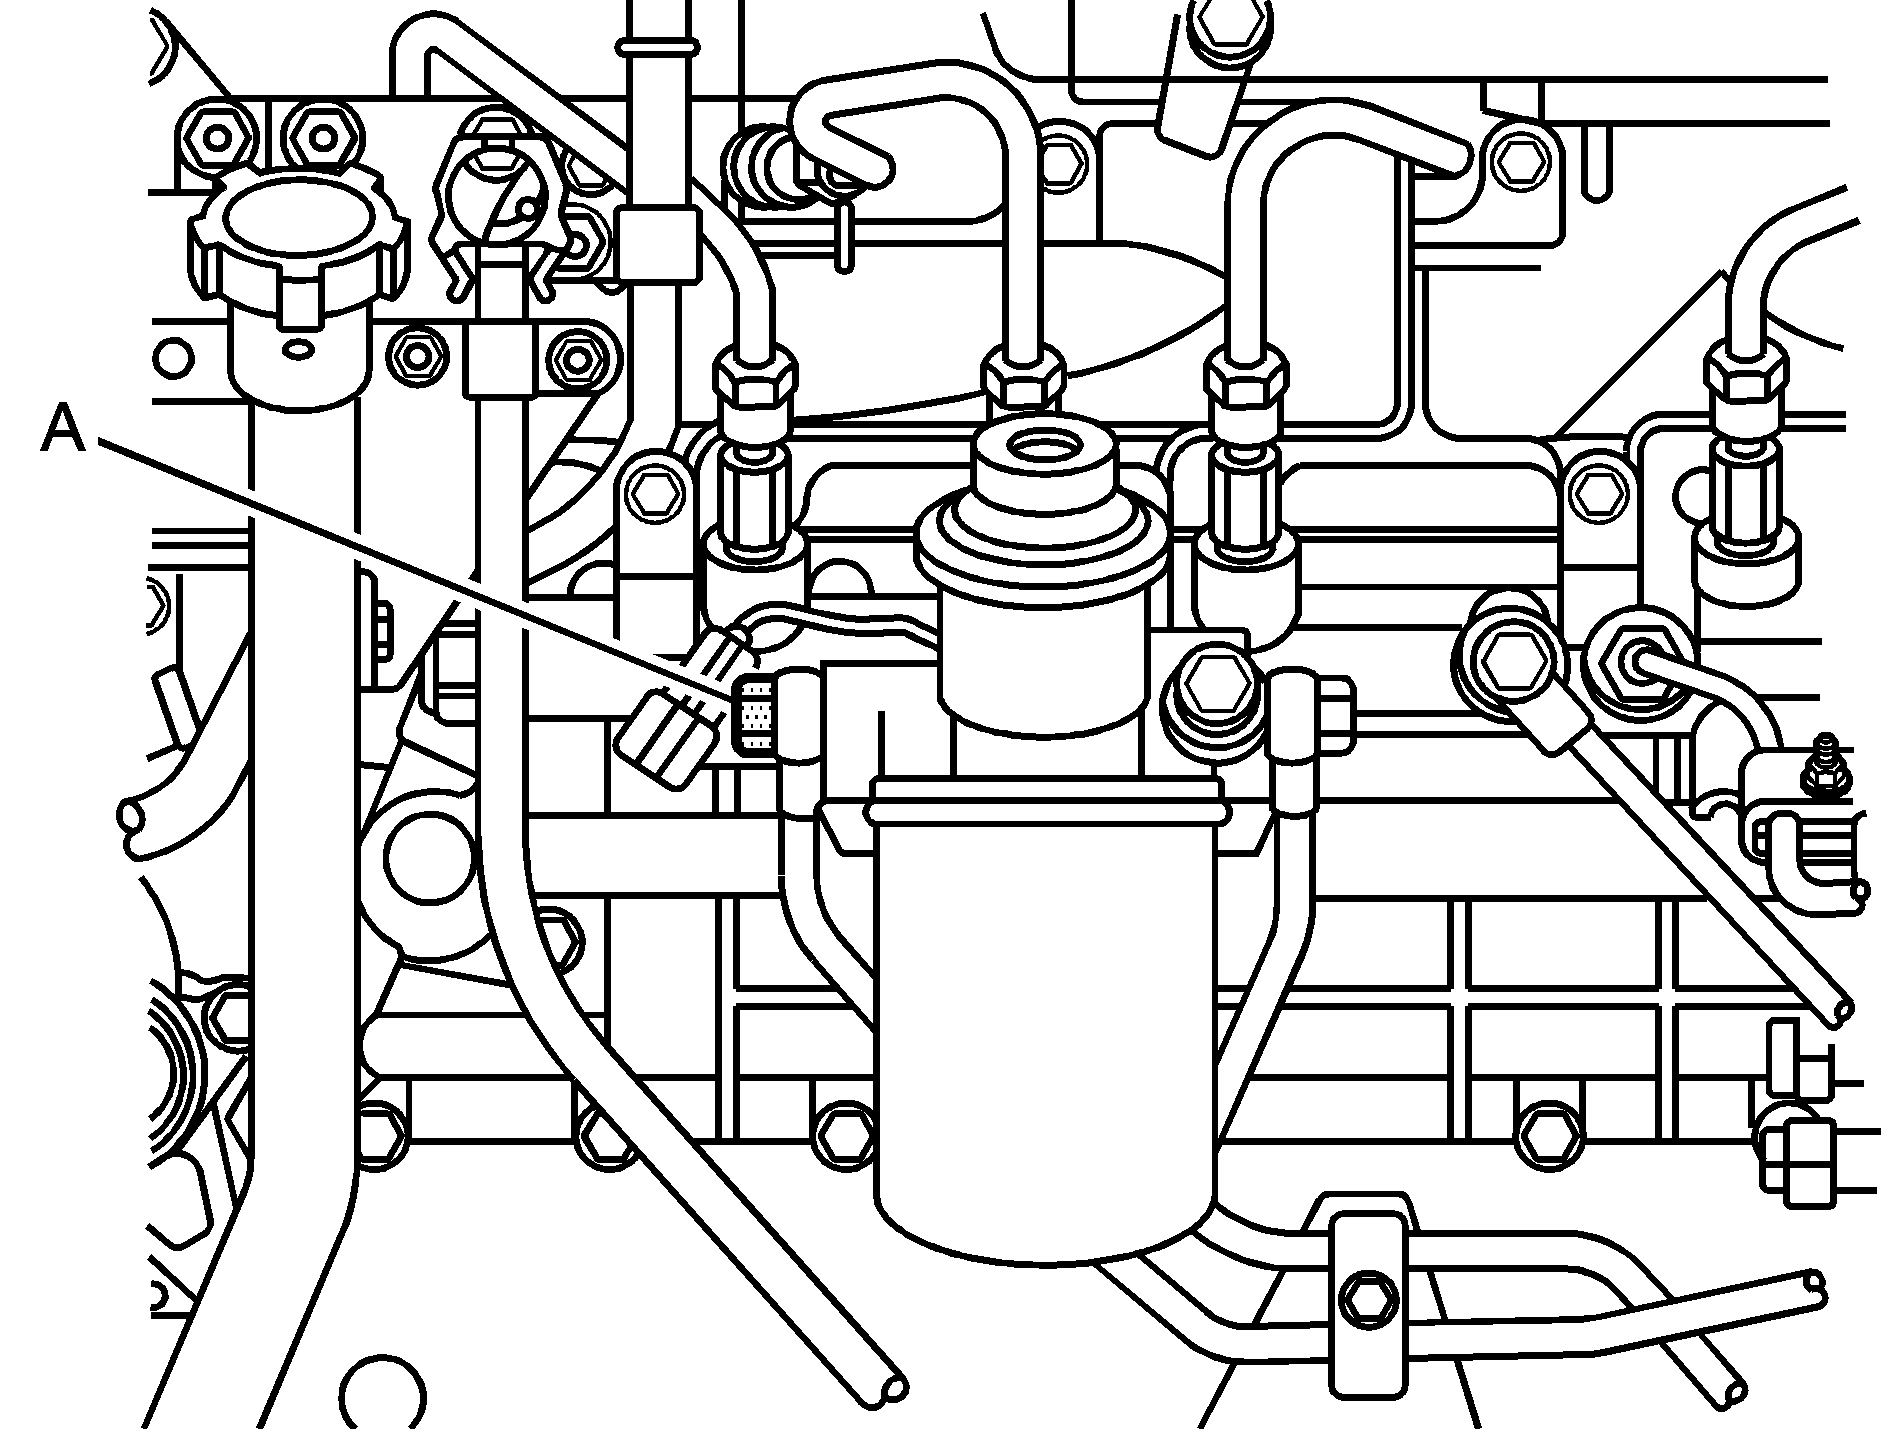
- Loosen the fuel filter eye bolt (A) which is located on the driver's side of the vehicle toward the front of the engine compartment.
- Push down on the plunger at the top of the priming pump which is located at the top of the fuel filter. Be sure that there are no bubbles in fuel flowing from the eye bolt.
- Tighten the eye bolt to 41 N·m (30 ft. lbs).
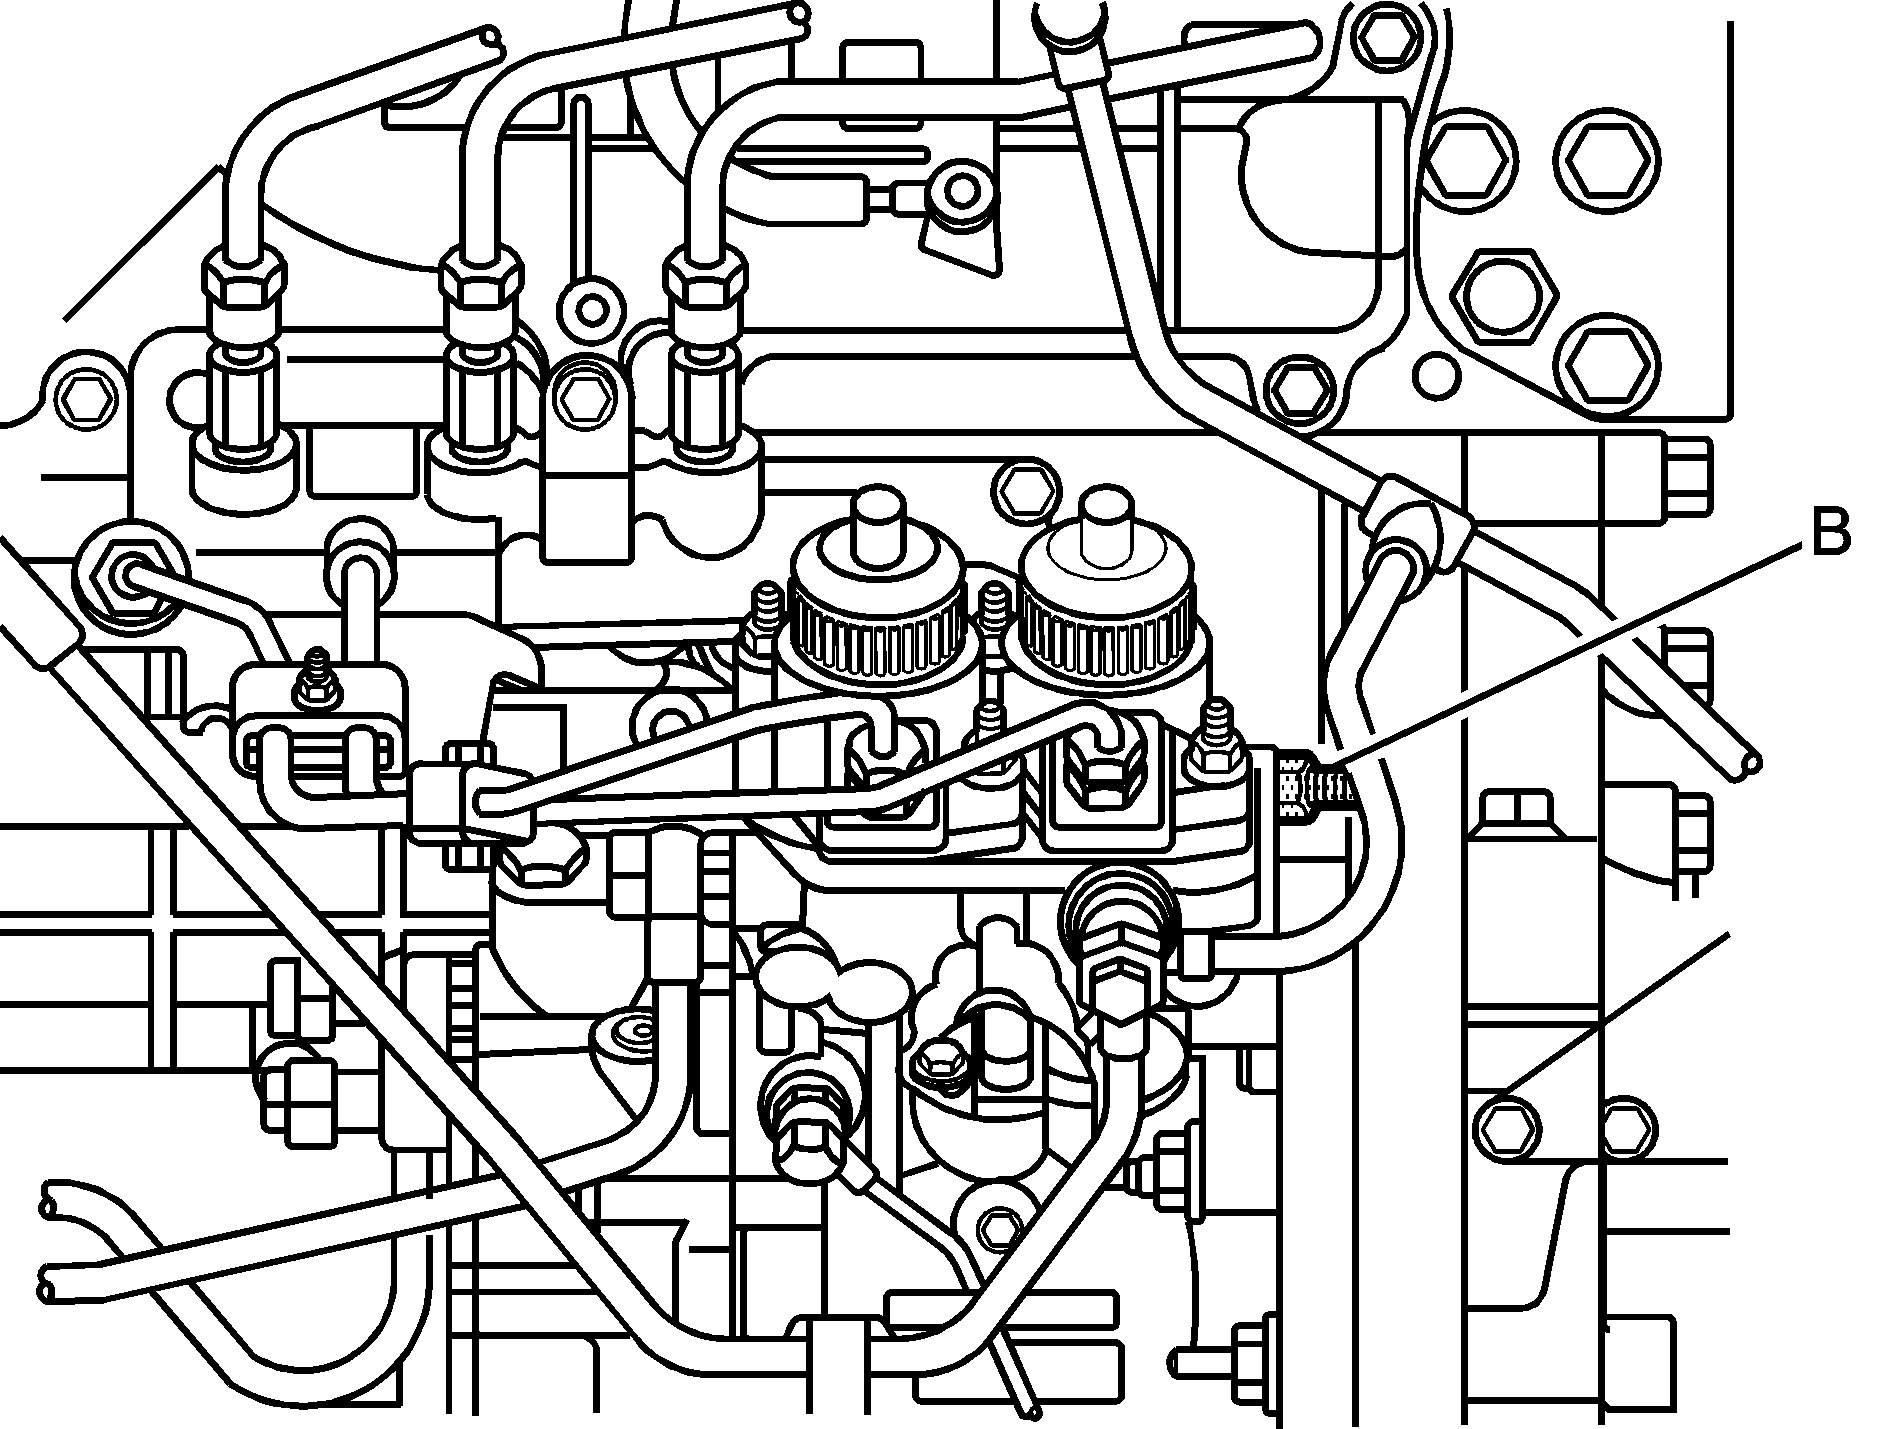
- Loosen the air bleeding plug (B) which is located at the side of the fuel supply pump on the driver's side of the vehicle toward the cab.
- Push down on the plunger at the top of the priming pump. Be sure that there are no bubbles in the fuel flowing from the air bleeding plug.
- Tighten the air bleeding plug to 6 N·m (52 in. lbs).
- Push down on the plunger at the top of the priming pump about 60 more times.
- Turn the ignition switch to the ON position. Do not start the engine.
- Press the cruise control main switch (if equipped) which is located on the lower left side of the instrument panel to activate the fuel injectors. The light inside of the switch will turn on. You will hear the sound of the injectors. Allow the fuel injectors to operate for five minutes
- Push down on the plunger at the top of the priming pump about 60 more times during this period.
- Press the cruise control switch (if equipped) again to stop the injectors.
- Start the engine and allow it to idle for a few minutes.


If you are unable to start the engine, repeat this air bleeding procedure.
For vehicles without cruise control, the following procedure will show you how:
- Follow steps 1 through 8 of the fuel priming and air bleeding for vehicles with cruise control procedure earlier in this section.
- Raise the passenger seat.
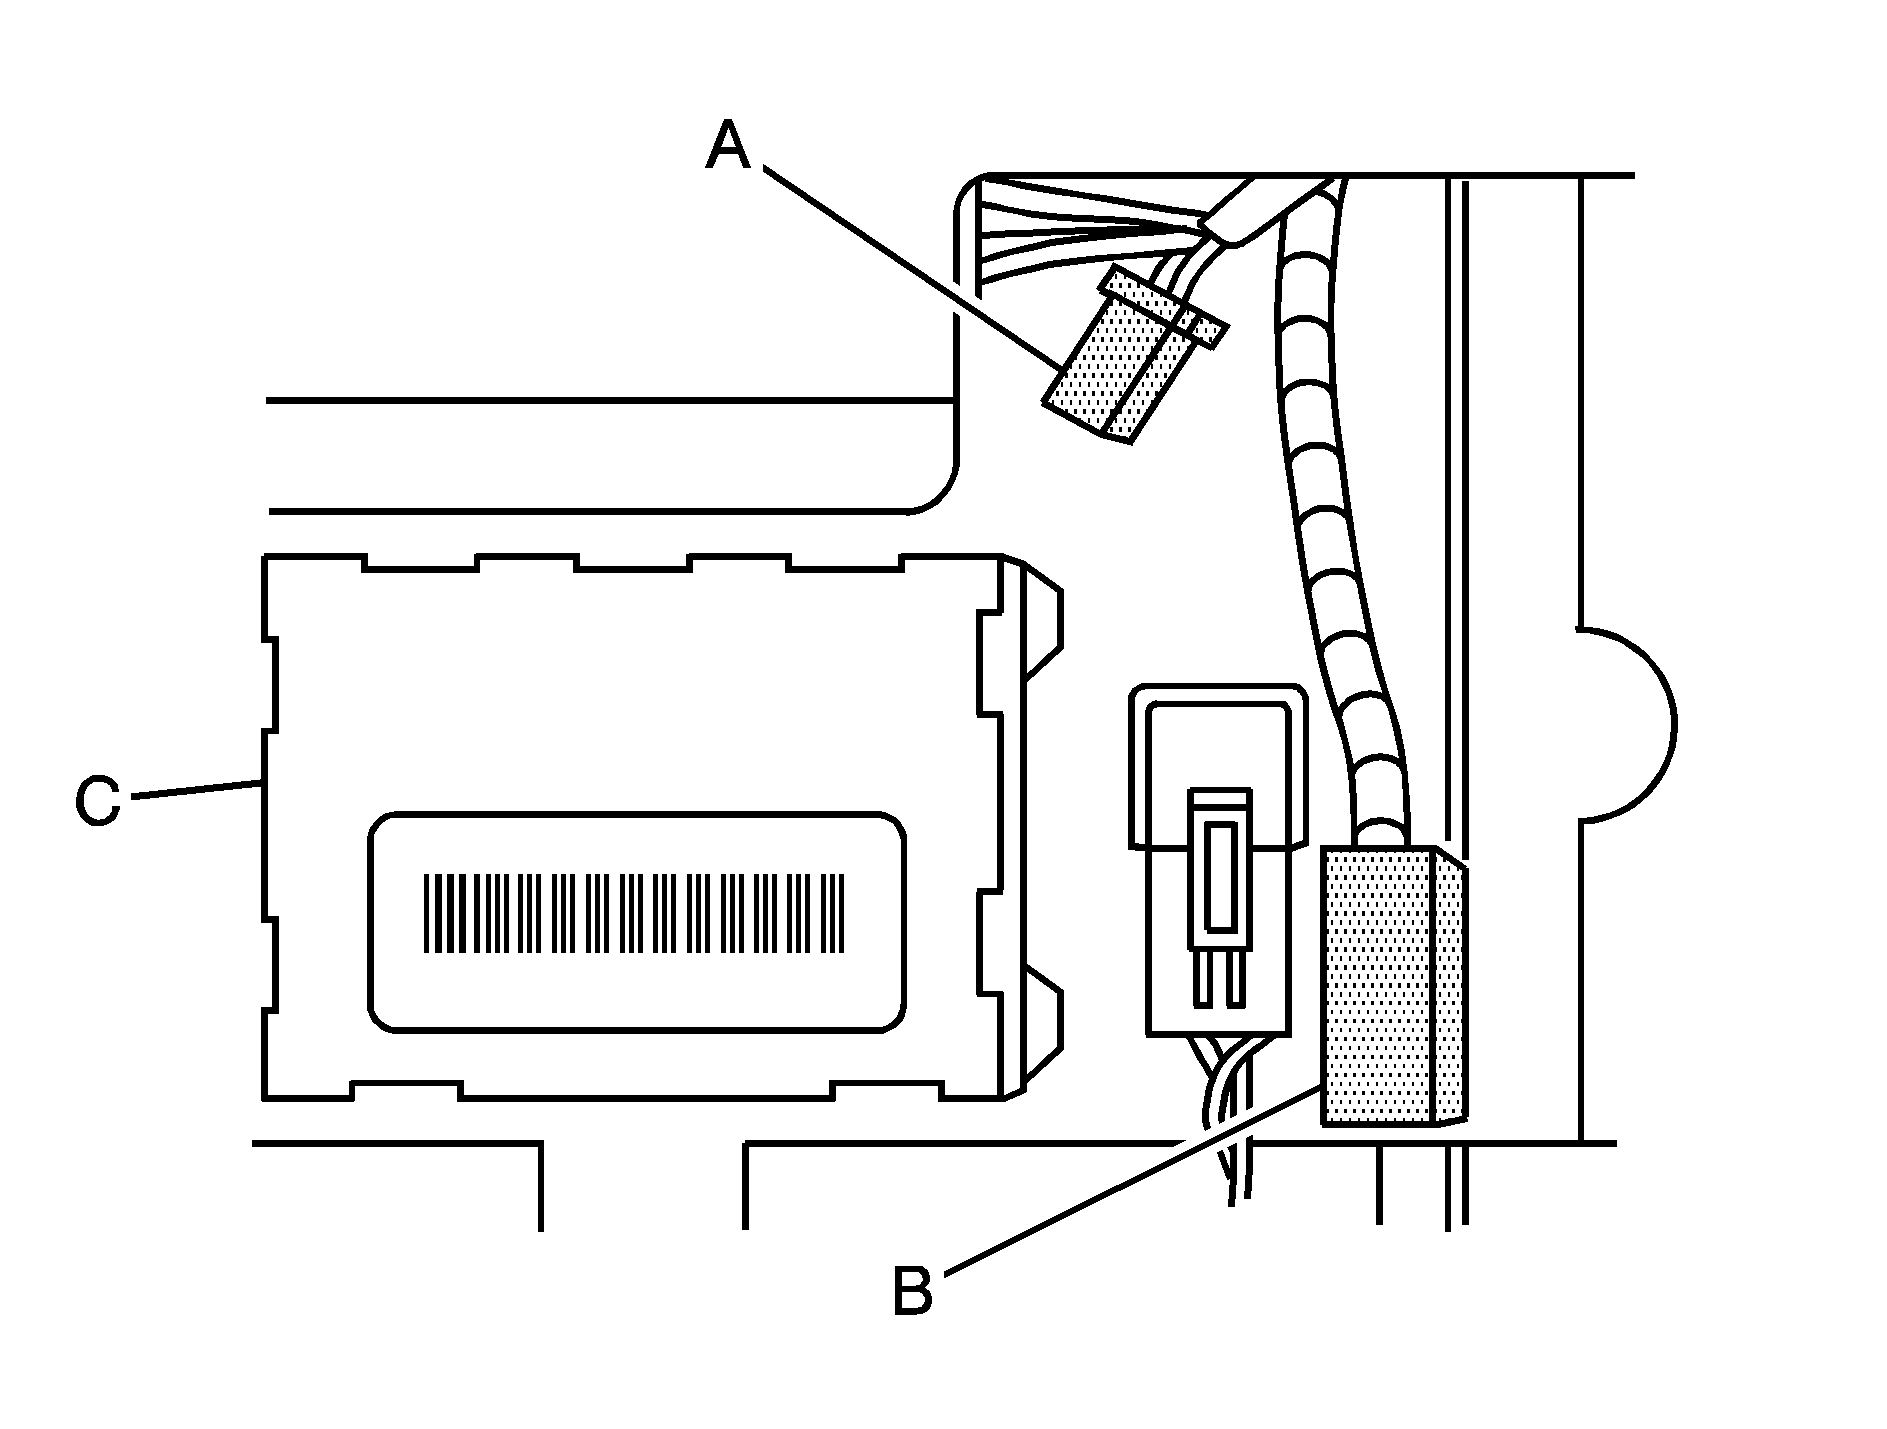
- Locate the short connector (A) and the long connector (B) near the electronic control module (ECM) (C). The short connector is inside of a protective cover.
- Join the two connectors to turn the fuel injectors on. You will hear the sound of the injectors. Allow the fuel injectors to operate for five minutes.
- Push down on the plunger at the top of the priming pump about 60 more times during this period.
- Disengage the connectors to stop the injectors.
- Start the engine and allow it to idle for a few minutes

If you are unable to start the engine, repeat this air bleeding procedure.
