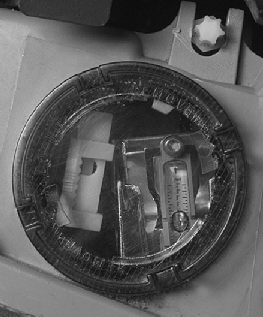
Your vehicle has a headlamp system equipped with horizontal and vertical aim
indicators. The aim has been pre-set at the factory and should need no further adjustment.
This is true even though your vertical and horizontal aim indicators may not fall
exactly on the "0" (zero) marks on their scales.
If your vehicle is damaged in an accident, the headlamp aim may be affected.
Aim adjustment may be necessary if it is difficult to see lane markers (for horizontal
aim), or if oncoming drivers flash their high beams at you (for vertical aim). If
you believe your headlamps need to be re-aimed, we recommend that you take it to your
dealer for service; however, it is possible for you to re-aim your headlamps as described
in the following procedure.
Notice: To make sure the headlamps are aimed
properly, read all the instructions before beginning. Failure to follow these instructions
could cause damage to headlamp parts.
To check the aim, the vehicle should be properly prepared as follows:
| • | The vehicle must have all four tires on a perfectly level surface. |
| • | If necessary, pads may be used on an uneven surface. |
| • | The vehicle should not have any snow, ice or mud attached to it. |
| • | The vehicle should be fully assembled and all other work stopped while
headlamp aiming is being done. |
| • | There should not be any cargo or loading of the vehicle, except it should
have a full tank of fuel and one person or 160 lbs. (75 kg) on the driver's
seat. |
| • | Tires should be properly inflated. |
| • | Rock the vehicle to stabilize the suspension. |

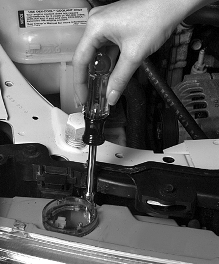
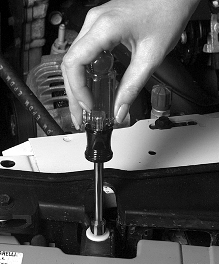
Start with the horizontal aim. The adjustment screws can be turned with an E8
Torx ® socket.
Once the horizontal aim is adjusted, then adjust the vertical aim.
Horizontal Aiming

Vertical Aiming

- Turn the horizontal aiming screw until the indicator is lined up with
zero.
- Turn the vertical aiming screw until the level bubble is lined up with
zero.


