Removal Procedure
Tools Required
J 38822 Cam Chain Tension Holder
- Remove the camshaft cover. Refer to Camshaft Cover Replacement (Left) and Camshaft Cover Replacement (Right) .
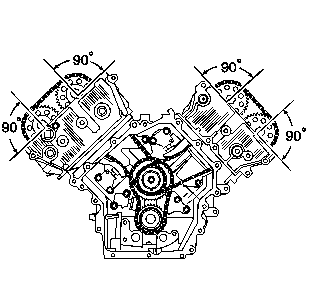
- Set the engine at base timing (top dead center number one piston).
- Align the timing marks to the correct position. Refer to Setting Camshaft Timing for the correct timing mark alignment.
- Secure the camshaft sprocket to the secondary timing chain using tie-straps through the camshaft sprocket holes. Use two tie-straps per sprocket.
- Working behind the sprockets, install the J 38822 between the chain tensioner and the chain guide. Apply tension by tightening the tool adjusting screw.
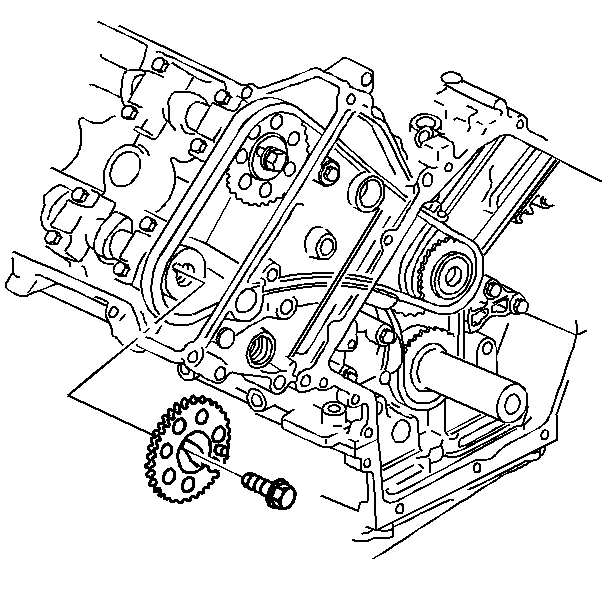
- Remove the camshaft sprocket bolts. Note the relative location of the camshaft drive pins in the ends of the camshafts.
- Work the sprockets off of the camshafts using the play in the chain.
- Alternately loosen the camshaft bearing cap screws a few turns at a time until all valve spring pressure has been released.
- Remove the camshaft bearing cap bolts and caps.
- Remove the camshaft.
- Inspect and measure the camshaft lobes and valve lifters. Measurement can be performed with the camshaft still in the engine. Refer to Camshaft Inspection and Measurement .
- Replace the camshaft if any of the following conditions exist:
Important: Do not mix the camshaft bearing caps between positions or between heads. Each cap must be reassembled in the position from which it was removed and in the original orientation (arrow pointing toward the front of the engine).
Important: The sprocket-to-chain relationship must be maintained throughout this procedure or the camshaft timing will be lost and require further engine disassembly for retiming.

Important: When using J 38822 on the right hand cylinder bank, remove the wiper motor in order to gain access for the tool usage.

| • | Excessive lifter wear |
| • | Excessive scoring on the lifters and/or camshaft |
| • | Excessive flaking on the lifters and/or camshaft |
| • | Scored or burned bearing journals |
Installation Procedure
Tools Required
J 38822 Camshaft Chain Tension Holder
- Apply GM approved camshaft prelube, P/N 1052365, to the face of each camshaft lobe and journal.
- Install the camshaft.
- Position the camshaft bearing caps to the cylinder head.
- Loosely install the camshaft bearing cap bolts.
- Alternately tighten each bearing cap bolt a few turns at a time against the valve spring pressure until all bolts are snug.
- Slide the camshaft sprockets onto the camshafts. Using the hex cast into the camshaft, rotate the camshafts until the drive pins are in the correct position to engage the camshaft sprockets over the camshafts.
- Install the camshaft sprocket retaining bolts.
- Remove the J 38822 .
- Remove the tie-straps from the camshaft sprockets.
- Install the camshaft covers. Refer to Camshaft Cover Replacement (Left) and Camshaft Cover Replacement (Right) .
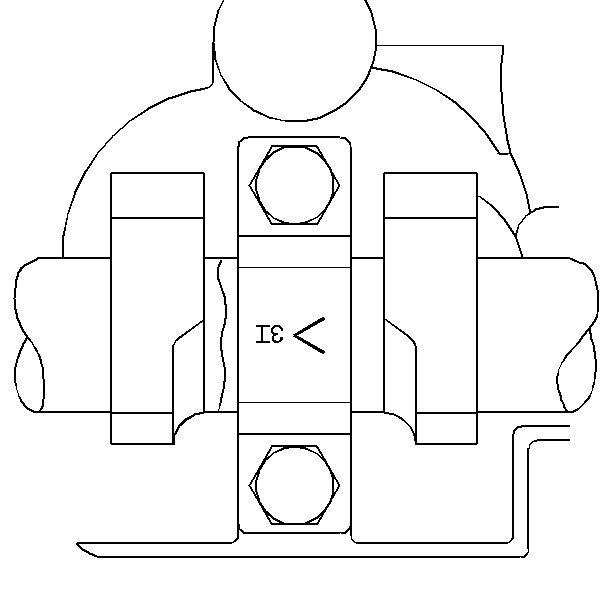
| • | Each cap is identified for position and direction. |
| • | The arrow should point toward the front of the engine. |
| • | These caps are stamped for identification. The E indicates a cap for the exhaust camshaft. The I indicates a cap for the intake camshaft. The E1 or I1 is the first cap at the front of the engine. |
Tighten
Tighten the bolts to 12 N·m (106 lb in).
Notice: Use the correct fastener in the correct location. Replacement fasteners must be the correct part number for that application. Fasteners requiring replacement or fasteners requiring the use of thread locking compound or sealant are identified in the service procedure. Do not use paints, lubricants, or corrosion inhibitors on fasteners or fastener joint surfaces unless specified. These coatings affect fastener torque and joint clamping force and may damage the fastener. Use the correct tightening sequence and specifications when installing fasteners in order to avoid damage to parts and systems.

Tighten
Tighten the sprocket bolts to 120 N·m (89 lb ft).
