Throttle Body Assembly Replacement Replacement
Removal Procedure
Notice: Do not damage the MAF sensor screen. A damaged screen could restrict airflow and lead to a driveability concern.
- Remove the rear seat cushion. Refer to Seats and Carpet.
- Remove the negative battery cable. Refer to Battery.
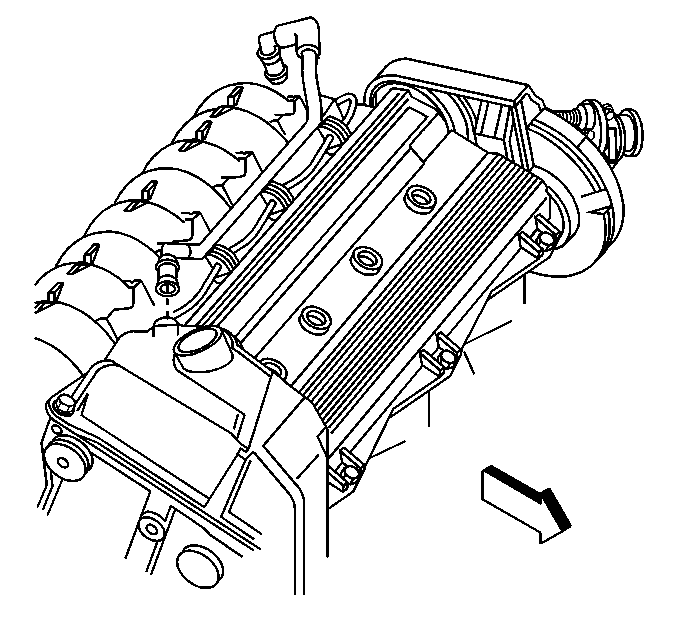
- Remove the intake manifold top cover.
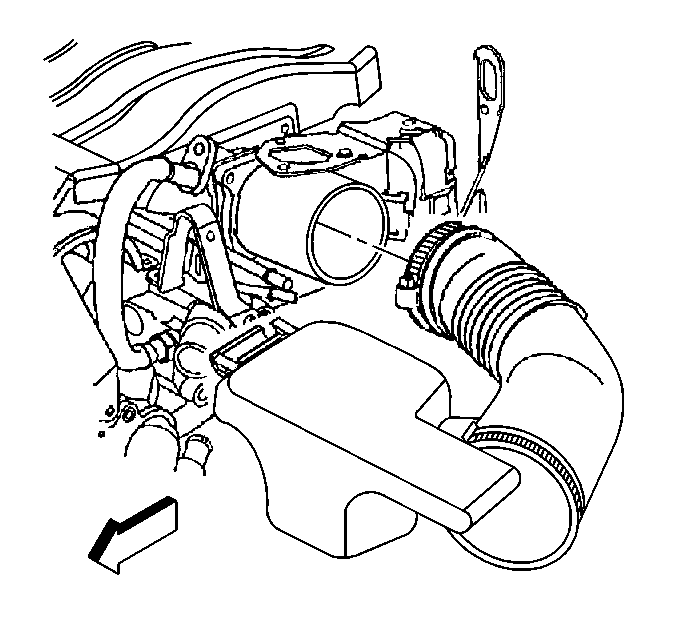
- Remove the intake air duct.
- Remove the MAF sensor electrical connector.
- Remove the MAF sensor.
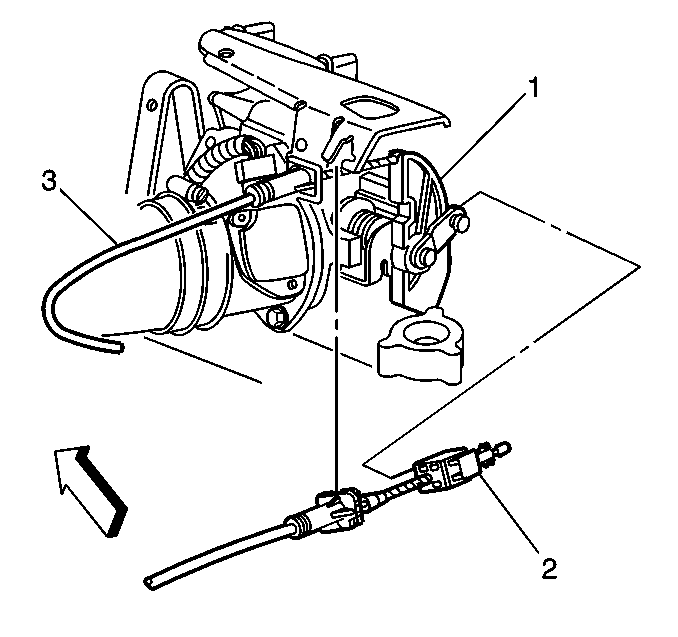
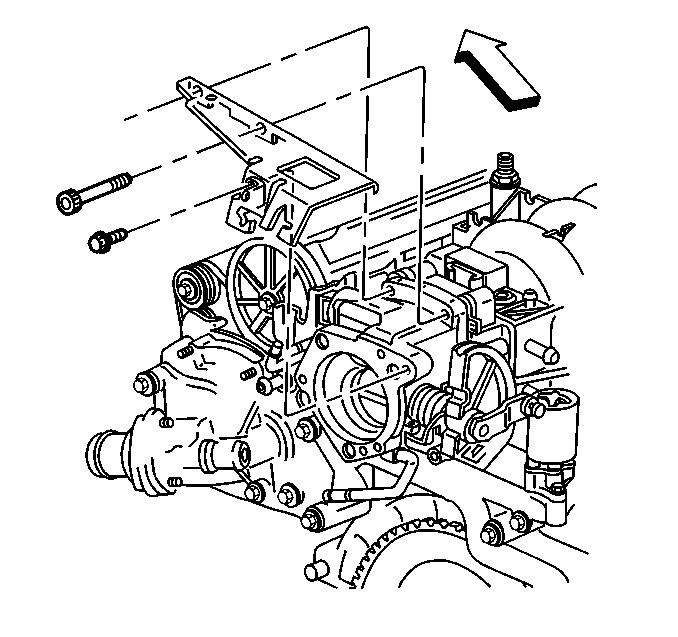
- Remove the cruise control cable (3) from the bracket (1).
- Remove the accelerator cable (1) from bracket.
- Remove the accelerator control cable (3) from throttle body lever (1).
- Remove the cruise control cable (3) from throttle body lever (2).
- Remove the TP sensor connector.
- Remove the IAC valve electrical connector.
- Drain coolant from system before removing throttle body coolant hose. Refer to Draining and Refilling in Cooling and Radiator.
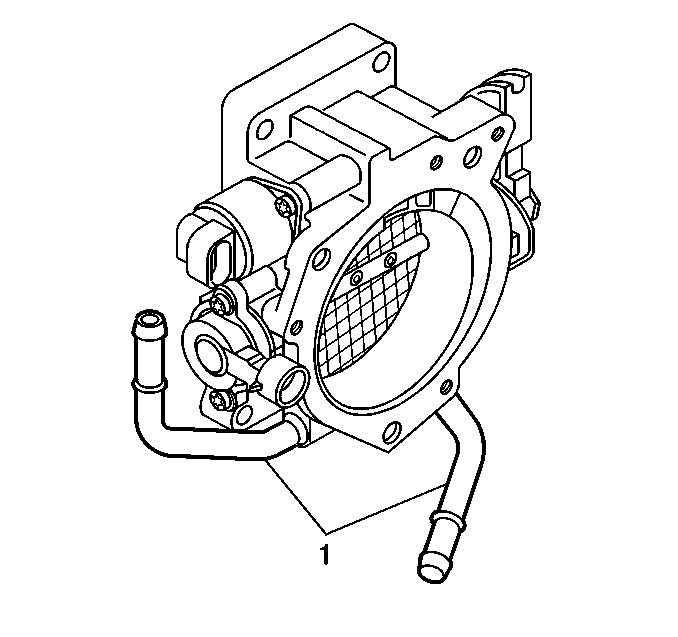
- Remove the throttle body coolant hoses (1) at the throttle body.
- Remove the accelerator cable bracket.
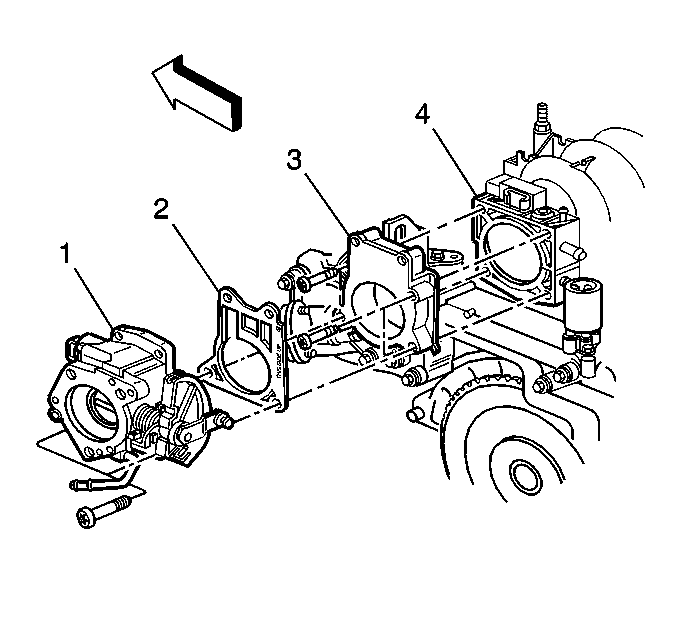
- Remove the throttle body (1) and gasket (2).


Important: Make sure the vehicle has had sufficient cool-down time before servicing the cooling system.
Disassemble Procedure
- Disassemble the TP sensor. Refer to TP Sensor Replacement .
- Disassemble the IAC valve. Refer to IAC Valve Replacement .
- Clean the throttle body gasket surfaces.

Notice: Do not immerse the TP sensor and IAC valve in any type of cleaner. This cleaning method may damage these electronic components.
Notice: Use care when cleaning the old gasket from the aluminum surfaces in order to prevent damage to the sealing surfaces.
Assemble Procedure
- Assemble the IAC valve. Refer to TP Sensor Replacement .
- Assemble the TP sensor. Refer to IAC Valve Replacement .
Tighten
Tighten the IAC Valve screws to 2.3 N·m (20 lb in).
Tighten
Tighten the TP sensor screws to 2.3 N·m (20 lb in).
Installation Procedure
Notice: The outlet of the air cleaner assembly and the MAF sensor inlet duct must line up when completely installed. Misalignment may cause incorrect airflow readings resulting in MIL illumination or a driveability concern. An improperly installed inlet duct assembly or air cleaner assembly may cause misalignment.
Important: Do Not Reuse the old throttle body gasket.
- Position the new throttle body gasket (2) on throttle body.
- Install accelerator control cable bracket and 2 top bolts to the throttle body (1) and finger tighten 2 lower bolts.
- Install the throttle body coolant hoses at throttle body.
- Install the lower accelerator cable bracket bolts.
- Install the IAC valve electrical connectors.
- Install the TP sensor electrical connectors.
- Install the accelerator control cable (1) at throttle body lever.
- Install the cruise control cable (2) at throttle body lever (1).
- Install the accelerator cable (1) to the bracket.
- Install the cruise control cable (3) to the bracket (1).
- Install the MAF sensor.
- Install the MAF sensor electrical connector.
- Install the intake air duct.
- Install the intake manifold top cover.
- Install the negative battery cable. Refer to Battery.
- Install the rear seat cushion. Refer to Seats and Carpet.
- Check and add coolant as necessary. Long life coolant must meet GM Specification 6277-M.
- Pressure check the cooling system and check for leaks.
- Perform the DTC P1526 Minimum Throttle Position Not Learned , if a new throttle body was installed.
Tighten
Tighten the top throttle body attaching bolts to 12 N·m
(106 lb in ).
Tighten
Tighten the bolts to 12 N·m (106 lb in).
Tighten
Tighten the bolts to 8 N·m 71 (lb in).
Tighten
Tighten the clamps to 3 N·m (27 lb in).
Tighten
Tighten the nuts to 2 N·m (18 lb in).
Throttle Body Assembly Replacement Idle Learn
A TP Sensor Learn routine has been implemented in the PCM software to allow the PCM to correct or offset the closed throttle signal value of the TP sensor. This is necessary because of manufacturing tolerances during assembly of throttle body, TP sensor manufacture and because the TP sensor is not adjustable on the throttle body. If an improper TP sensor offset is maintained by the PCM, a high idle at closed throttle or stall condition may occur. Performing the TP Sensor Learn procedure lets the PCM learn the correct TP sensor offset.
| • |
Notice:: Make sure nothing is touching or obstructing the accelerator or brake pedals during the TP Sensor Learn procedure because this will prevent the PCM from performing the learn routine. Also ensure that the cruise cable is not holding the throttle open. The TP sensor is replaced. |
| • |
| • | To perform the TP Sensor Learn: |
| 0.1. | Turn the ignition switch to the ON position, with the engine not running. |
| 0.2. | Wait for 30 seconds. |
| 0.3. | Turn the ignition switch to the Lock position. |
| 0.4. | Wait for 30 seconds. |
Throttle Body Assembly Replacement Inspection Procedure
Removal Procedure
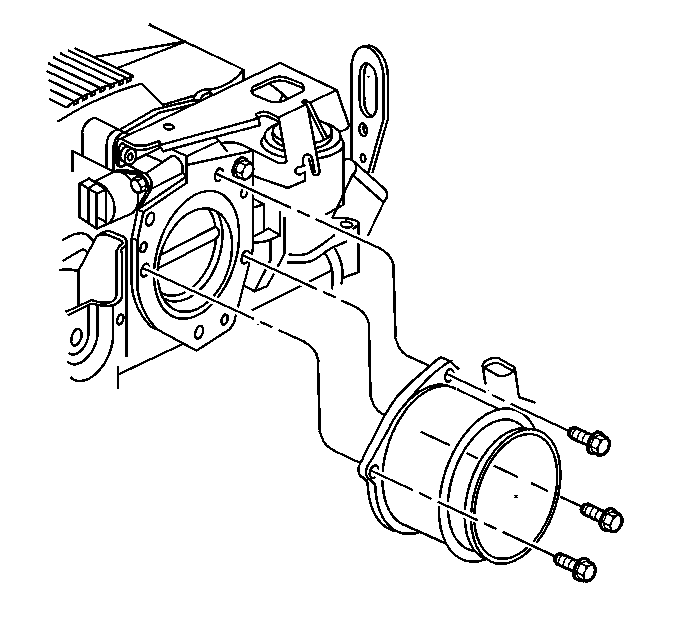
- Remove the MAF sensor bolts and intake air duct as an assembly.
- Inspect the throttle body bore and throttle valve plate for deposits. It is necessary to open the throttle valve to inspect all surfaces.
- Clean the throttle body bore and throttle valve plate using a clean shop towel with GM Top Engine Cleaner, P/N 1052626 or AC-Delco Carburetor Tune-Up Conditioner, P/N X66-P, or equivalent product.
Notice: Do not damage the MAF sensor screen. A damaged screen could restrict airflow and lead to a driveability concern.
Notice: Do not use any solvent that contains Methyl Ethyl Ketone (MEK). This solvent may damage fuel system components.
Installation Procedure
Notice: The outlet of the air cleaner assembly and the MAF sensor inlet duct must line up when completely installed. Misalignment may cause incorrect airflow readings resulting in MIL illumination or a driveability concern. An improperly installed inlet duct assembly or air cleaner assembly may cause misalignment.
- Install the MAF sensor with three bolts and intake air duct as an assembly.
- Perform the DTC P1526 Minimum Throttle Position Not Learned .
Tighten
Tighten the MAF sensor attaching bolts to 8 N·m
(71 lb in.)
Notice: Use the correct fastener in the correct location. Replacement fasteners must be the correct part number for that application. Fasteners requiring replacement or fasteners requiring the use of thread locking compound or sealant are identified in the service procedure. Do not use paints, lubricants, or corrosion inhibitors on fasteners or fastener joint surfaces unless specified. These coatings affect fastener torque and joint clamping force and may damage the fastener. Use the correct tightening sequence and specifications when installing fasteners in order to avoid damage to parts and systems.
Throttle Body Assembly Replacement Spacer
Removal Procedure
- Remove the rear seat cushion. Refer to Seats and Carpet.
- Remove the negative battery cable.
- Remove the intake manifold top cover.
- Remove the intake air duct.
- Remove the MAF connector.
- Remove the MAF sensor.
- Remove the accelerator cable bracket. Refer to Accelerator Controls Accelerator Controls .
- Remove the throttle body. Refer to Throttle Body Assembly Replacement (Replacement) Throttle Body Assembly .
- Remove the throttle body spacer bolts (3).
- Remove the crankcase ventilation pipe at throttle body spacer.
- Remove the EGR valve water pump crossover pipe at throttle body spacer.
- Remove the throttle body spacer (3) and gasket (2) from the intake manifold (4).
- Clean the throttle body gasket surfaces.
- Clean the throttle body spacer gasket surfaces.

Notice: Use care when cleaning the old gasket from the aluminum surfaces in order to prevent damage to the sealing surfaces.
Installation Procedure
- Install the throttle body spacer gasket, and throttle body spacer.
- Install the new gasket and throttle body.
- Install the crankcase ventilation pipe at throttle body spacer.
- Install the EGR pipe to throttle body spacer.
- Install the throttle body. Refer to Throttle Body Assembly Replacement (Replacement) Throttle Body Assembly .
- Install the MAF sensor.
- Install the MAF connector.
- Install the accelerator cable bracket. Refer to Accelerator Controls Accelerator Controls .
- Install the intake air duct.
- Install the intake manifold top cover.
- Install the negative battery cable.
- Install the rear seat cushion. Refer to Seats and Carpet.
Tighten
Tighten the throttle body spacer attaching bolts to 12 N·m
(106 lb in).
Tighten
Tighten the throttle body attaching bolts to 12 N·m (106 lb in).
Tighten
Tighten the EGR pipe bolt to 24 N·m (18 lb ft).
